
Best Teacher Ever Stamp Set Tutorial: Create an Easy Thank You Card

There are some occasions when a handmade card means just a little bit more, and saying thank you to a teacher is one of them. Whether it's the end of the school year, Teacher Appreciation Week, or simply a way to recognize someone who has made a difference, a handmade card adds a personal touch that can't be found on a store shelf.
For this card, I wanted to keep the design clean and simple while still making it feel fun and full of personality. Sometimes the easiest designs have the biggest impact because they allow the focal sentiment to shine. The Best Teacher Ever Stamp Set from Simon Says Stamp made that easy with its bold greeting and playful school-themed images.

Let the Sentiment Do the Work
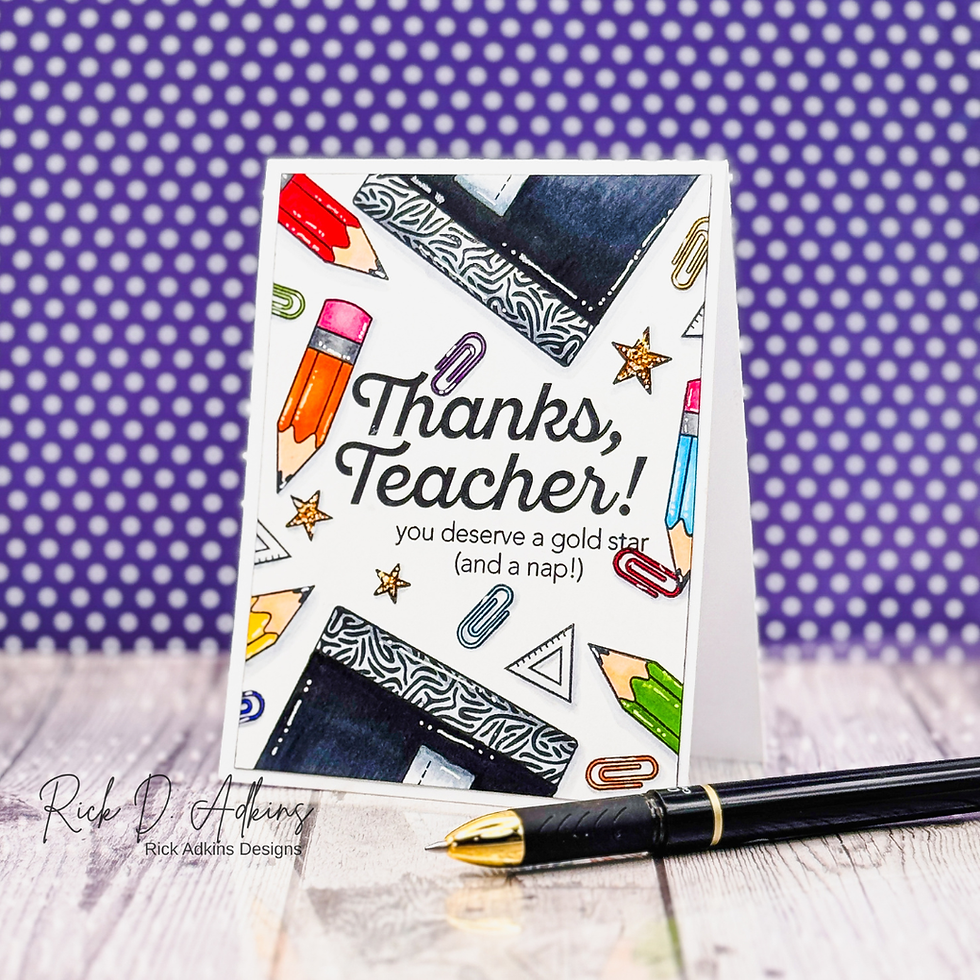
One of my favorite design approaches is to build a card around a large sentiment instead of treating it as an afterthought. Here, the oversized "Thanks, Teacher!" greeting naturally becomes the focal point while the pencils, notebooks, paper clips, and rulers create a loose frame around it.
This layout works especially well because it gives your eye somewhere to rest before exploring the smaller images. It's a great reminder that you don't always need layers, dies, or complicated techniques to create a balanced handmade card.
If you have other themed stamp sets in your collection, this same idea can easily be adapted. Holiday icons, flowers, kitchen tools, or even pets can surround a bold sentiment using exactly the same layout.

Why One-Layer Cards Never Go Out of Style
One-layer cards are often associated with beginner cardmaking, but I think they're one of the most rewarding styles to master. Without layers and embellishments to hide behind, every design decision matters—from image placement to color choices and spacing.
The clean white background gives each stamped image room to breathe while keeping the overall design uncluttered. Even though there are several small images, the card doesn't feel busy because they are intentionally spaced around the sentiment instead of competing with it.
This is also a wonderful style when you're making multiple thank you cards since there's very little bulk and the design comes together quickly.

Small Details Create Big Impact
While the overall design is simple, a few finishing touches help elevate the card without making it complicated.
I colored all of the images with alcohol markers, choosing bright school-inspired colors that immediately reinforce the teacher theme. Instead of trying to blend every area perfectly, I focused on clean coloring with enough contrast to add life to each image.
Around each stamped image, I added a soft drop shadow using a cool gray marker. This simple technique helps separate the images from the background and creates the illusion of dimension without adding extra cardstock layers. It's one of those small details that quietly makes the entire card feel more polished.

The little gold stars received a glitter coloring treatment to add just the right amount of sparkle. Since the sentiment mentions earning a "gold star," adding glitter helps reinforce the message while drawing attention to those tiny accent images.
To finish everything off, I ran a black marker around the outside edge of the card front to create a thin faux mat. This is one of my favorite tricks for one-layer cards because it frames the design beautifully without adding another layer of cardstock. It's quick, inexpensive, and gives the finished card a crisp, professional look.
Make It Your Own
One of the things I love most about simple stamping is how adaptable it is. If you don't have this particular stamp set, don't let that stop you from trying the layout.
Look through your stash for a large sentiment and several coordinating small images. Arrange the smaller images around the greeting, leaving plenty of white space so everything feels open and balanced.
You can also personalize the card by changing the color palette to match a teacher's favorite colors or a school mascot. Metallic embellishments could be swapped for enamel dots, or you could skip the sparkle altogether for an even more clean and simple look.
The basic design works for so many occasions. Simply change the sentiment and themed images to create birthday cards, retirement cards, graduation cards, or thank you cards for almost anyone.

Confidence Comes from Keeping It Simple
One of the biggest lessons I've learned over the years is that simple doesn't mean boring. In fact, some of the most memorable handmade cards rely on thoughtful composition, intentional color choices, and a strong focal point rather than lots of layers and techniques.
If you've ever felt intimidated by elaborate card designs, I encourage you to revisit simple stamping. It gives you the opportunity to practice your coloring, improve your design skills, and build confidence—all while creating cards that are easy to mail and enjoyable to make.
Sometimes all you need is a meaningful sentiment, a few well-placed images, and the confidence to let simplicity do the work.
Thanks for dropping by today I hope that you found a little spark of creative inspiration with my project today. Wondering what I used in this project? Everything is linked to multiple sources in the thumbnails in the Materials Used section, or in the text below. Compensated affiliate links used when possible.
Supplies Used
Here you will find the list of supplies that I used to create today's card. All supplies are linked to supply sources below. Compensated affiliate links may be used at no cost to you.
Happy Crafting,

Rick Adkins
Affiliate Disclaimer:
Just a friendly reminder, as part of my commitment to transparency, please note that some of the links provided maybe affiliate links. This means that if you make a purchase through these links, I may earn a small commission at no extra cost to you. Your support is truly appreciated!
Additionally, I kindly ask that you always accept the tracking cookie for the affiliate websites. Rest assured, this will not in any way expose your computer to viruses or compromise your information. It's simply necessary for the company to attribute the sale to the affiliate, ensuring creators like myself receive their rightful commissions.
Your trust and support enable me to continue sharing creativity through my email lists, blog, and YouTube channel. Thank you for being a valued part of our crafting community!


Comments