
Celebration Stencils Techniques: AECP Class Projects
- Rick Adkins

- Apr 23, 2024
- 3 min read
Hello and welcome to my blog; today I am sharing my cards for the Celebration Stencils Techniques card making class that is part of the Altenew Educator Certification Program (AECP). In this class you learn different ways to use your stencils and create beautiful projects. I made two different cards today using one of the techniques that I learned in the class.

Celebration Stencils Techniques:
Two For One:
I love a good two for one technique! It's one of my favorite things to do: When you can get more from your stash I am all up on it. The technique that I am showcasing from the class is just that a great two for one background technique that will allow you to stretch your supplies. Today I am going to be sharing with you how to use your stencils as a stamping tool.

The first thing that I did was create my backgrounds. I cut down a sheet of Canson XL Watercolor Paper (but you can use whatever watercolor paper you have) so that I could get two panels from one sheet. The Altenew Watercolor Paper is great but I didn't have any. Then I took the lattice stencil from the Build-a-Garden Elegant Tulips bundle and placed it onto one side of my watercolor paper.

Next I took my Sweet Dream Fresh Dye Inks (used three of the colors from this set) and dragged the ink pads across the stencil starting with the lightest color (Dew Drop) and worked up to Teal Cave (the next to darkest color in this set). Now take a water bottle and spritzed the paper with water to get the ink moving. I sprayed the watercolor paper very generously, you want enough water to move the ink but not to much that its going all over the place. I suggest playing with this technique to find the perfect ration of water for you. I gave the ink a little time to soak into the paper and then picked up the stencil and flipped it over on the other side of the watercolor paper.

At this point I pressed the wet and inky stencil into the watercolor paper to get the ink to transfer. I let this set for a little while before removing the stencil. You are going to get a little inky from this technique. So, if you are not into that I would suggest wearing gloves. Once I pulled up the stencil I let the wet ink soak into the paper and then started drying it.

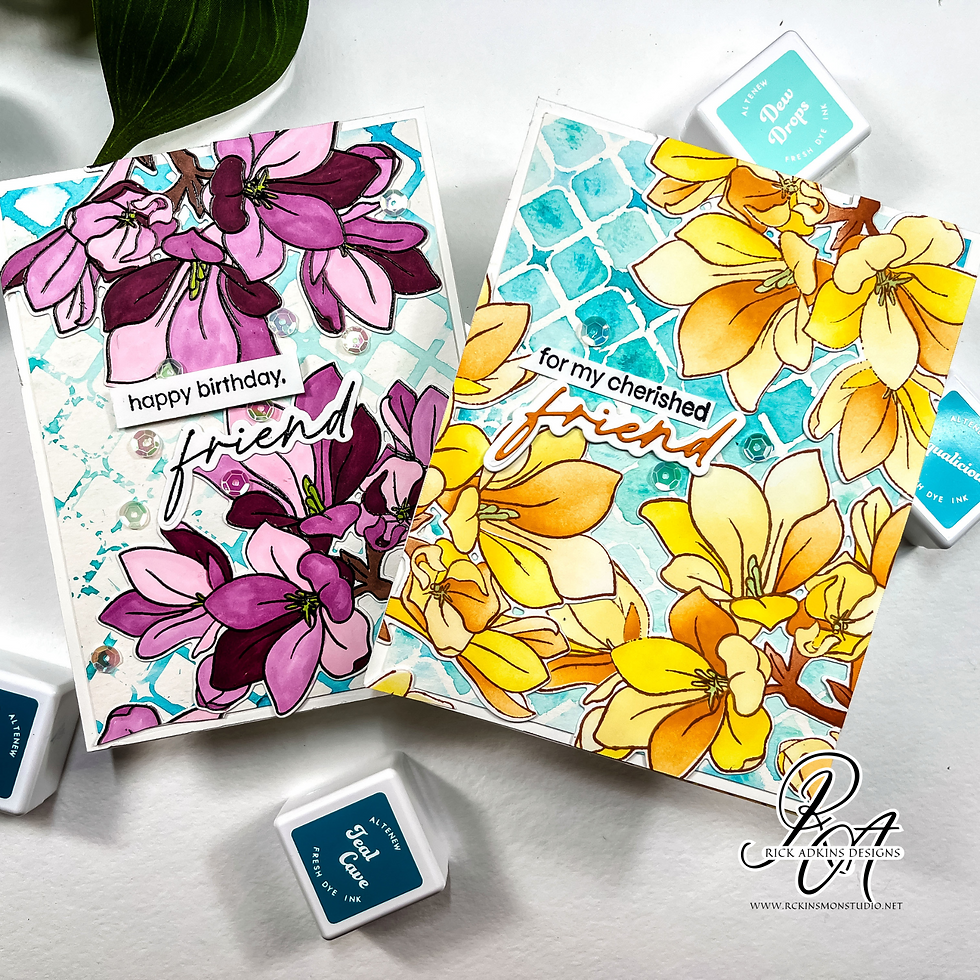
Once the panel was completely dry I then cut the panels down into two different A2 size card fronts. The card above showcases the first panel that I created by applying the ink and then spraying the paper with water. I then used the stamp set and stencils from the Build-A-Garden Blossoming Freesia Bundle to stamp the and color the floral image with my Summer Afternoon Fresh Dye Ink Mini Ink Cubes. For the inside of the first card I also added one of the leftover pieces at the bottom of the card. I didn't want these stamped and inked floral images to go to waste since I had this large section from where I trimmed off the ones on the front.

On the next card I took the second panel (which would be the negative of the stencil) and the one that I stamped and cut it down to an A2 size card front as well. I added it to the card base with strong adhesive. I then stamped the same images twice from the Build-A-Garden Blossoming Freesia Bundle in an alcohol marker friendly ink and used my artist markers to color in each petal and the stem. I just went around each petal and picked a different color from the Rose Petals Artist Markers Set and added the color.

Once each petal was colored I then re-stamped the images again with Altenew Jet Black Ink to have a crisp black outline. This gave the floral images a comic like effect, for a fun and playful focal image. I finished off the cards by adding my stamped and die cut sentiments also from the Build-A-Garden Blossoming Freesia Bundle and added a few clear sequins for a little sparkle.
Thanks for dropping by today I hope that you have a fabulous week, and that you will give the stencil stamping technique a try. If you want to learn more about different stenciling techniques I would highly suggest taking the Celebration Stencils Techniques card making class. You don't have to be part of the AECP program to take the class, it's open for anyone that wants to take the class as are all of Altenew Online Card Making Classes.
Materials Used:
Here you will find the list of supplies that I used to create today's card. All supplies are linked to supply sources below. Compensated affiliate links may be used at no cost to you.

Happy Stampin'

Rick Adkins


In the words of Taylor Swift, "You're so gorgeous!"
Rick, your cards are absolutely stunning! I love the way it adds texture to the card. I love the color palette of the florals against the soft blue background, as well as how you decorated the inside of the card. Well done!!