
Creating Joyful Cards with the Delicate Blossoms Stamp Set from Simon Says Stamp
- Rick Adkins

- Aug 8, 2025
- 4 min read
Updated: Oct 5, 2025
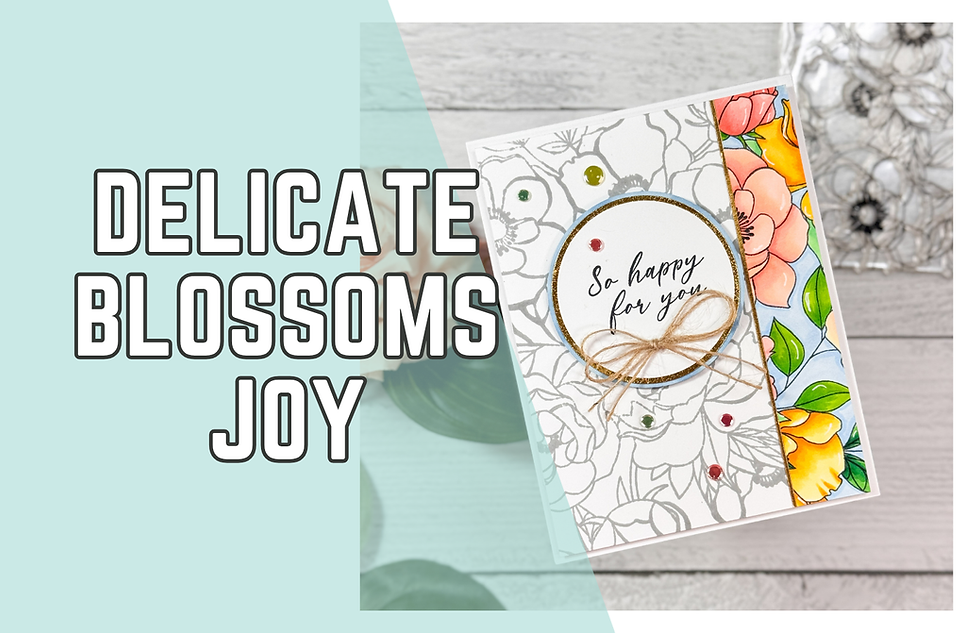
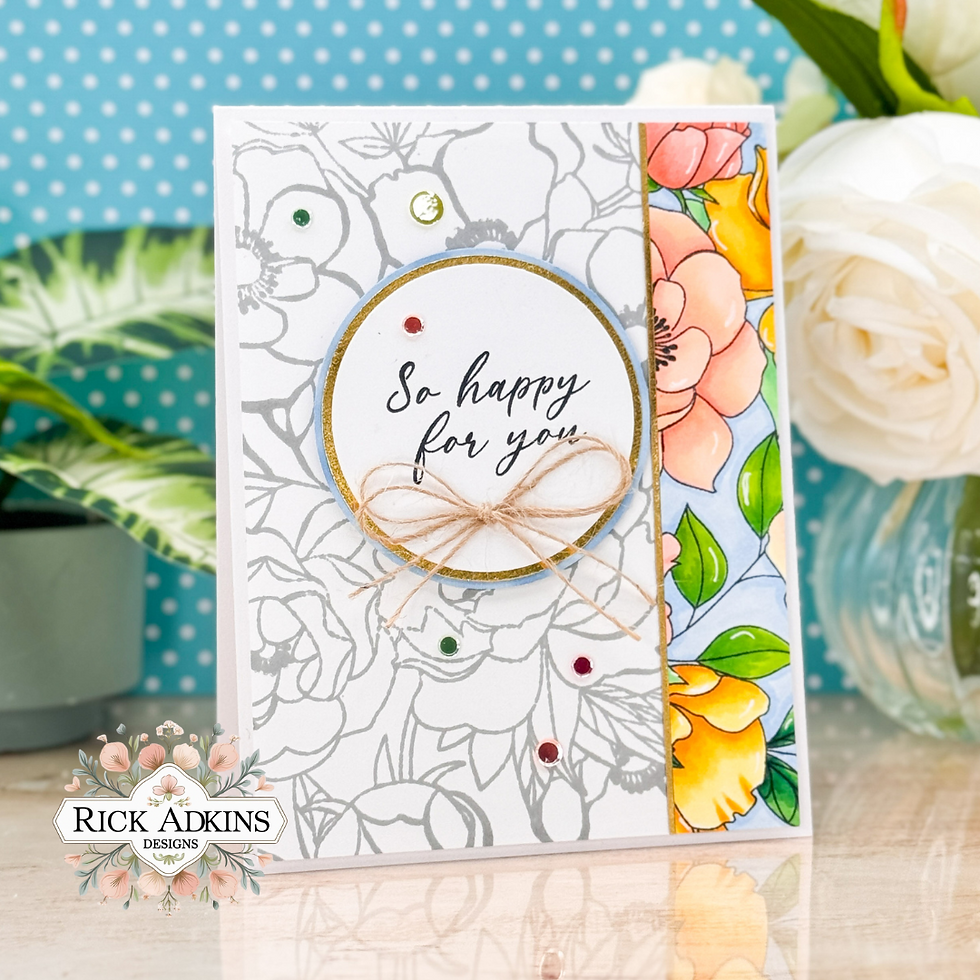
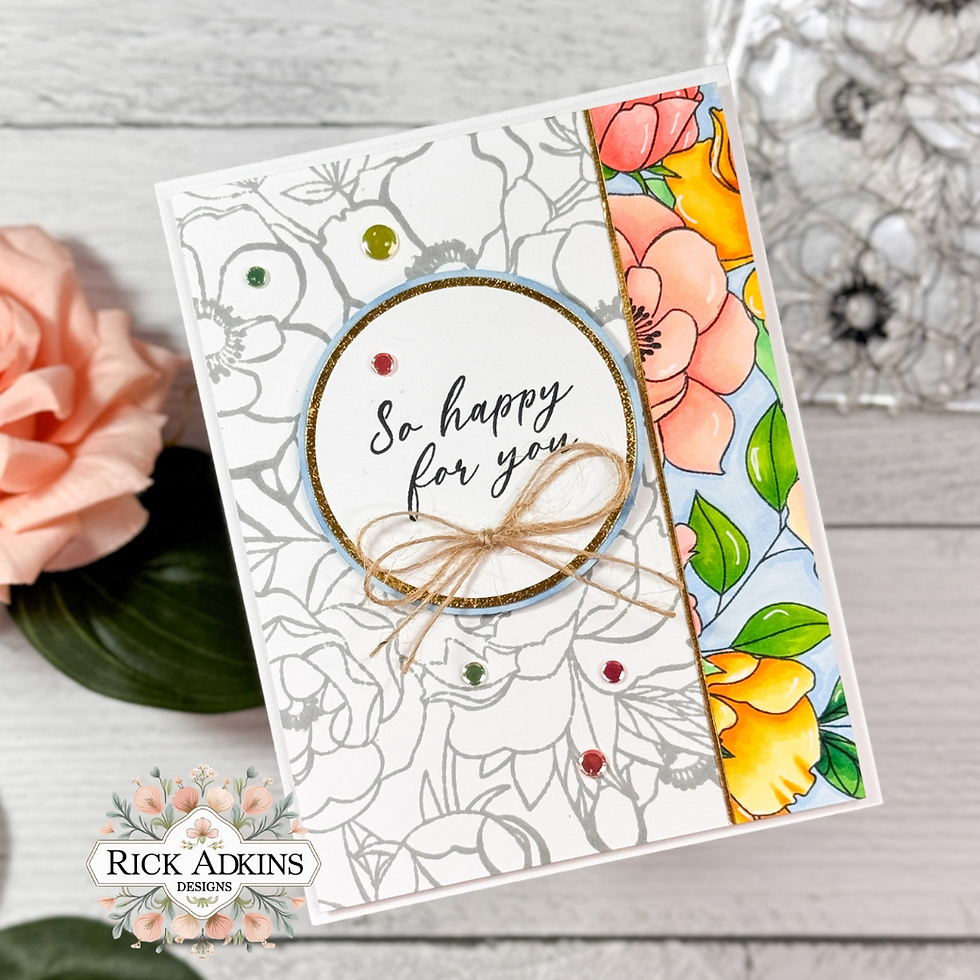
Sometimes a card design just feels happy, doesn’t it? That was the case with this one—and I knew as soon as I placed that little colored strip down and everything lined up perfectly, it was going to be a keeper. This card is the result of a leftover panel from another project, and honestly, I think I love this one even more than the original. It’s one of those fun moments when a small leftover piece becomes the star of the show.
What I want to share with you today isn’t just a pretty card, but a reminder that even your smallest scraps and trimmed-off bits can turn into joyful little gems. And when you're working with a gorgeous floral set like Delicate Blossoms from Simon Says Stamp, the possibilities for creative reuse are endless.
Creating Joyful Cards with the Delicate Blossoms Stamp Set from Simon Says Stamp:
Stamping Twice, Designing Smart
I started by stamping the Delicate Blossoms Stamp Set onto Hammermill Smooth Cardstock—which, if you haven’t tried yet, is a dream for both crisp stamping and alcohol marker blending. For the first impression, I used Gravel Ink, which is a soft, warm gray that doesn’t overpower the design but gives just enough definition for a more neutral background.
Then I stamped the same floral image again, this time in Memento Tuxedo Black Ink, so I could bring it to life with my Ohuhu Brush Markers. I love how the bold black outline pairs with vibrant coloring. After coloring the full panel, I cut it up—one section I used for a card I shared a few weeks ago, and the leftover piece just sat on my desk... until inspiration struck.
Pro Tip: When you're stamping detailed floral designs, consider doing two impressions—one for coloring and one for a neutral base. That way, you're ready for a spotlight card or even a coordinating card set.
Spotlight Technique with Leftovers
I love using the spotlight technique when I have a leftover panel that still packs a punch. For this card, I trimmed the colored section down and carefully lined it up on top of the original Gravel Ink stamped background. That alignment creates this polished, eye-catching moment where color meets black-and-white.
To separate the two areas and add a little shine, I tucked in a narrow strip of gold cardstock right up against the edge of the colored strip. That one simple addition completely elevated the card and gave it a more refined look without overwhelming the design.
Pro Tip: When doing spotlight cards, make sure the stamped image on both panels is perfectly aligned—it’s the clean matching lines that create that professional finish.

The Joy Is in the Layers
To keep the sentiment soft and cheerful, I stamped “So Happy For You” onto a white circle die cut, then layered it with two more circles—one in gold cardstock, and another just slightly larger in a soft blue for contrast. I love how that trio of layers echoes the clean structure of the card while adding just enough color to balance the bold floral strip.
I finished it off with a burlap twine bow—because texture is such a lovely way to break up all that smooth cardstock—and added a few Pastel Ice Sequins for a little sparkle.
There’s something really satisfying about using layered circles for sentiments. They frame your words beautifully and give the whole design a grounded feel, even when the background is busy.

A Card That Brings a Smile
What I love most about this card is how joyful and easy it feels, even though there’s a lot of thought behind the layout. It’s one of those designs that makes you feel like you really got the most out of your supplies—two cards from one colored panel, a bit of texture, a pop of shine, and a whole lot of happy.
If you’ve ever looked at a leftover strip of cardstock and wondered if it was worth saving, let this be your sign to keep it. You never know when it’ll become the focal point of your next favorite card.
Thanks for dropping by today I hope that you found a little spark of creative inspiration with my project today. Wondering what I used in this project? Everything is linked to multiple sources in the thumbnails in the Materials Used section, or in the text below. Compensated affiliate links used when possible.
Materials Used:
Here you will find the list of supplies that I used to create today's card. All supplies are linked to supply sources below. Compensated affiliate links may be used at no cost to you.
Happy Stampin'

Rick Adkins
Affiliate Disclaimer:
Just a friendly reminder, as part of my commitment to transparency, please note that some of the links provided maybe affiliate links. This means that if you make a purchase through these links, I may earn a small commission at no extra cost to you. Your support is truly appreciated!
Additionally, I kindly ask that you always accept the tracking cookie for the affiliate websites. Rest assured, this will not in any way expose your computer to viruses or compromise your information. It's simply necessary for the company to attribute the sale to the affiliate, ensuring creators like myself receive their rightful commissions.
Your trust and support enable me to continue sharing creativity through my email lists, blog, and YouTube channel. Thank you for being a valued part of our crafting community!


Comments