
Elegant Embossed Resist Christmas Card | The Rabbit Hole Designs One Line Santa
- Rick Adkins

- Oct 16, 2025
- 4 min read
If you’re like me, you love creating cards that look elegant and polished—but don’t actually take all day to make. Today’s project is one of those designs that gives you that “wow” factor with very little fuss. I’m sharing an elegant embossed resist Christmas card featuring the One Line Santa Stamp Set from The Rabbit Hole Designs, and I have to say… this one feels like pure holiday magic. Between the shimmer of gold embossing and the bold blend of Distress Ink colors, it’s a simple card that still feels incredibly special.

When I was making this, I was reminded of one of my earliest experiences with heat embossing—the first time I saw that powder melt into shiny perfection, I was completely hooked. There’s just something about watching it transform right before your eyes. It never gets old, even after years of cardmaking. And this technique, paired with bright ink blending, takes that same sense of wonder and adds a modern, vibrant twist.
Elegant Embossed Resist Christmas Card | The Rabbit Hole Designs One Line Santa
Creating That Embossed Resist Magic
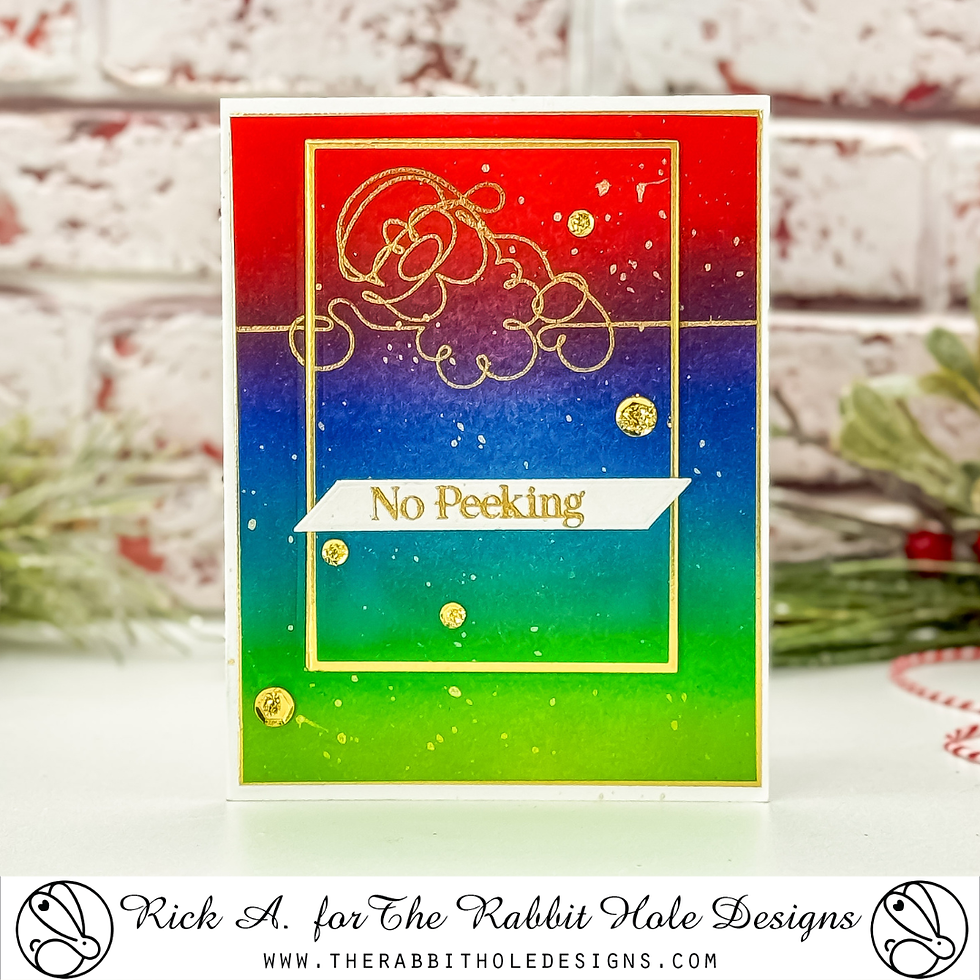
I started by prepping a piece of Neenah Classic Crest Solar White 80 lb Cardstock with my Cottontail Powder Tool to keep those fine embossing lines crisp. I stamped the whimsical One Line Santa image in gold pigment ink and added super fine gold detail embossing powder before heat setting it. That thin, elegant outline is what gives the entire card its polished look.

Here’s a little pro tip: let your embossed panel cool completely before you start blending. If you go in while the embossing is still warm, the ink can grab in places you don’t want it to. Once it’s cool, that embossed surface resists the ink beautifully, letting Santa shine through the color.
For my background, I reached for some of my favorite Distress Ink shades—Festive Berries, Prize Ribbon, Peacock Feathers, and Twisted Citron. I love how these unexpected colors come together to create a cheerful rainbow gradient that still feels festive. The emboss resist technique makes it so easy to achieve that seamless transition of color without losing the detail of the stamped image.
Framing the Design
Once my panel was dry, I used one of the Diamond District Layering/Nesting Dies from The Rabbit Hole Designs to cut out a window from the upper third of my ink-blended panel. To create a thin gold border around that cutout, I paired it with a slightly larger rectangle die from the Precision Layering A2 A Etched Dies. I also cut a piece of gold foiled cardstock using the same die, which ties in beautifully with the embossed image and adds just the right amount of shine.
I layered everything together, adding a thin gold mat before adhering it to an A2 card base made from Neenah Ultra Thick Cardstock. This gives the card structure and a professional finish—something I always recommend when you’ve put time into your design. The gold layers frame that bold background perfectly, giving the entire card a clean, high-end look.

Finishing Touches That Shine
For the sentiment, I went back to the One Line Santa Stamp Set and heat embossed the “No Peeking” phrase in the same gold powder on a scrap of white cardstock. Using one of the banner dies from the You’ve Been Framed Die Set, I cut it out and trimmed both ends at a diagonal. Little details like that make the sentiment feel intentional and tailored.
I adhered the sentiment across the lower portion of the design using liquid adhesive, then flicked on some gold watercolor for an extra touch of shimmer. Once everything was dry, I finished off the card with a few gold sequins. They catch the light beautifully and balance the design without stealing attention from Santa.
If you’ve ever struggled with making your holiday cards feel both simple and elegant, this technique is a game-changer. The embossed resist approach lets you play with bold colors while maintaining that clean, sophisticated finish.

Why This Design Works
What I love most about this card is the balance—it’s playful and bright but still refined. The gold heat embossing brings elegance, while the ink blending adds personality. And since the One Line Santa image is such a strong focal point, you don’t need a lot of extra embellishments to make the design pop.
This is one of those projects that reminds me why I love cardmaking so much. It’s creative, relaxing, and rewarding all at once. And it’s proof that you don’t need layers of patterned paper or hours of coloring to make something that truly shines.
If you’ve never tried the emboss resist technique, I encourage you to pull out your heat tool and give it a go. Start with one of your favorite line-art images—like this One Line Santa—and watch how it comes to life once you start blending over it. You’ll end up with a design that looks elegant, professional, and just a little bit magical.

Thanks for dropping by today I hope that you found a little spark of creative inspiration with my project today. Wondering what I used in this project? Everything is linked to multiple sources in the thumbnails in the Materials Used section, or in the text below. Compensated affiliate links used when possible.
Materials Used:
Here you will find the list of supplies that I used to create today's card. All supplies are linked to supply sources below. Compensated affiliate links may be used at no cost to you.
Happy Crafting,

Rick Adkins
Affiliate Disclaimer:
Just a friendly reminder, as part of my commitment to transparency, please note that some of the links provided maybe affiliate links. This means that if you make a purchase through these links, I may earn a small commission at no extra cost to you. Your support is truly appreciated!
Additionally, I kindly ask that you always accept the tracking cookie for the affiliate websites. Rest assured, this will not in any way expose your computer to viruses or compromise your information. It's simply necessary for the company to attribute the sale to the affiliate, ensuring creators like myself receive their rightful commissions.
Your trust and support enable me to continue sharing creativity through my email lists, blog, and YouTube channel. Thank you for being a valued part of our crafting community!


Comments