
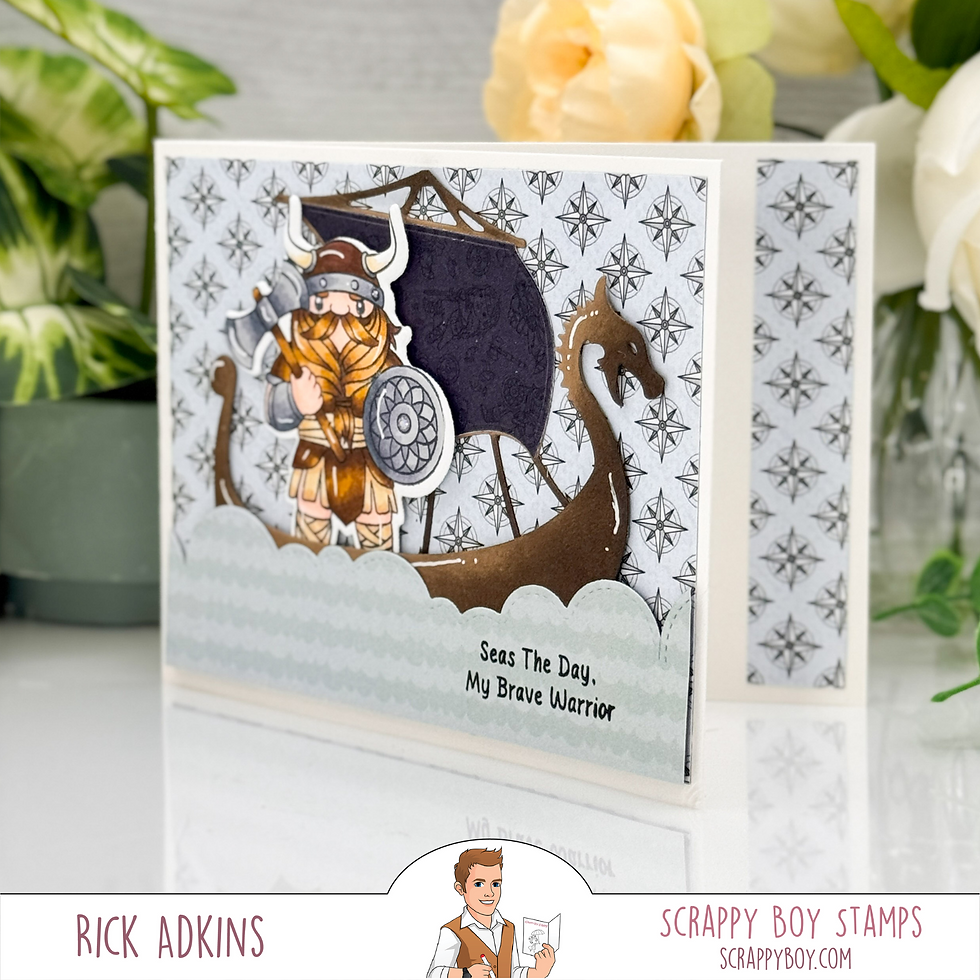
Seas the Day | Masculine Viking Card Featuring Scrappy Boy Stamps
- Rick Adkins

- Oct 5, 2025
- 5 min read
Masculine cards have always felt like one of those creative puzzles in cardmaking — fun, but a little tricky. I love all things cute and colorful, but sometimes, finding the right mix of “strong” and “stylish” for a masculine card can take a little thought. So today, I’m sharing a project that hits that balance perfectly — a bold Viking-themed card using products from the Vikings Collection by Scrappy Boy Stamps. This collection made it so easy to pull together a cohesive look that feels adventurous and masculine while still giving me plenty of room to play with color and texture.

Seas the Day | Masculine Viking Card Featuring Scrappy Boy Stamps
Setting Sail with the Viking Collection
When I first saw the Vikings Stamp Set and coordinating Outline Dies, I knew exactly the kind of project I wanted to make — something that looked strong and brave, but still had a bit of charm. I stamped one of the Viking images onto Hammermill Smooth Cardstock using Memento Tuxedo Black Ink. That cardstock is one of my go-tos for alcohol marker coloring because it blends beautifully and holds crisp stamped lines.
For coloring, I used my Triblend Brush Markers. They’re such a great tool for crafters who want easy, clean blending without needing a dozen different markers. I went with warm tones for his armor and beard to bring in that rugged Viking feel and balanced them with cool grays for his helmet and shield.
Pro Tip: When coloring metal elements like helmets or armor, blend a touch of a warm brown or beige into your grays. It softens the contrast and gives that realistic, slightly aged metal look that feels more natural than flat gray tones.
Once everything was colored, I used the coordinating Vikings Outline Die to cut him out — a small step that adds a lot of polish to the finished piece.

Building the Ship and Scene
I wanted my Viking to have a proper ship to command, so I reached for the Viking Ship Die. I cut it from Neenah Desert Storm Cardstock — the perfect base color for wood — and added shading with Walnut Stain and Ground Espresso Distress Inks. The two ink shades worked beautifully together to give that weathered, sea-worn look to the wood grain.
For the sail, I used one of the patterns from the Vikings 6x6 Pattern Paper Pack. The darker paper design added a wonderful contrast to the lighter tones of the ship and helped draw attention to the Viking himself. I also used one of the compass-themed pattern papers for the background — it instantly gave that sense of adventure I was going for.
As I was building this scene, I found myself remembering when I first started making cards and would avoid masculine designs altogether because they felt limiting. Over time, I realized that “limiting” really just meant I needed to think differently — to focus more on texture, layering, and earthy color palettes rather than sparkle and florals. This Viking project reminded me just how fun those design challenges can be when you let the theme guide you.

Waves, Clouds, and a Touch of Creativity
To ground the scene, I created waves using one of the dies from the Grass and Clouds Edger Dies. Instead of a traditional wave die, I used the cloud edge and cut it from soft patterned paper. It’s a simple twist, but it creates a nice illusion of water without feeling too harsh or graphic.
I stamped the sentiment “Seas the Day. My Brave Warrior” directly onto the waves and popped that panel up with foam adhesive. Then I tucked the Viking and his ship just behind it to add dimension and make it feel like they’re truly setting out to sea.
Pro Tip: When you’re creating a scene card, think in layers. Even small things like tucking an image slightly behind another element can create instant depth and make your design feel more intentional and complete.

Finishing Touches
For those last little details that make everything come together, I added highlights with a white gel pen. Tiny touches on the helmet, shield, and beard bring everything to life and help break up darker areas. It’s one of those simple steps that makes a huge difference in how polished your card looks.
To finish off the inside, I added a strip of coordinating patterned paper. I love doing this on masculine cards because it ties everything together without adding extra bulk or fuss. Plus, it’s a nice little surprise when the card is opened — just enough to make it feel special.
Final Thoughts
Masculine cards don’t have to be intimidating or dull — they just call for a different kind of creativity. Using themed collections like the Vikings Collection from Scrappy Boy Stamps takes out the guesswork, letting you focus on bringing the story to life through color, layering, and texture.
If you’ve ever found yourself stuck on how to design a masculine card, try choosing a strong, story-driven theme like this one. It’s a great reminder that even when we step away from our usual florals and sparkle, there’s still plenty of room to make something bold, detailed, and full of heart.

Thanks for dropping by today I hope that you found a little spark of creative inspiration with my project today. Wondering what I used in this project? Everything is linked to multiple sources in the thumbnails in the Materials Used section, or in the text below. Compensated affiliate links used when possible.
Materials Used:
Here you will find the list of supplies that I used to create today's card. All supplies are linked to supply sources below. Compensated affiliate links may be used at no cost to you.
Happy Crafting,

Rick Adkins
Affiliate Disclaimer:
Just a friendly reminder, as part of my commitment to transparency, please note that some of the links provided maybe affiliate links. This means that if you make a purchase through these links, I may earn a small commission at no extra cost to you. Your support is truly appreciated!
Additionally, I kindly ask that you always accept the tracking cookie for the affiliate websites. Rest assured, this will not in any way expose your computer to viruses or compromise your information. It's simply necessary for the company to attribute the sale to the affiliate, ensuring creators like myself receive their rightful commissions.
Your trust and support enable me to continue sharing creativity through my email lists, blog, and YouTube channel. Thank you for being a valued part of our crafting community!


Comments