
Stash Busting Cardmaking: Create an Elegant Wedding Congratulations Card

One of my favorite challenges as a cardmaker is creating something that feels fresh and special while using supplies I already have on hand. Over the years, I've collected stamps, dies, embossing folders, and cardstock that I absolutely love, but sometimes those older supplies get pushed aside in favor of the newest releases. For this Summer Wedding Congratulations Card, I wanted to challenge myself to revisit some favorites from my stash and pair them with beautiful cardstock from CutCardStock to create a design that feels timeless and elegant.

Wedding cards can sometimes feel intimidating to make. We often think they need to be elaborate or covered in layers and embellishments. In reality, a few thoughtfully chosen design elements can create a card that feels sophisticated without becoming overly complicated.
Building a Color Palette with Cardstock
The starting point for this card was actually the cardstock. Instead of reaching for traditional wedding colors like black, silver, or ivory, I wanted something that felt appropriate for a summer wedding.
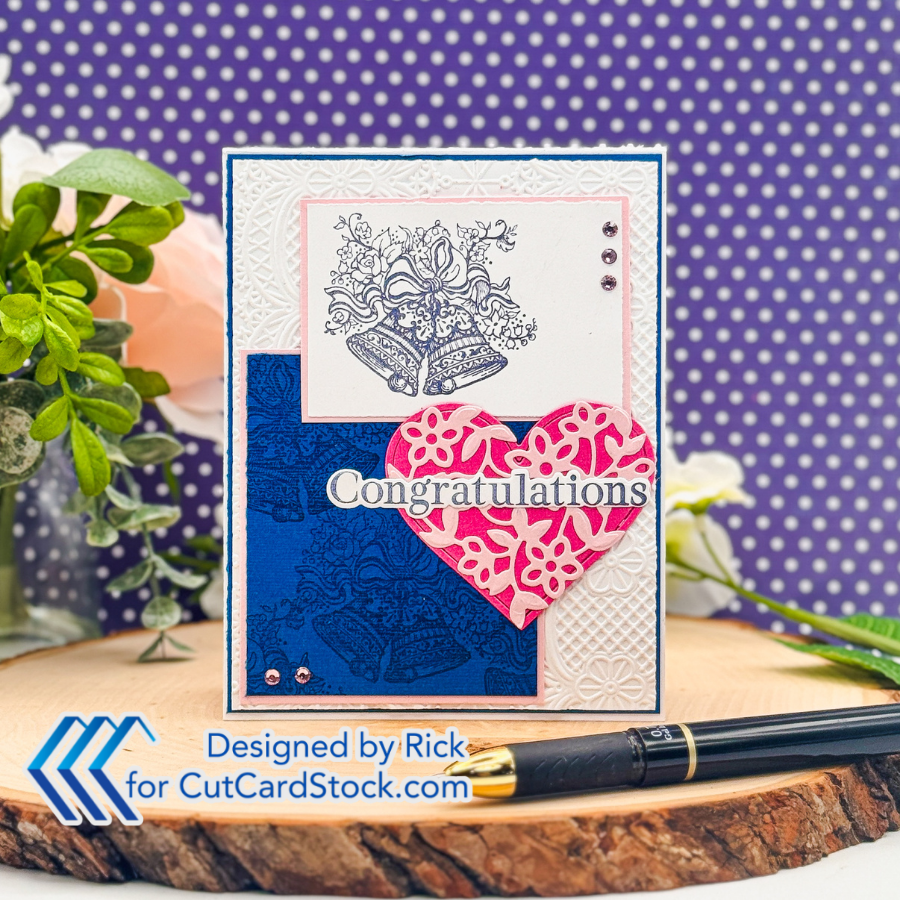
The combination of Indigo Blue DCS Discount Card Stock, Fruit Punch Pink DCS Discount Card Stock, and Pink Lemonade Pop Tone Cardstock immediately caught my attention. The deep blue provides a strong foundation while the pink tones soften the design and add a romantic feel. Together, they create a color palette that feels elegant but still cheerful and seasonal.
This is a good reminder that cardstock can do much of the design work for you. Before adding techniques or embellishments, spend a few minutes exploring color combinations. Sometimes an unexpected color choice is what makes a project stand out.

Why Texture Makes Such a Difference
One of the details I love most on this card is the embossed background. Dry embossing is a technique I return to again and again because it adds visual interest without adding clutter.
Wedding-themed cards often benefit from subtle texture because it creates an elegant backdrop while allowing the focal images to remain the star of the design. The lace pattern echoes the romantic theme of the card while adding dimension that catches the light beautifully.
If you're ever looking at a card design and feeling like it needs "something," embossing is often the answer. It fills empty space without overwhelming the overall design.
Layering Creates Focus
The wedding bells image became the focal point of this project, but what really helps it stand out is the layering.
Rather than relying on coloring or complicated techniques, I used layered panels to create separation between the different design elements. The contrast between the white cardstock and the Indigo Blue cardstock helps guide the eye exactly where I want it to go.
This is one of my favorite design principles because it works with almost any stamp set. When you use layers strategically, even a simple stamped image can become a strong focal point.

Making the Most of Your Stash
One reason I enjoyed creating this card so much is that nearly every element came from supplies I already owned. The wedding bells stamp, embossing folder, and heart die had all been sitting in my craft room waiting for the right project.
It's easy to forget how many possibilities exist within our current collections. Sometimes all it takes is pairing older supplies with a fresh color palette or combining products that were never originally designed to work together.
The layered floral heart is a great example. While it wasn't designed specifically for wedding cards, it complements the romantic theme perfectly. Looking beyond a product's intended purpose often leads to some of the most creative results.

How You Can Adapt This Design
One of the things I hope cardmakers take away from this project is that the overall concept is easy to customize.
You could swap the wedding bells for flowers, butterflies, or even a sentiment-focused design. Change the colors to coordinate with a wedding theme or adapt the layout for anniversaries, engagements, or bridal showers. The combination of texture, layered panels, and a focal embellishment works across countless occasions.
If you're newer to cardmaking, this design is also a great reminder that you don't need the latest supplies to create something beautiful. Focus on strong color choices, interesting texture, and thoughtful layering. Those design fundamentals never go out of style.

Final Thoughts
Creating this card reminded me why I enjoy stash-busting projects so much. They encourage creativity, help us see our supplies in new ways, and often result in designs that feel more personal than projects built entirely around new products.
The next time you're looking for inspiration, try pulling out a few older favorites and challenge yourself to pair them with a new color palette. You might be surprised by what you create.
Until next time, happy crafting—and don't forget to look through your stash before adding something new to your shopping cart. Your next favorite card design might already be waiting in your craft room.
Thanks for dropping by today I hope that you found a little spark of creative inspiration with my project today. Wondering what I used in this project? Everything is linked to multiple sources in the thumbnails in the Materials Used section, or in the text below. Compensated affiliate links used when possible.
Supplies Used
Here you will find the list of supplies that I used to create today's card. All supplies are linked to supply sources below. Compensated affiliate links may be used at no cost to you.
Happy Crafting,

Rick Adkins
Affiliate Disclaimer:
Just a friendly reminder, as part of my commitment to transparency, please note that some of the links provided maybe affiliate links. This means that if you make a purchase through these links, I may earn a small commission at no extra cost to you. Your support is truly appreciated!
Additionally, I kindly ask that you always accept the tracking cookie for the affiliate websites. Rest assured, this will not in any way expose your computer to viruses or compromise your information. It's simply necessary for the company to attribute the sale to the affiliate, ensuring creators like myself receive their rightful commissions.
Your trust and support enable me to continue sharing creativity through my email lists, blog, and YouTube channel. Thank you for being a valued part of our crafting community!


Comments