
5 Ways to Use One Halloween Stamp Set for Handmade Cards

I love finding ways to stretch a stamp set beyond the first card idea that comes to mind. It’s easy to look at a new stamp set, choose one image, create a card, and then move on to the next project. But what if that same stamp set could give you five completely different handmade cards? That was the idea behind this Halloween cardmaking project.
I challenged myself to use one Halloween stamp set in five different ways, changing the layout, color palette, focal point, and background while keeping the overall designs clean and approachable. The goal wasn’t simply to make five cards. I wanted to show how a little design flexibility can help you get much more from the stamps you already own.
I created a video, “One Stamp Set, Five Halloween Cards,” so you can see these ideas come together visually. But before you watch, I want to share some of the design thinking behind the five cards because these are ideas you can use with almost any stamp set in your collection.

One Stamp Set Can Give You Many Different Card Designs
One of the biggest challenges I hear from cardmakers is figuring out what to do with a stamp set after the first card has been made. My solution is to stop thinking of the stamp set as one finished idea and start looking at the individual design choices you can change.
For these five Halloween cards, I focused on five simple questions:
What happens if I keep the layout very simple?
What happens if I change the arrangement of the stamped images?
What happens if I change the color palette?
What happens if I change the shape or structure of the focal point?
And what happens if I change the background?
Those questions can turn one stamp set into a surprisingly versatile cardmaking tool. You don’t have to make all five cards at once, either. You can use one of these approaches whenever you’re sitting at your craft table wondering, What else can I do with this set?
Card One: Start With a Clean and Simple Layout
The first card is intentionally uncomplicated. I stamped the image of the two pumpkins in the center of the card front and let that image do most of the work. This is a great reminder that a clean and simple card doesn’t need to feel unfinished. The key is giving the focal image enough room to breathe.
When I use a larger stamped image, I often resist the temptation to fill every bit of available space. Instead, I ask myself whether the image is strong enough to stand on its own. For this card, the answer was yes.

The Jack of All Faces Stamp Set from The Rabbit Hole Designs worked especially well for this approach because the stamped images have enough personality and detail to remain interesting without requiring a complicated background. Once the image is stamped and colored, there isn’t a need to keep adding elements just because there is empty space on the card.
When you’re stuck on a card layout, try starting with one focal image and plenty of open space. This approach is especially helpful when you’re short on time, working with a new stamp set, or simply want a beginner-friendly design that lets your coloring take center stage.
Card Two: Change the Arrangement
For the second card, I kept the same stamp set but changed how I used the images. Instead of relying on one stamped image, I created a small cluster using multiple stamped and colored images. I also added a little ink blending behind the images to establish a simple scene.
This is one of my favorite ways to get more mileage from a stamp set because you don’t necessarily need a completely different technique. Simply changing the arrangement of the same images can make a card feel completely different.
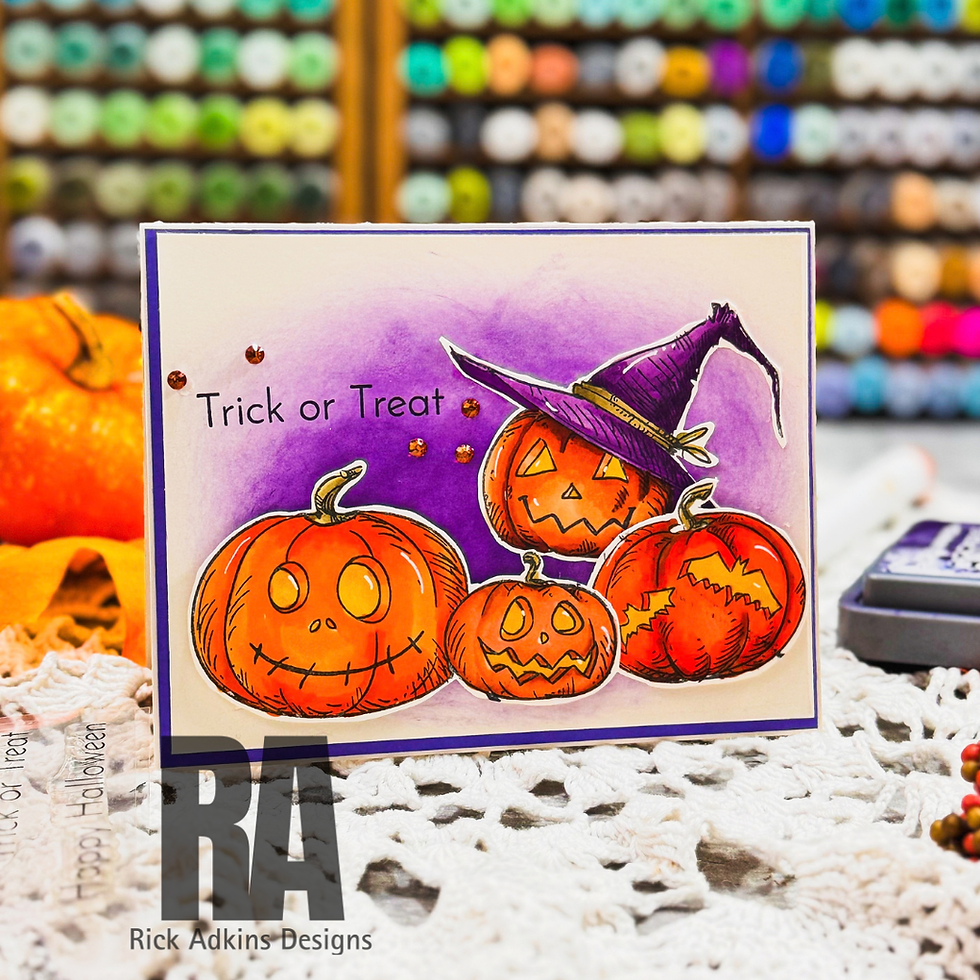
Think of your stamped images as pieces that you can move around the card front. Try overlapping them, grouping smaller images around a larger focal point, or creating a visual triangle with several images. Before you adhere anything, stamp and color a few images and experiment with their placement. You may discover a completely different composition simply by moving the pieces around.
If your first card feels too predictable, don’t immediately reach for another stamp set. Try changing the arrangement first. Creating a small cluster or scene is a simple way to make your card feel fuller while still maintaining a clean and approachable design.
Card Three: Let the Color Palette Change the Mood
Color is one of the easiest ways to make a familiar layout look new. For the third card, I explored this by using the same basic design with two different Halloween color approaches. One uses a more traditional Halloween palette, while the other takes a more modern approach.
This is something I encourage cardmakers to experiment with more often. We tend to associate Halloween with certain colors—orange, purple, black, and green—but there is no rule saying your Halloween cards have to use all of them. A modern color palette can completely change the personality of a card while keeping the stamping and layout essentially the same.

The Ohuhu Honolulu Brush Markers made this especially fun because I could explore different color combinations while coloring the stamped images. Changing the colors gave the cards a noticeably different feel even though the basic design concept remained similar.
The next time you make a card you really like, try making another version with a completely different color palette. You might be surprised by how different the finished card feels. This works far beyond Halloween, too. Soft pastels can give a spring card a completely different mood, while blue and white can create a winter feel, and neutrals can give a masculine card a more understated look.
Changing color is one of the simplest ways to stretch a successful card design without having to reinvent the entire project.

Card Four: Change the Focal Point With a Die Cut
For the fourth card, I changed more than just the arrangement. I changed the way the stamped image interacts with the card itself. Adding a die-cut shape—or even creating a window in the card base—can give a stamped image an entirely different role.
Instead of simply placing the stamped image on top of the card front, you can use the opening as a frame for the image. The stamped and colored piece can sit behind the window on the inside of the card, creating a little surprise when the card is opened.
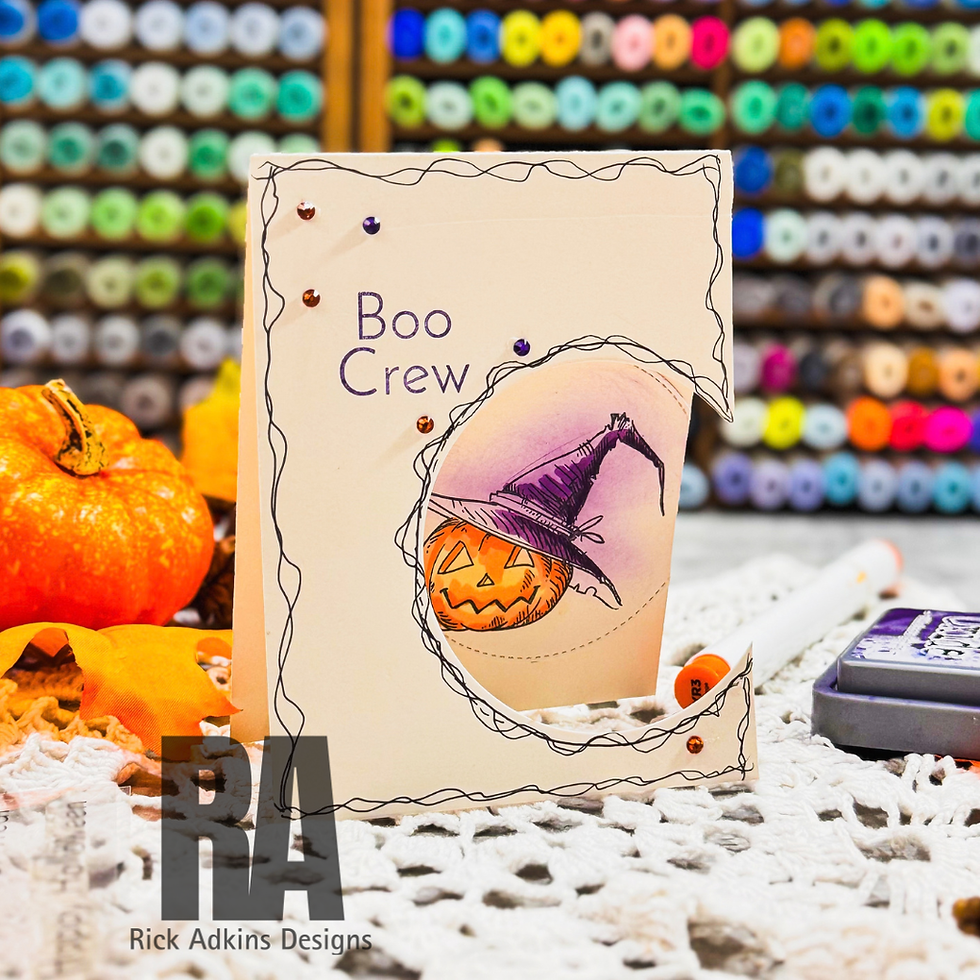
You don’t need a specific window-card die to try this idea. A shaped die, an outline die, or even a basic circle or rectangle can work. The important part is thinking about how the shape changes the way the recipient sees the stamped image.
When you’re looking for a way to make a card feel different without learning an entirely new technique, try changing the shape of the focal area. A window can create visual interest, draw attention to a stamped image, and add dimension without requiring lots of embellishments.
This is also a good technique to save for when you want to make a card that feels a little more special without becoming overly complicated.
Card Five: Change the Background
For the final card, I changed something that can have a surprisingly big impact: the background. Instead of keeping the stamped image on a plain cardstock background, I incorporated Halloween Parade Pattern Paper from Echo Park.
Pattern paper can sometimes feel intimidating because there are so many patterns to choose from. My approach is to think of patterned paper as part of the card’s composition rather than simply as decoration. The right pattern can establish the theme, add color, and provide visual interest without requiring additional stamping.

For a clean and simple card, I usually like to balance a busier pattern with a quieter area where the stamped focal image can live. That contrast keeps the card from feeling visually crowded. In this design, the patterned paper helps establish the Halloween theme while the lighter focal panel gives the stamped and colored image a place to stand out.
If a card design feels like it’s missing something, try changing the background before adding more embellishments. A piece of patterned paper might provide exactly what you need. You can also use this idea with papers already in your stash, whether you’re working with a small repeating pattern, a tonal design, a subtle geometric print, or a seasonal collection.
You don’t have to use a large piece of patterned paper, either. Even a narrow strip or small panel can change the look of a handmade card.
Why This Approach Makes Cardmaking Easier
What I like most about this exercise is that it takes some of the pressure out of coming up with new card ideas. Instead of starting with a blank sheet of cardstock and asking, What should I make?, you can start with something you already know works and then change one design variable at a time.
You might change the layout, rearrange the images, experiment with the color palette, change the shape or focal point, or introduce patterned paper. This gives you a simple framework for brainstorming when your creative ideas aren’t flowing.
It’s also a great way to stretch your crafting supplies. You don’t necessarily need to buy a new stamp set every time you want to make something different. Sometimes the best new card idea is hiding inside a stamp set you’ve already used.

You Don’t Need the Exact Supplies
Although I used The Rabbit Hole Designs Jack of All Faces Stamp Set, Echo Park Halloween Parade Pattern Paper, and Ohuhu Honolulu Brush Markers, the real takeaway isn’t the specific products. It’s the design process.
You can use these same five ideas with the stamps, markers, dies, inks, and patterned papers already in your craft room. Have a floral stamp set? Try changing the arrangement or color palette. Have a Christmas stamp set? Create one clean and simple card, then try a cluster, a window, a different color scheme, and patterned paper. Have a birthday stamp set? Use the same layout with several different color combinations.
The goal is to become more comfortable asking, “What else can I do with this?” rather than feeling like every card needs an entirely new set of supplies.
A Few Things to Keep in Mind
When you’re creating multiple cards from one stamp set, I find it helpful not to change everything at once. If you change the layout, colors, background, focal image, and embellishments simultaneously, it becomes difficult to understand what actually made the design work. Instead, change one or two elements and see how that affects the overall card.
It’s also important not to feel obligated to fill empty space. Especially with clean and simple cards, open space is part of the design. If you’re working with a familiar layout, changing the color palette or background can often give you the fresh look you’re after without adding more embellishments.
And don’t underestimate your patterned paper stash. Pattern paper can solve a design problem without adding another complicated technique. Likewise, don’t assume that the first card you make has to be the best version of the idea. Sometimes the second or third variation is where the design really starts to come together.
Five Cards From One Set Is Really Five Design Lessons
That’s the part of this project I hope you’ll take away. The five cards aren’t really about making five Halloween cards. They’re about learning how to look at one stamp set in five different ways.
You can simplify the layout, rearrange the images, change the colors, change the shape of the focal point, or change the background. Those are small decisions, but they can make a huge difference in the finished card.
And that’s one of the things I enjoy most about cardmaking: you don’t always need more supplies to create something new. Sometimes you just need to look at what you already have a little differently.
Ready to See the Five Cards Come Together?
You can watch the process here: One Stamp Set, Five Halloween Cards.
If you’re a visual learner, the video will help you see how each design develops and how the same Jack of All Faces images can take on a different look from card to card.
If you have problems watching the video here on my blog you can always watch it on my YouTube Channel by Clicking Here!
I hope this gives you a few new ways to look at the stamp sets already sitting on your craft table. The next time you’re wondering what else you can make, try changing just one element—your layout, colors, focal point, or background—and see where it takes you.
You don’t need every new product or a completely new idea to make a beautiful handmade card. Sometimes the best creative challenge is simply getting more possibilities from what you already own. If you try one of these approaches, I’d love to know which one you chose, so feel free to leave a comment and share your idea.
(Wondering what I used in this video? Everything is linked to multiple sources in the thumbnails at the end of this post, or in the text below. Compensated affiliate links used when possible). As always I appreciate your support of my videos!
Supplies Used
Here you will find the list of supplies that I used to create today's card. All supplies are linked to supply sources below. Compensated affiliate links may be used at no cost to you.
Happy Crafting,

Rick Adkins
Affiliate Disclaimer:
This post contains affiliate links. If you choose to shop through these links, I may earn a small commission at no extra cost to you. Thank you so much for supporting my business!


Comments