
Book Cradle Fun Fold Cardmaking Tutorial: 5 x 7 Handmade Card with Die Cutting & Pattern Paper
- Rick Adkins

- Feb 15
- 5 min read
There is something so satisfying about creating a card that looks impressive but is actually built on a very repeatable structure. That’s exactly why I love a Book Cradle fun fold card. It has presence. It stands beautifully for display. And it gives you multiple design areas to play with—without feeling overwhelming.
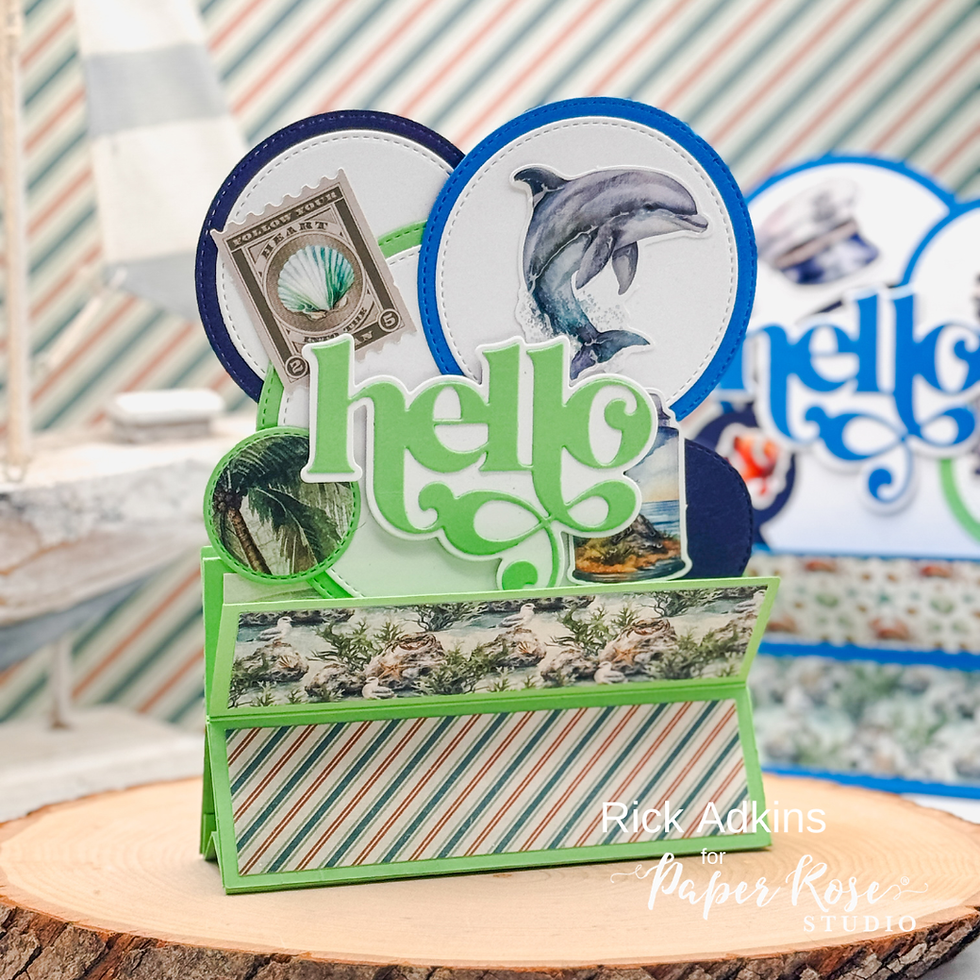
For these two 5 x 7 handmade cards, I wanted to show how one layout can feel completely different simply by shifting the color story. Both designs use the same Book Cradle base and the same core products from Paper Rose Studio, including the Seaside Memories 6 x 6 Pattern Paper, Embossed Die Cuts and cardstock. The difference comes from intentionally pulling two distinct color schemes from the patterned paper and letting those choices guide everything else.
And that’s where the real teaching moment lives.

Let the Pattern Paper Make the Decisions
When I’m working with patterned paper—especially a cohesive collection like Seaside Memories 6 x 6 Pattern Paper—I treat it like my built-in design assistant.
Instead of trying to force extra colors into the project, I study the paper first:
What are the dominant tones?
Which colors feel calm or bold?
What contrast already exists?
For the first card, I leaned into the rich navy and ocean blues from the paper. That led me to use Midnight Navy and Pacific Blue cardstock for the base and layering. The result feels classic and coastal.
For the second card, I shifted my focus toward the softer greens pulled from the shells and seaside elements. Pairing Spring Green with white and subtle navy accents created a lighter, fresher look—still related, but distinctly different.
This is a simple cardmaking principle that works every time: Pull your cardstock colors directly from your patterned paper and your design will automatically feel cohesive.

Why the Book Cradle Layout Works
Fun fold cards sometimes intimidate crafters because they look complicated. But structurally, the Book Cradle fold is just smart scoring and thoughtful layering.
Here’s why I love using it for 5 x 7 cards:
The angled front panel creates visual movement.
The “cradle” gives you a built-in design feature.
It stands up for display without extra engineering.
It offers multiple pattern paper opportunities without looking busy.
Because there are distinct panels, this layout is perfect for showcasing collections like the Seaside Memories Embossed Die Cuts and Tags & Tickets. You can cluster elements without overcrowding the design.
And for those of us who have been crafting for a while, it’s a wonderful reminder:You don’t always need more embellishments—sometimes you just need better structure.
Using Die Cutting to Create a Focal Point
On both cards, I used the Stitched Circles Metal Cutting Dies and the Fancy Script Layered Hello Metal Cutting Dies to anchor the design.
When you’re working with patterned paper, especially detailed prints, die cutting is your best friend.
Here’s why:
A stitched shape softens and frames busy patterns.
Layered word dies add depth without extra embellishment.
Repeating the same focal element on multiple cards builds consistency.
The layered “Hello” sentiment does a lot of heavy lifting here. Because it’s bold and dimensional, it balances the smaller die cut accents like the sailor hat, tags, and fish. That contrast between large sentiment and small detail elements keeps the card feeling intentional instead of scattered.
If you don’t have these exact dies, look through your stash for:
A large script word die
A stitched circle or oval
Even a simple rectangle with embossing detail
The concept is more important than the exact product.

Scoring & Folding with Confidence
For many crafters, scoring and folding can feel like the “technical” part of cardmaking. But once you make one Book Cradle card, you’ll realize it’s incredibly adaptable.
You can:
Change the finished size.
Flip the angle.
Create a top-fold version.
Turn it vertical instead of horizontal.
If you’re newer to fun folds, I encourage you to think of this as a layout template rather than a one-time design. Once you understand the structure, you can reuse it with holiday paper, florals, masculine themes, or even clean and simple cardstock-only designs.
That’s how you stretch your supplies—and your skills.

Two Cards, One Layout, Endless Possibilities
What I love most about making these two Hello Book Cradle cards is that they feel coordinated but not identical. They could easily be part of a gift set or class sample, yet each stands on its own.
This is a helpful creative exercise:
Choose one layout.
Choose one paper collection.
Create two cards using different color pulls from the same paper.
You’ll train your eye to see options instead of limits.
And that’s how you grow as a cardmaker—not by buying more, but by seeing more in what you already have.

If you’ve been wanting to try a 5 x 7 fun fold card, let this be your sign. Start with patterned paper you love. Let the colors guide you. Use die cutting to create balance. And trust that a thoughtful layout can do most of the design work for you.
You are more capable than you think. Sometimes all it takes is one fold to open up a whole new level of creativity. If you want to see the step by step tutorial I shared on the Paper Rose Studio YouTube Channel you can watch the video here!
Thanks for dropping by today I hope that you found a little spark of creative inspiration with my project today. Wondering what I used in this project? Everything is linked to multiple sources in the thumbnails in the Materials Used section, or in the text below. Compensated affiliate links used when possible.
Materials Used:
Here you will find the list of supplies that I used to create today's card. All supplies are linked to supply sources below. Compensated affiliate links may be used at no cost to you.
Happy Crafting,

Rick Adkins
Affiliate Disclaimer:
Just a friendly reminder, as part of my commitment to transparency, please note that some of the links provided maybe affiliate links. This means that if you make a purchase through these links, I may earn a small commission at no extra cost to you. Your support is truly appreciated!
Additionally, I kindly ask that you always accept the tracking cookie for the affiliate websites. Rest assured, this will not in any way expose your computer to viruses or compromise your information. It's simply necessary for the company to attribute the sale to the affiliate, ensuring creators like myself receive their rightful commissions.
Your trust and support enable me to continue sharing creativity through my email lists, blog, and YouTube channel. Thank you for being a valued part of our crafting community!


Comments