
Clean and Simple Deco Flower Pride Card!
- Rick Adkins

- Jun 17, 2025
- 4 min read
Updated: Oct 6, 2025
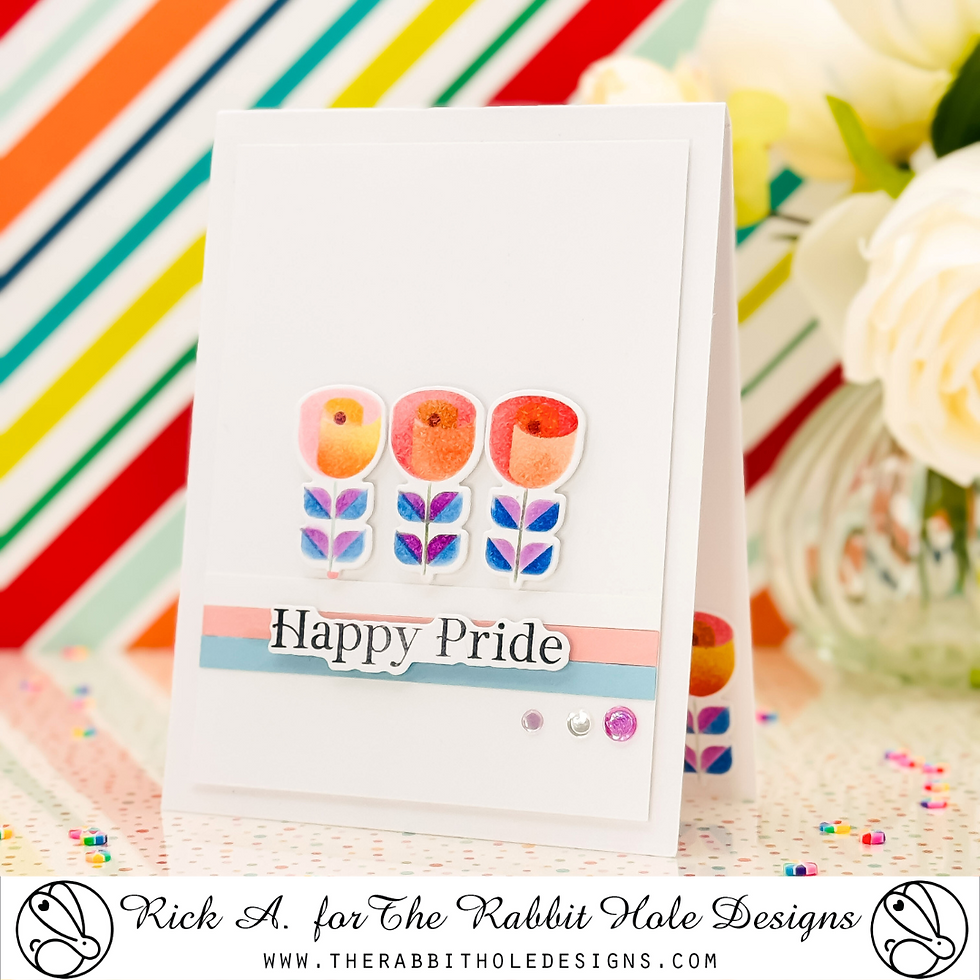
Hey there, crafty friends! Rick here, and today I’ve got a fresh card design to share with you that’s both clean and bold—perfect for Pride month or really any time you want to send a little rainbow love. I’m featuring the Deco Flower 6 Layer Stencils with Die Bundle and the Sentimentally Speaking Holidays Bundle from The Rabbit Hole Designs, and I have to say—this combination is a dream for simple, impactful cards with a little extra heart.
What I love most about this project is that it solves a problem I think a lot of us run into: we want to create something that’s meaningful and colorful, but we don’t always have hours to spend or a hundred different products on hand. This design keeps things quick and simple, but still lets the message shine—literally and figuratively.

Clean and Simple Deco Flower Pride Card:
A Rainbow of Ink with Clean Lines
I started off by doing a bit of ink blending with the Deco Flower 6 Layer Stencil Set—and yes, you read that right, six layers. Don’t let that number intimidate you though. These stencils are clearly labeled, easy to align, and they pretty much do the design work for you. I used Bristol Smooth Cardstock (because it holds up so well to blending), placed it on my sticky mat, and inked each layer using my Bitty Bunny Blending Brushes in full rainbow order.
Here’s a little pro tip: if you want more depth, don’t be afraid to switch up your ink shades slightly for each layer. I let the colors overlap a bit and added some extra shading to certain areas—it gave the flower so much more interest without any extra effort. You can get a totally different look just by how much you blend or which colors you pair together.
When I finished blending all six stencil layers, I used the coordinating die from the same bundle to cut out three floral pieces. I like to do a few in one sitting so I have extras ready to go for future projects. It’s a time-saver and makes it easy to batch create if you ever need a last-minute card.

A Subtle Pride Background with Purpose
I really wanted this card to be clean and simple, but still have a clear message of support and celebration. Instead of going full rainbow across the whole card, I added a small, symbolic background made from three cardstock strips—white, light pink, and light blue—to represent the trans pride flag. These were trimmed down to 1/4" and adhered to a piece of Bristol Smooth Cardstock cut to 3 3/4" x 5".
I’ve found that when using narrow cardstock strips, it helps to add a bit of temporary adhesive to the work surface and lay them out side by side before gluing down—less shifting, more straight lines.
Once the panel was done, I adhered it to a top-folding A2 card base made from Brilliant White 110 lb Smooth Cardstock using some 1" foam tape. The dimension here really helps the clean design stand out without getting overly busy.

A Bold Sentiment That Says It All
For the sentiment, I turned to the Sentimentally Speaking Holidays Bundle—a super versatile set from The Rabbit Hole Designs that covers everything from holiday cheer to celebratory sentiments like this one. I stamped the “Happy Pride” sentiment in Versafine Clair Nocturne ink onto a scrap of white cardstock and used the coordinating die to cut it out perfectly.
I placed the sentiment just below the floral cluster and over the background strips, so everything feels centered and intentional. The die-cut sentiment adds just the right amount of polish to a clean card design.

Final Touches and Flat-Back Sparkle
To finish things off, I adhered the three die-cut flowers right above the pride background using foam squares. I love how the layering of dimension leads your eye from the flowers to the sentiment, then back to the strips below. It’s simple, but there’s a rhythm to the layout that keeps things visually interesting.
The final embellishment? Three flat-back sequins for just a hint of sparkle—because even in a clean and simple design, a little shine can go a long way.
Why This Card Works
This card is all about balance: color and white space, simplicity and intention. It’s proof that you don’t need a complicated design to create something meaningful and beautiful. Whether you’re celebrating Pride, showing support, or just wanting to share a little love and color, this design offers a thoughtful way to do it.
And that’s the best part of this hobby, right? We get to tell stories with cardstock and ink—one layer at a time.

Thanks so much for stopping by today. I hope this card inspires you to stretch your stencils, play with rainbow color, and create something that speaks from the heart.
Wondering what I used in this project? Everything is linked to multiple sources in the thumbnails in the Materials Used section, or in the text below. Compensated affiliate links used when possible.
Materials Used:
Here you will find the list of supplies that I used to create today's card. All supplies are linked to supply sources below. Compensated affiliate links may be used at no cost to you.
Happy Stampin'

Rick Adkins
Affiliate Disclaimer:
Just a friendly reminder, as part of my commitment to transparency, please note that some of the links provided maybe affiliate links. This means that if you make a purchase through these links, I may earn a small commission at no extra cost to you. Your support is truly appreciated!
Additionally, I kindly ask that you always accept the tracking cookie for the affiliate websites. Rest assured, this will not in any way expose your computer to viruses or compromise your information. It's simply necessary for the company to attribute the sale to the affiliate, ensuring creators like myself receive their rightful commissions.
Your trust and support enable me to continue sharing creativity through my email lists, blog, and YouTube channel. Thank you for being a valued part of our crafting community!


Comments