
Clean and Simple Valentine Card with Stamping and OLO Marker Coloring
- Rick Adkins

- Feb 2
- 4 min read
When I sit down to make a Valentine’s Day card, my goal is almost always the same: something cheerful and heartfelt that doesn’t require overthinking every single step. This project started with that exact intention—creating a handmade card that feels finished and polished, but still relaxed and approachable from start to finish.
One of the biggest challenges I hear from cardmakers is alcohol marker coloring. Not the coloring itself, but the decisions that come with it—what colors to use, how many to choose, and how to make everything work together. For this card, I wanted to remove as much of that decision fatigue as possible by letting my patterned paper do the heavy lifting.

I walked through the process on video so you can see how it all comes together visually, but I also wanted to share the design thinking behind this approach here on the blog—especially if you like understanding the why just as much as the how.
Why Let Patterned Paper Lead the Coloring Choices
Instead of starting with markers, I started with patterned paper from my stash. This simple shift makes alcohol marker coloring feel much more manageable, especially if you’ve ever felt stuck staring at a rainbow of marker caps.
By pulling colors directly from the patterned paper, you:
Automatically create a cohesive color palette
Avoid over-coloring or adding unnecessary shades
End up with a card that feels intentional, not accidental
For this Valentine’s card, the softer pinks and reds in the paper helped guide every coloring decision. The result is a stamped image that feels like it belongs on the card—not something added as an afterthought.
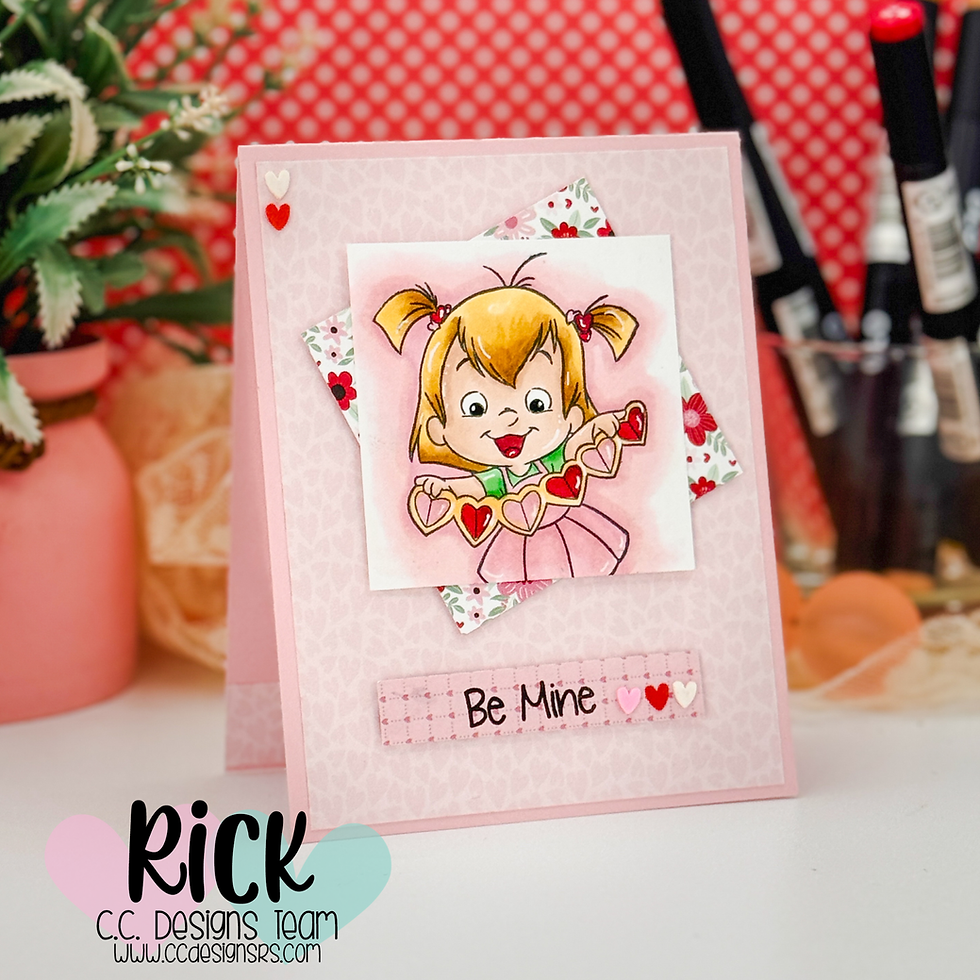
Why This Stamp Set Works So Well for Clean & Simple Cards
The Henry & Twila Valentine Stamp Set from C. C. Designs is a great example of a stamp that supports simple coloring without sacrificing personality. The image has enough open space to keep coloring stress-free, but still includes details that bring the character to life.
This makes it especially helpful when:
You want to practice alcohol marker coloring without pressure
You’re creating cards in batches
You’re teaching yourself how to color more confidently
Clean images like this are also very forgiving, which is always a bonus when you’re still building coloring skills.

How This Approach Simplifies Cardmaking Decisions
This style of cardmaking solves a few common problems I see all the time:
Too many color choices → Solved by starting with patterned paper
Overworked images → Solved by limiting marker colors
By narrowing your choices early, the rest of the card tends to come together much more naturally. You spend less time second-guessing and more time actually enjoying the process.
A common mistake is thinking you need more—more layers, more colors, more techniques. In reality, restraint is often what gives a card that finished, professional look.

Making This Idea Work with Your Own Supplies
You don’t need the exact supplies I used to apply this idea to your own cardmaking.
Here are a few easy substitutions:
Any Valentine or character stamp with open areas will work
Use scraps of patterned paper instead of a full sheet
Substitute any alcohol markers you already own
You can also take this concept beyond Valentine’s Day. Try it with:
Birthday cards
Baby cards
Thank you cards
Seasonal projects
The core idea stays the same—let one element guide your choices and keep everything else simple.

A Gentle Reminder Before You Go
Alcohol marker coloring doesn’t have to be perfect to be effective. Cards like this are about creating something joyful and handmade, not about flawless blending or expert-level shading.
If this approach helps you feel more confident using your markers, then it’s done its job. Save the idea, revisit it later, and don’t be afraid to experiment as you go.

Video Tutorial:
If you’re a visual learner, you can watch the process here:
Easy Alcohol Marker Coloring for Stamped Images | Valentine Card Tutorial
If you have problems watching the video here on my blog you can always watch it on my YouTube Channel by Clicking Here!
Thanks so much for spending time with me today—and as always, happy crafting
(Wondering what I used in this video? Everything is linked to multiple sources in the thumbnails at the end of this post, or in the text below. Compensated affiliate links used when possible). As always I appreciate your support of my videos!
Materials Used:
Here you will find the list of supplies that I used to create today's card. All supplies are linked to supply sources below. Compensated affiliate links may be used at no cost to you.
Happy Crafting,

Rick Adkins
Affiliate Disclaimer:
Just a friendly reminder, as part of my commitment to transparency, please note that some of the links provided maybe affiliate links. This means that if you make a purchase through these links, I may earn a small commission at no extra cost to you. Your support is truly appreciated!
Additionally, I kindly ask that you always accept the tracking cookie for the affiliate websites. Rest assured, this will not in any way expose your computer to viruses or compromise your information. It's simply necessary for the company to attribute the sale to the affiliate, ensuring creators like myself receive their rightful commissions.
Your trust and support enable me to continue sharing creativity through my email lists, blog, and YouTube channel. Thank you for being a valued part of our crafting community!


Comments