
Happy Halloween Card: Sentimentally Speaking Holidays
- Rick Adkins

- Oct 2, 2025
- 4 min read
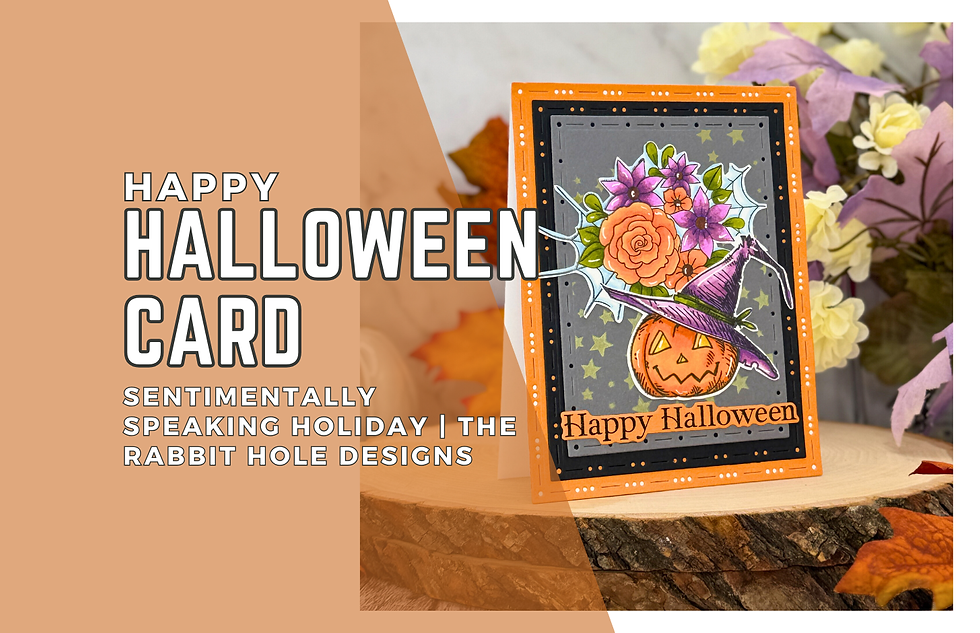
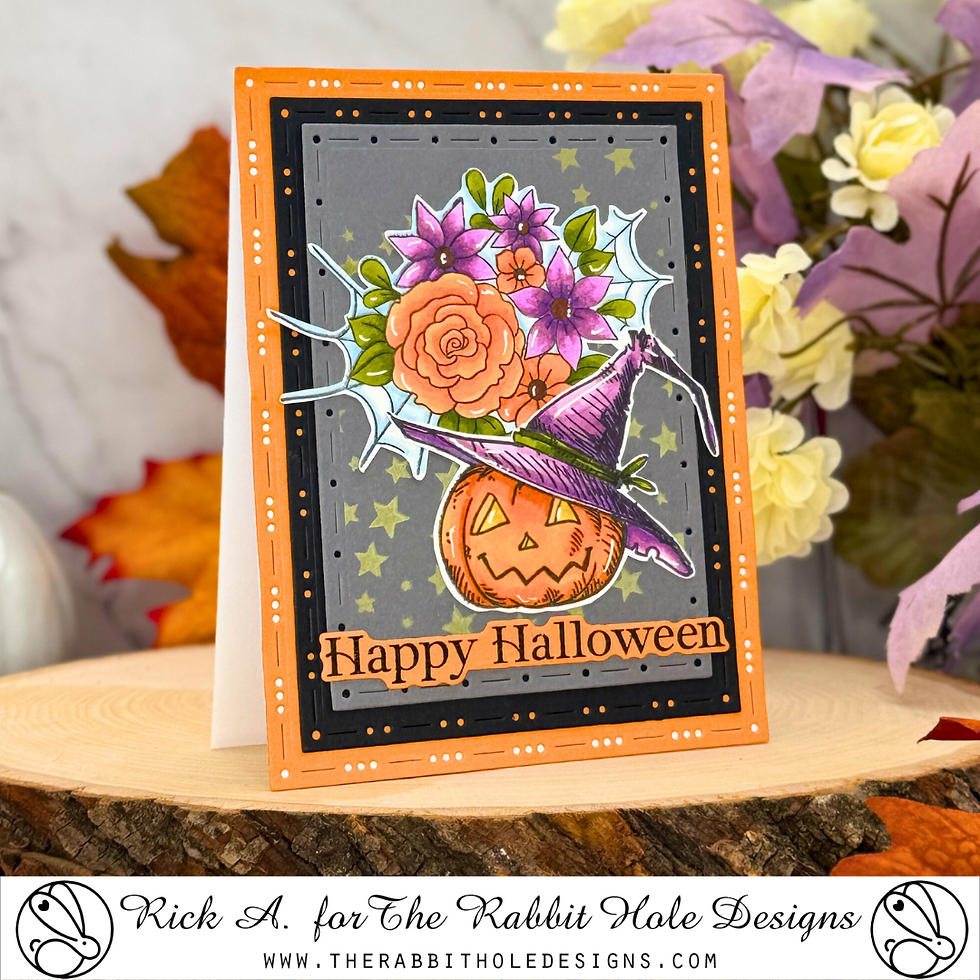
Halloween cardmaking is one of my favorite parts of the season. I love the mix of spooky and playful, and sometimes I like to surprise myself by combining the unexpected. That’s exactly what happened with today’s card. Instead of leaning fully into bats, ghosts, and skeletons, I decided to pair a grinning jack-o-lantern and witch’s hat with a big bouquet of florals on a spider web. The result is festive, unique, and just a little whimsical—perfect for sending to someone who appreciates Halloween but also loves a touch of beauty.
Happy Halloween Card: Sentimentally Speaking Holidays:
A Fresh Take on Halloween
Sometimes Halloween cards can feel a little limited—either cutesy or downright spooky. I wanted something in-between, a card that still celebrates the season but with a fresh twist. That’s where the Jack of All Faces Stamp Set and Spooky Sightings Stamp Set from The Rabbit Hole Designs came together beautifully. The jack-o-lantern image already has personality with its wide grin and tilted witch hat, but when paired with the floral arrangement on a spider web, it suddenly feels elegant as well as festive.
A little pro tip here: don’t be afraid to mix your seasonal stamps with florals. It’s an easy way to stretch your supplies and create cards that feel one-of-a-kind.
Color Brings It to Life
I stamped my images on Neenah Classic Crest Solar White 80 lb Cardstock with Memento Tuxedo Black Ink and reached for my Ohuhu Brush Markers. These are budget-friendly but pack a punch with vibrant color. For the flowers, I leaned into purples and corals to balance the orange of the pumpkin, and I added green leaves to keep the arrangement lively. The combination instantly softened the “spooky” vibe while keeping the Halloween feel.
One of my favorite parts of coloring is seeing the images go from flat black and white to vibrant focal points. I still remember the first time I tried alcohol markers years ago—I was so intimidated. But the truth is, the more you practice, the more comfortable you get. If you’re new to coloring, stick to simple blends: one dark, one midtone, and one light. You’ll be amazed at how quickly your confidence grows.

Building the Background
The background is where everything comes together. I die cut three stacked frames using the You’ve Been Framed Dies: Pumpkin Cardstock for the largest, Black Licorice for the middle, and Narwhal for the top. The Narwhal layer gave me the perfect canvas to stencil some glowing stars with Squeezed Lemonade Distress Oxide Ink and the Aim for the Stars Stencil. It added just enough atmosphere without competing with the focal images.
Layering cardstock like this is one of my favorite tricks. It instantly makes a card look more polished and finished, and it’s such a simple step. Think of it as adding a frame to a piece of art—it makes the design pop.

Sentiment & Finishing Touches
No Halloween card is complete without a greeting, and the Sentimentally Speaking Holidays Bundle worked perfectly. I stamped “Happy Halloween” on a scrap of Pumpkin Cardstock and die cut it with the coordinating die. It’s little touches like this—matching your sentiment strip to your framing layer—that tie a design together.
To assemble everything, I adhered the floral spider web flat to the background and popped up the jack-o-lantern with thin foam tape for dimension. The entire card front was then attached to a top-folding A2 card base cut from Neenah Ultra Thick Cardstock. A few white gel pen highlights finished it all off, adding that crisp detail that makes the images shine.

Takeaway for Cardmakers
The real magic in this card is how different stamp sets play together. Halloween doesn’t have to be all bats and ghosts—sometimes it’s a smiling pumpkin dressed up with flowers. By layering your cardstock, adding subtle stenciling, and mixing images creatively, you can create a design that’s festive, unique, and completely your own.
Next time you’re looking at your seasonal stamps, ask yourself: “What can I pair this with that might be unexpected?” You’ll be surprised at how many new ideas come to life.

Thanks for dropping by today I hope that you found a little spark of creative inspiration with my project today. Wondering what I used in this project? Everything is linked to multiple sources in the thumbnails in the Materials Used section, or in the text below. Compensated affiliate links used when possible.
Materials Used:
Here you will find the list of supplies that I used to create today's card. All supplies are linked to supply sources below. Compensated affiliate links may be used at no cost to you.
Happy Stampin'

Rick Adkins
Affiliate Disclaimer:
Just a friendly reminder, as part of my commitment to transparency, please note that some of the links provided maybe affiliate links. This means that if you make a purchase through these links, I may earn a small commission at no extra cost to you. Your support is truly appreciated!
Additionally, I kindly ask that you always accept the tracking cookie for the affiliate websites. Rest assured, this will not in any way expose your computer to viruses or compromise your information. It's simply necessary for the company to attribute the sale to the affiliate, ensuring creators like myself receive their rightful commissions.
Your trust and support enable me to continue sharing creativity through my email lists, blog, and YouTube channel. Thank you for being a valued part of our crafting community!


Comments