
How to Make a 3D Gift Bag with Dies and Pattern Paper
- Rick Adkins

- Mar 23
- 4 min read
Sometimes the hardest part of gift-giving isn’t the gift—it’s the packaging. I can’t tell you how many times I’ve grabbed a store-bought gift bag at the last minute, wishing I had something that felt a little more personal. That’s exactly what inspired this project.
I wanted to create a 3D gift bag that looks polished and put-together, but is still simple enough to make with basic die cutting and patterned paper. The kind of project you can pull together quickly, but still feel proud handing to someone. I shared the full process in today’s video so you can see how it all comes together, but I also wanted to walk through the design thinking behind it here.

Letting the Pattern Paper Do the Work
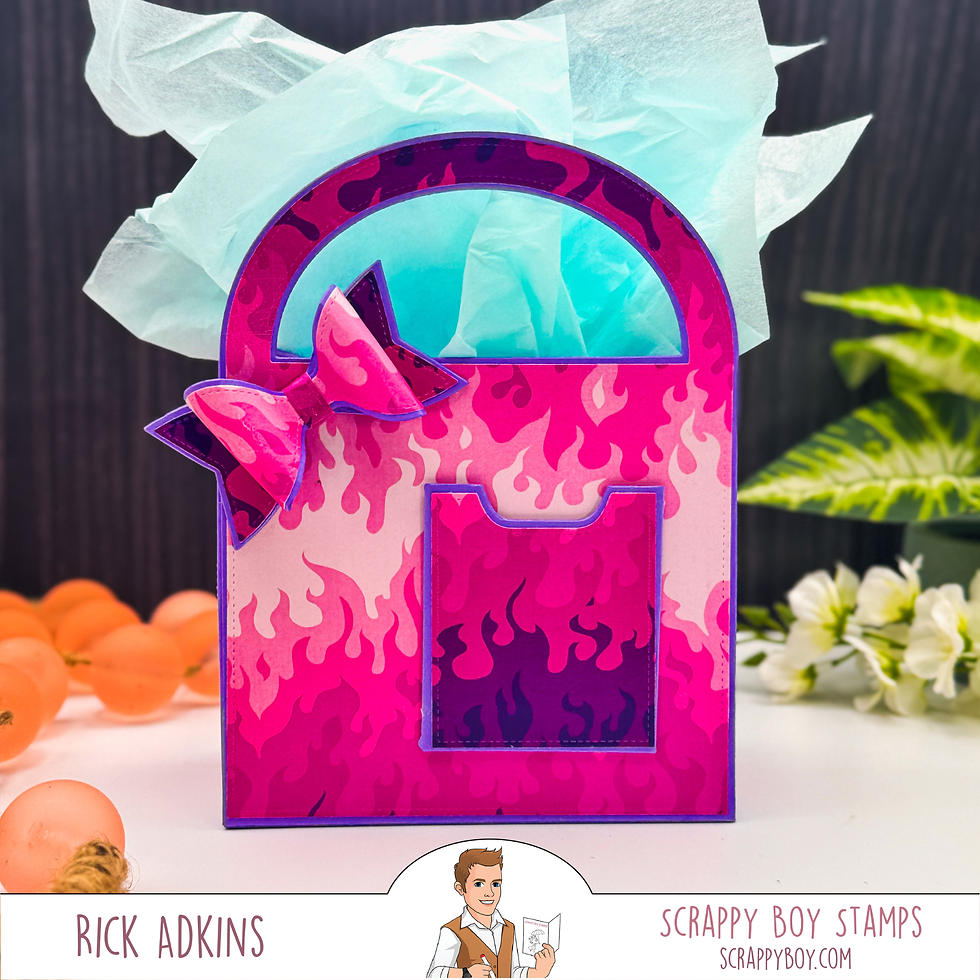
One of the biggest decisions in this project was leaning heavily on patterned paper instead of adding extra stamping or coloring. The Stage Slayers pattern paper from Scrappy Boy Stamps has such a bold, high-contrast design that it instantly creates visual interest without needing additional layers of detail.
This is one of my favorite approaches when I want something that looks “finished” without a lot of extra effort. When your paper already has strong color variation and movement, it naturally guides the eye and gives your project that store-bought feel.
If you’ve ever struggled with knowing when to stop adding details, this is a great solution—start with a paper that already does most of the design work for you.

Why a 3D Die Makes This Easier
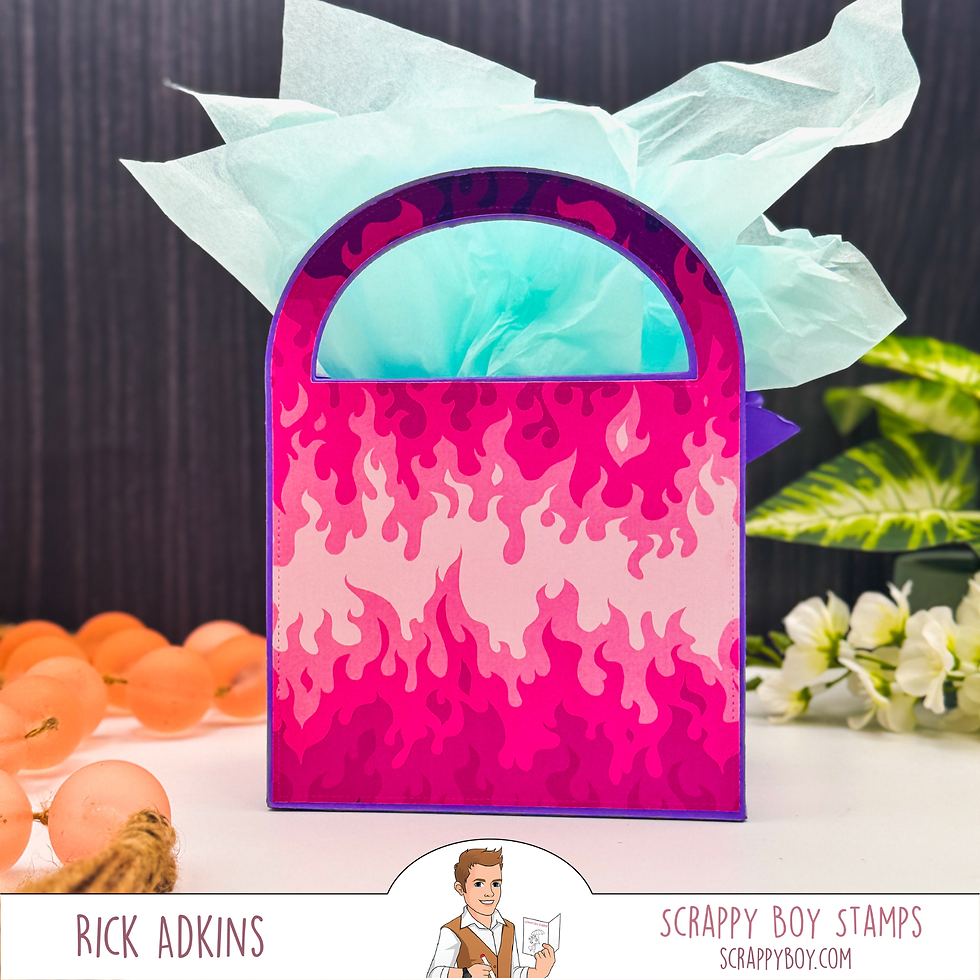
Using the 3D Treat Bag Die Set really simplifies the construction process. Instead of measuring, scoring, and hoping everything lines up, the die creates consistent pieces that fit together cleanly.
That consistency is what gives this bag its structure. A sturdy base makes a big difference—not just in how it looks, but in how it functions. It stands upright, holds its shape, and feels more like something you’d buy in a store.
This is especially helpful if you’ve ever tried to make handmade packaging and ended up with something that felt a little… flimsy. The right foundation removes that frustration.
Small Details That Elevate the Design
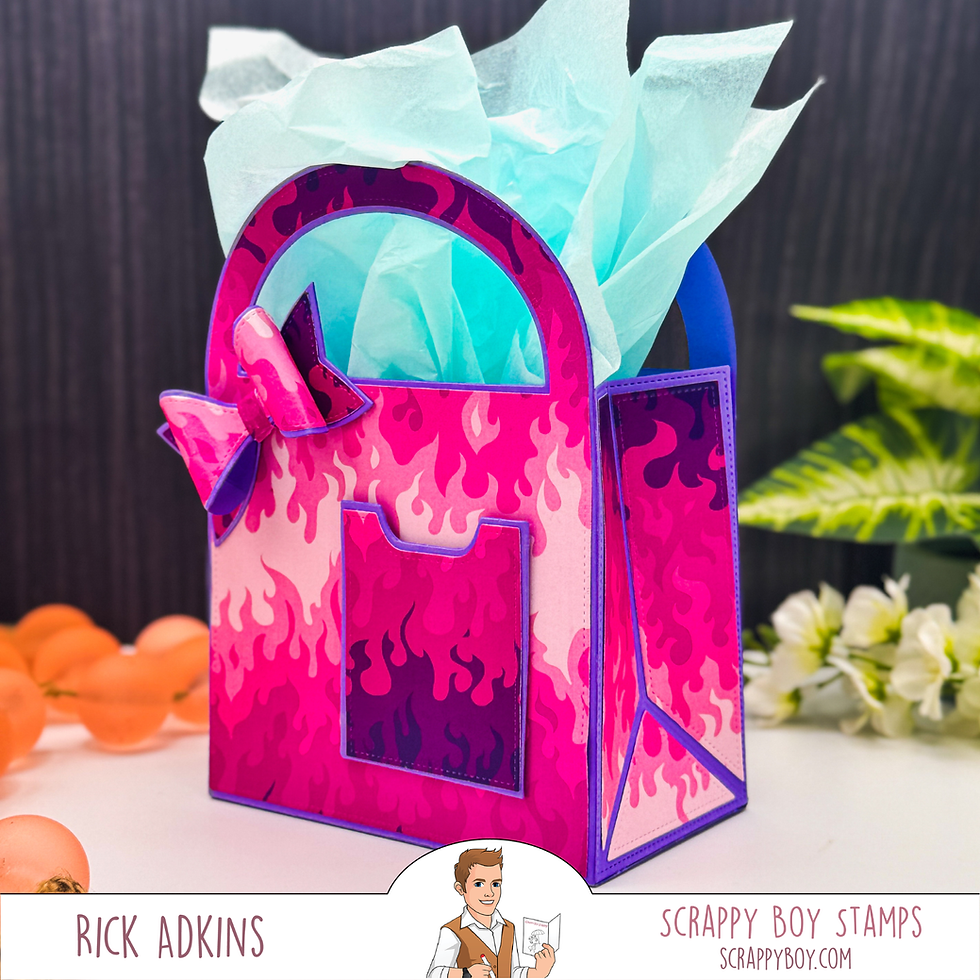
There are two elements on this bag that really take it to the next level: the front pocket and the bow.
The pocket is a practical detail, but it also adds dimension and layering without overcomplicating the design. It’s a great way to include a gift card, which makes this project even more versatile.
The bow, on the other hand, is all about finishing. It draws your eye, adds a focal point, and softens the bold pattern just enough to keep everything balanced.
A common mistake I see is stopping right after assembly. But it’s these small, intentional details that shift a project from “homemade” to “handmade.”
When to Use This Approach
This style of project works especially well when:
You need quick, polished gift packaging
You want to use up patterned paper in your stash
You’re short on time but still want something special
It’s also a great alternative to making a card. Sometimes the packaging is the project, and this is a perfect example of that.
Make It Work with What You Have
You definitely don’t need these exact supplies to recreate this idea.
If you don’t have a 3D bag die, you can adapt this concept using:
Pre-made gift bags (just decorate the panels)
Envelope-style dies
Simple scored cardstock templates
For patterned paper, look for designs with strong contrast or repeating patterns. Florals, geometrics, and seasonal prints all work beautifully here.
You can also easily change the theme. Swap the bold flame pattern for something softer for birthdays, holidays, or even baby gifts. The structure stays the same—the personality comes from your paper choices.

Final Thoughts
This project is a great reminder that you don’t always need more techniques—you just need the right combination of supplies and a clear design direction.
If you’ve ever felt like your projects were missing that polished look, try letting your patterned paper take the lead and focus on clean assembly and a few thoughtful details.
And don’t worry about making it perfect. Handmade pieces are meant to have personality—that’s what makes them special.
Watch the Video
If you’re a visual learner, this will really help you see how everything comes together from start to finish.
You can watch the process here: Make a Gift Bag That Looks Store-Bought (But Isn’t!)
If you have problems watching the video here on my blog you can always watch it on my YouTube Channel by Clicking Here!
I’d love to hear how you would customize this—would you keep it bold like this, or switch it up with a different theme?
(Wondering what I used in this video? Everything is linked to multiple sources in the thumbnails at the end of this post, or in the text below. Compensated affiliate links used when possible). As always I appreciate your support of my videos!
Materials Used:
Here you will find the list of supplies that I used to create today's card. All supplies are linked to supply sources below. Compensated affiliate links may be used at no cost to you.
Happy Crafting,

Rick Adkins
Affiliate Disclaimer:
Just a friendly reminder, as part of my commitment to transparency, please note that some of the links provided maybe affiliate links. This means that if you make a purchase through these links, I may earn a small commission at no extra cost to you. Your support is truly appreciated!
Additionally, I kindly ask that you always accept the tracking cookie for the affiliate websites. Rest assured, this will not in any way expose your computer to viruses or compromise your information. It's simply necessary for the company to attribute the sale to the affiliate, ensuring creators like myself receive their rightful commissions.
Your trust and support enable me to continue sharing creativity through my email lists, blog, and YouTube channel. Thank you for being a valued part of our crafting community!


Comments