
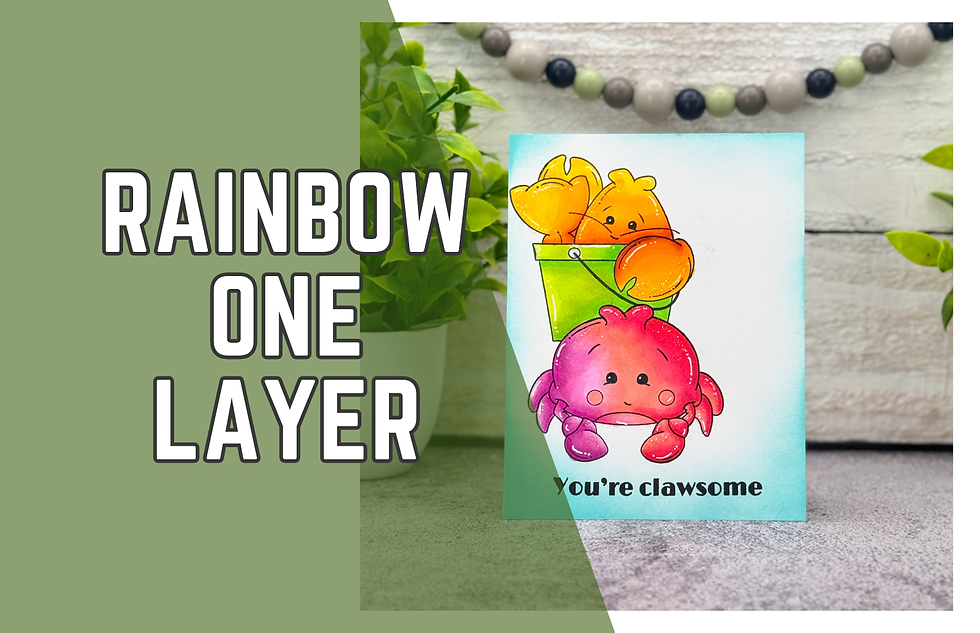
Rainbow One Layer Card with the Crusty Set from C.C. Designs | Bright, Bold & Easy Coloring!
- Rick Adkins

- Aug 4, 2025
- 4 min read
Updated: Oct 5, 2025
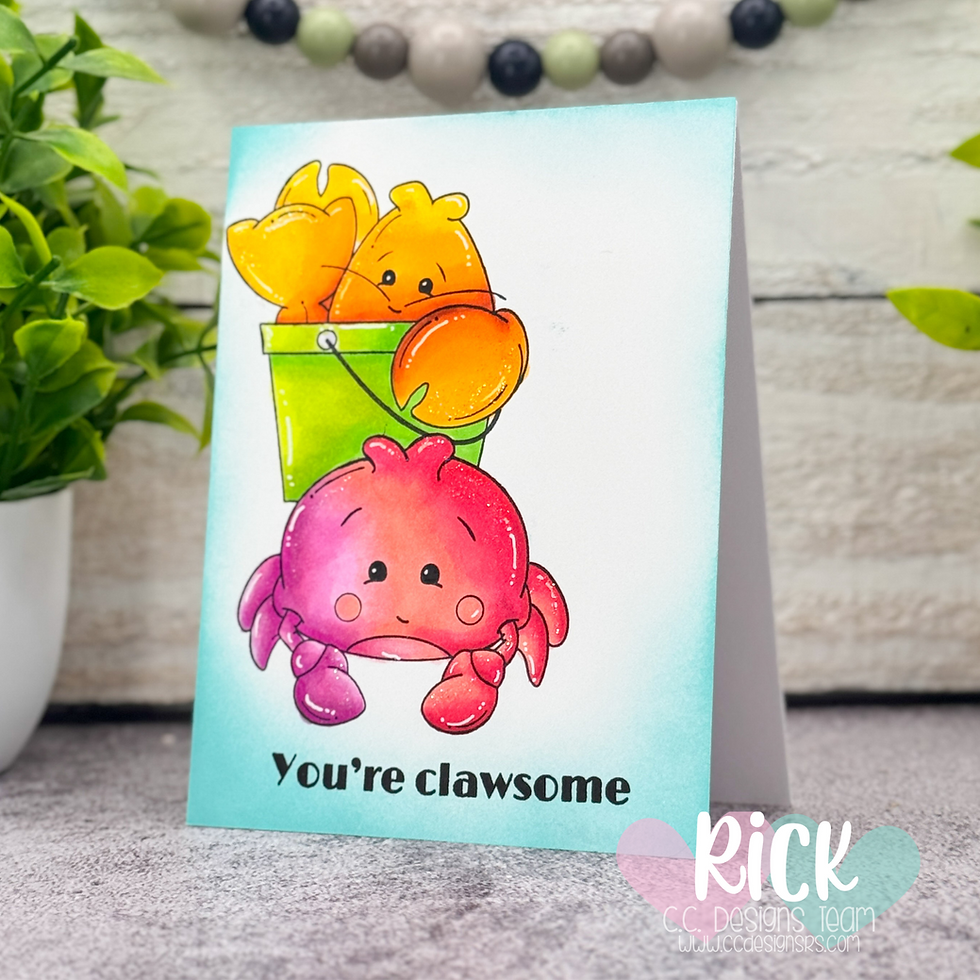
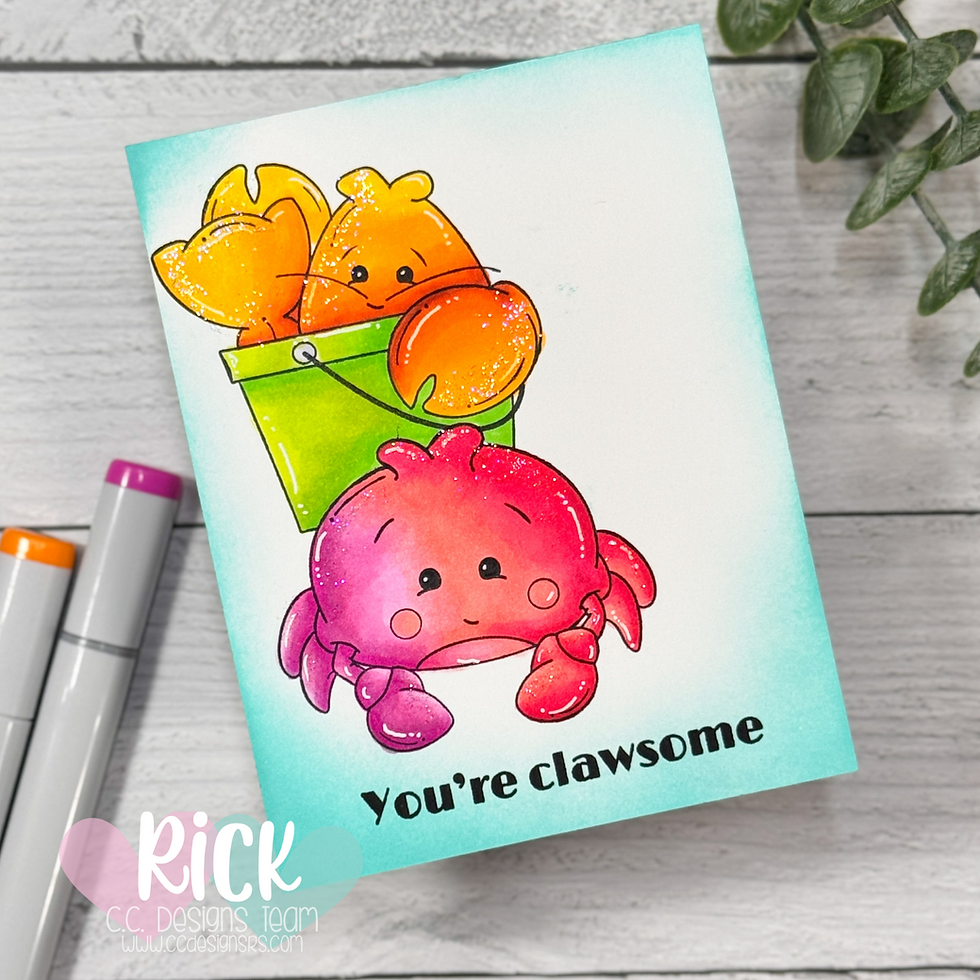
I don’t know about you, but I’ve always loved the challenge of making a one layer card feel dimensional and fun—especially when working with cute critters. Today’s card was one of those delightful surprises that came together quickly but still felt super satisfying to create. I pulled out the Crusty Stamp Set from C.C. Designs, which is packed with the most adorable little sea creatures, and knew I wanted to make something clean, bright, and bold without a ton of layers.
Honestly, I was inspired by a walk I took recently down by the Gulf Coast—just watching the bright beach buckets and little kids collecting crabs and shells had me itching to create something colorful and whimsical. That memory paired perfectly with this stamp set, and the result is a sweet and simple one layer design that still packs a punch.
Rainbow One Layer Card with the Crusty Set from C.C. Designs | Bright, Bold & Easy Coloring!
Masking for Depth on a One Layer Design
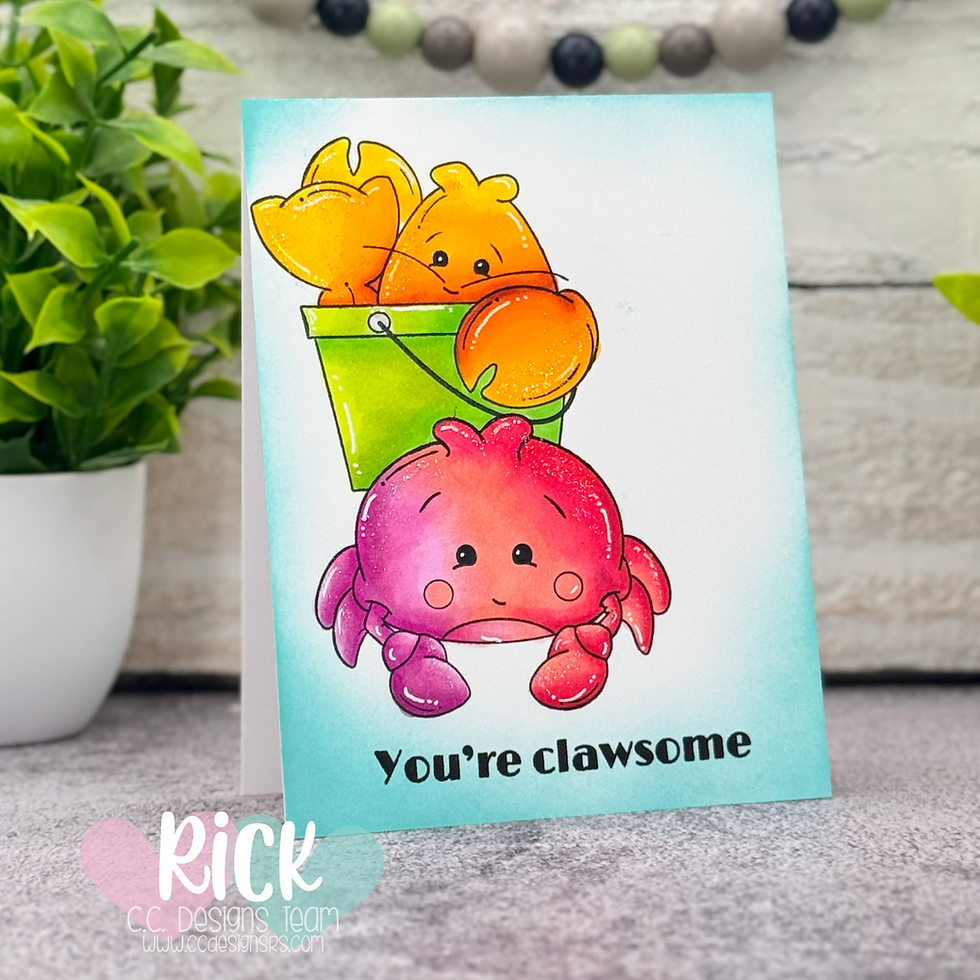
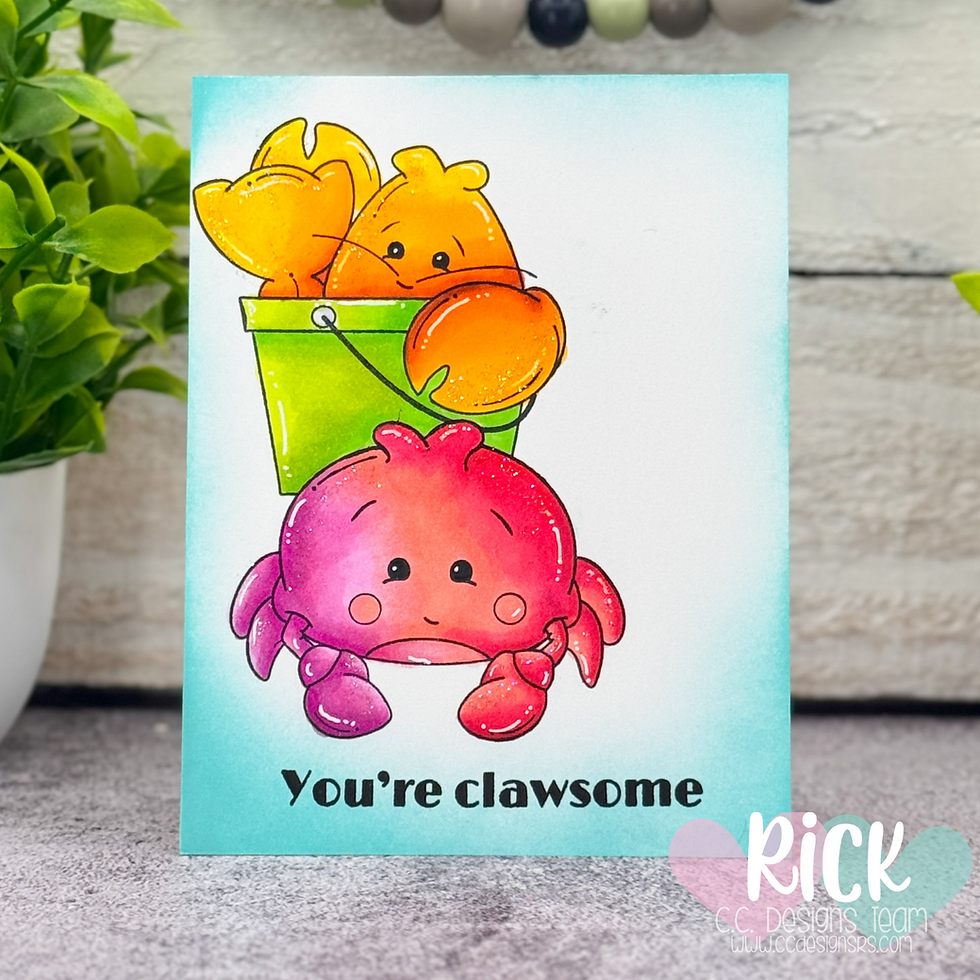
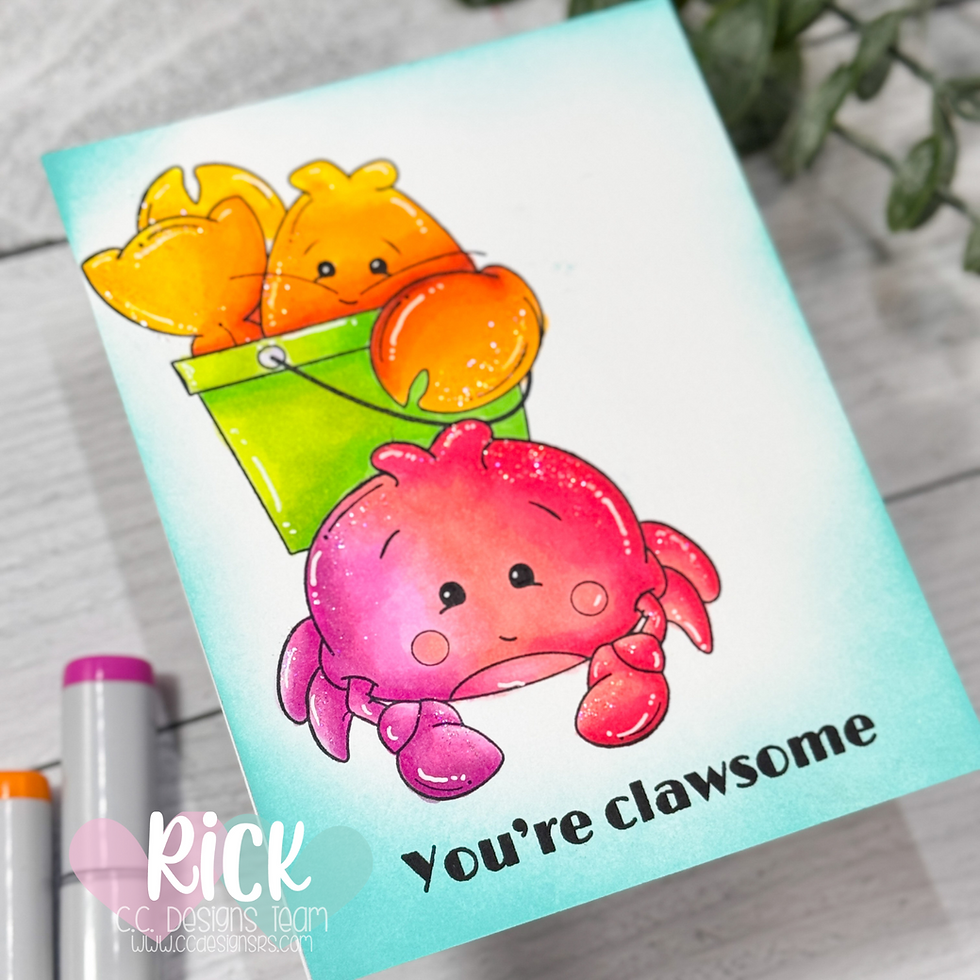
This card might be simple, but the trick to making it work is masking—one of those techniques that never stops feeling a bit like magic. I started by stamping the crab in front from the Crusty Stamp Set using Memento Tuxedo Black Ink onto a piece of Neenah 80 lb. Solar White cardstock. That paper is my go-to for Copic coloring because it’s smooth and holds up beautifully to lots of ink.
Once I had the front image stamped, I quickly stamped it again on a sticky note, trimmed it right up to the edge (a little inside the line works best), and popped that mask over the image. Then I stamped the crab-in-the-bucket image from the same set right behind it. It’s such a simple trick, but the layered look you get is totally worth the two extra minutes it takes.
Pro Tip: When you’re masking, cut just inside the line of your image. It keeps you from getting that awkward white halo around the masked area when you stamp over it.
Coloring with Bold, Happy Hues
The coloring on this one was pure fun. I reached for my Copic markers and just let myself play—leaning into the rainbow look with bright pinks, oranges, and golden yellows. There’s something so cheerful about non-traditional crab colors. Who says your ocean critters have to be realistic?
To give the images even more life, I added highlights with a white gel pen and topped a few areas with Stardust Stickles—because if I can sneak a little sparkle into a card, I absolutely will. These little touches don’t take much time but really make a difference in the finished card.
Pro Tip: If you’re not sure where to put your highlights, imagine a light source in one corner of your image and add gel pen accents to the opposite side of your shadows. Even a few small dots can make things pop.
Sentiment & Ink Blending for a Polished Finish
The sentiment, “You’re clawsome,” is one of my favorites from the set—it’s punny, playful, and just right for this cheerful design. I stamped it with Versafine Onyx Black Ink for that deep, crisp impression that stands out against the colorful images.
To frame the whole card, I did a soft ink blend around the edges using a pale aqua dye ink. This gave just enough definition to keep the design from feeling flat without adding another layer. Once everything was dry, I adhered the panel to a top-folding A2 card base.
It’s clean. It’s colorful. And best of all—it’s flat enough to mail without any fuss.
Why This Card Style Works
One layer cards like this are perfect when you want something quick, but still want it to feel thoughtful and unique. They’re also great for showing off your coloring and masking skills without needing a ton of product or time. This style is one I come back to again and again, especially when I want to stretch a stamp set and really get creative with layout and composition.
If you’re new to masking, this is a perfect place to start. And if you’ve been crafting for years, it’s a great reminder that simple techniques still make beautiful results.
Watch It Come Together
If you’d like to see the process in action, you can catch the full video tutorial at the end of this post. I walk you through the entire card from start to finish, including tips for stamping, masking, blending, and adding those finishing touches. Whether you’re crafting along or just looking for inspiration, I hope it gives you some new ideas for your own projects.
Until next time—stay crafty and remember, one layer doesn't mean boring. It just means the fun’s all packed into the front.
Rainbow One Layer Card with the Crusty Set from C.C. Designs | Bright, Bold & Easy Coloring Video Tutorial:
If you have problems watching the video here on my blog you can always watch it on my YouTube Channel by Clicking Here!
(Wondering what I used in this video? Everything is linked to multiple sources in the thumbnails at the end of this post, or in the text below. Compensated affiliate links used when possible). As always I appreciate your support of my videos!
Materials Used:
Here you will find the list of supplies that I used to create today's card. All supplies are linked to supply sources below. Compensated affiliate links may be used at no cost to you.
Happy Stampin'

Rick Adkins
Affiliate Disclaimer:
Just a friendly reminder, as part of my commitment to transparency, please note that some of the links provided maybe affiliate links. This means that if you make a purchase through these links, I may earn a small commission at no extra cost to you. Your support is truly appreciated!
Additionally, I kindly ask that you always accept the tracking cookie for the affiliate websites. Rest assured, this will not in any way expose your computer to viruses or compromise your information. It's simply necessary for the company to attribute the sale to the affiliate, ensuring creators like myself receive their rightful commissions.
Your trust and support enable me to continue sharing creativity through my email lists, blog, and YouTube channel. Thank you for being a valued part of our crafting community!


Comments