
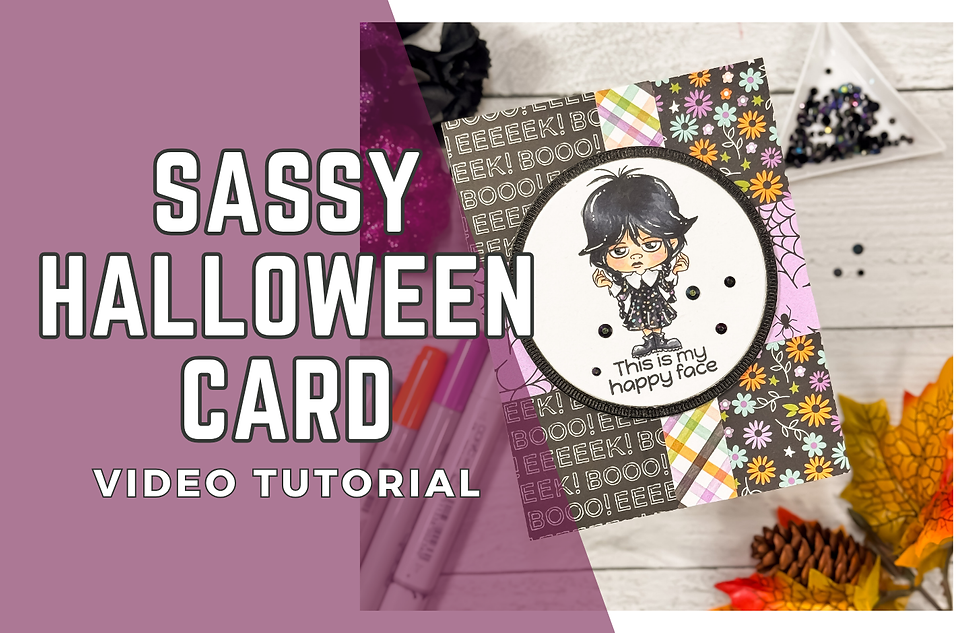
Sassy Halloween Card with Copic Coloring and Patterned Paper Layers
- Rick Adkins

- Aug 6, 2025
- 4 min read
Updated: Oct 5, 2025
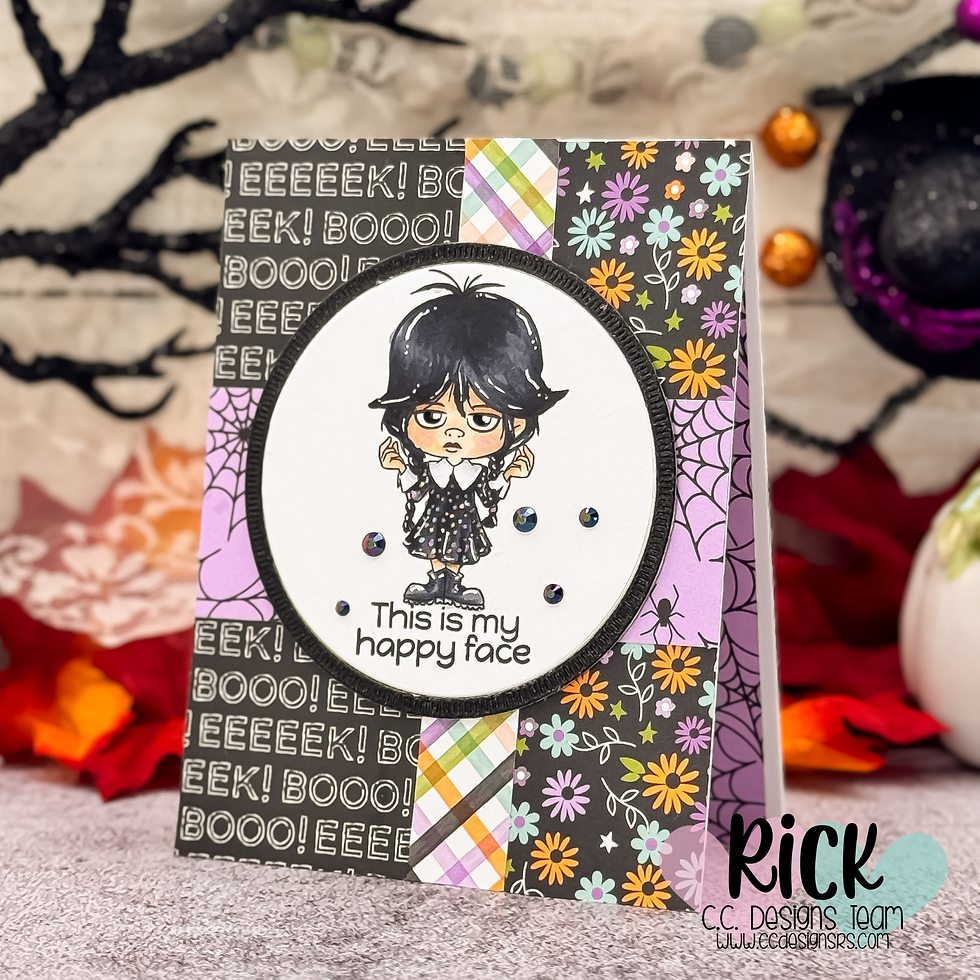
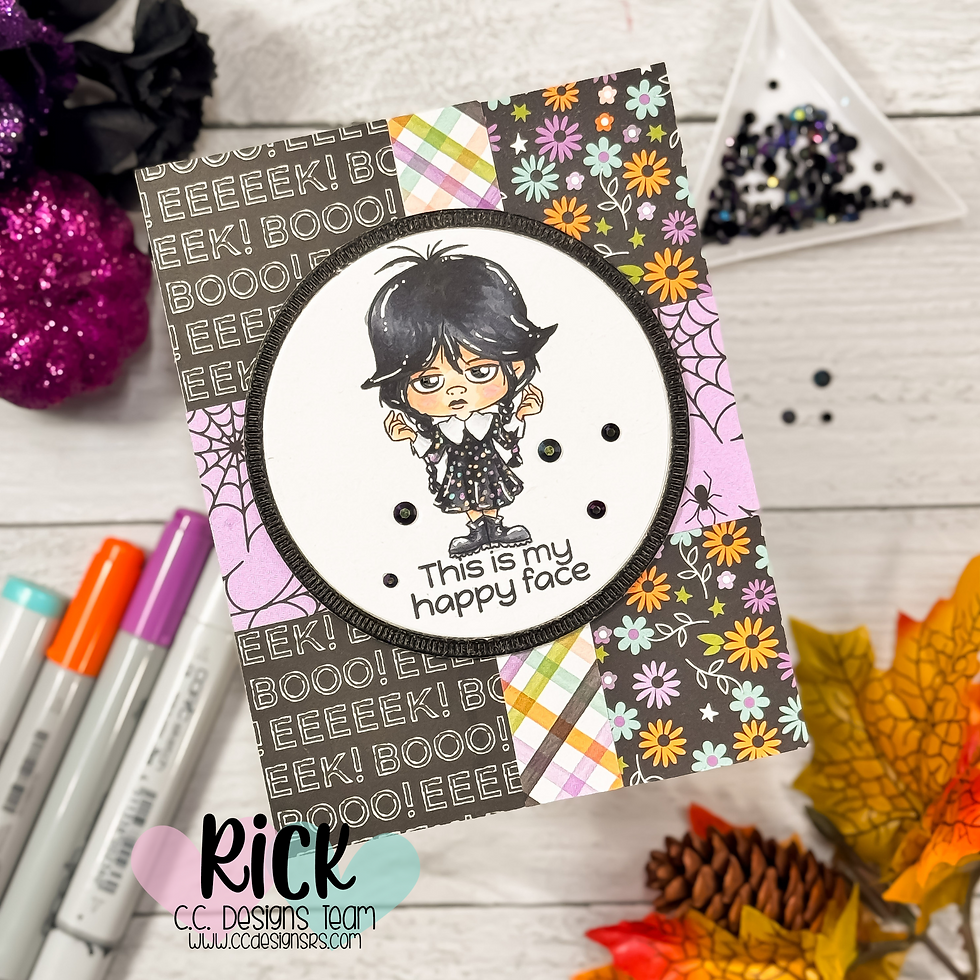
There’s just something about Halloween cardmaking that invites a little mischief—and today’s project definitely delivers. I had so much fun stepping away from traditional spooky or cute Halloween cards and creating something with a little attitude. When I saw The Girl Stamp Set from C.C. Designs, I immediately thought, “Yes. That’s the face I make in every family Halloween photo.” So of course, she needed to be front and center on a card.
The whole design came together when I paired that delightfully unimpressed face with the Spooky Things 6x8 Paper Pad from Simple Stories. Between the bold “BOO!” sentiments, spider webs, florals, and that pop of plaid—I had all the personality I needed to back her up. This card came together quickly, but it still feels layered, playful, and packed with character. Let me walk you through what made this card work so well and how you can recreate the same vibe in your own crafty space.
Sassy Halloween Card with Copic Coloring and Patterned Paper Layers
Let Your Focal Image Lead the Design
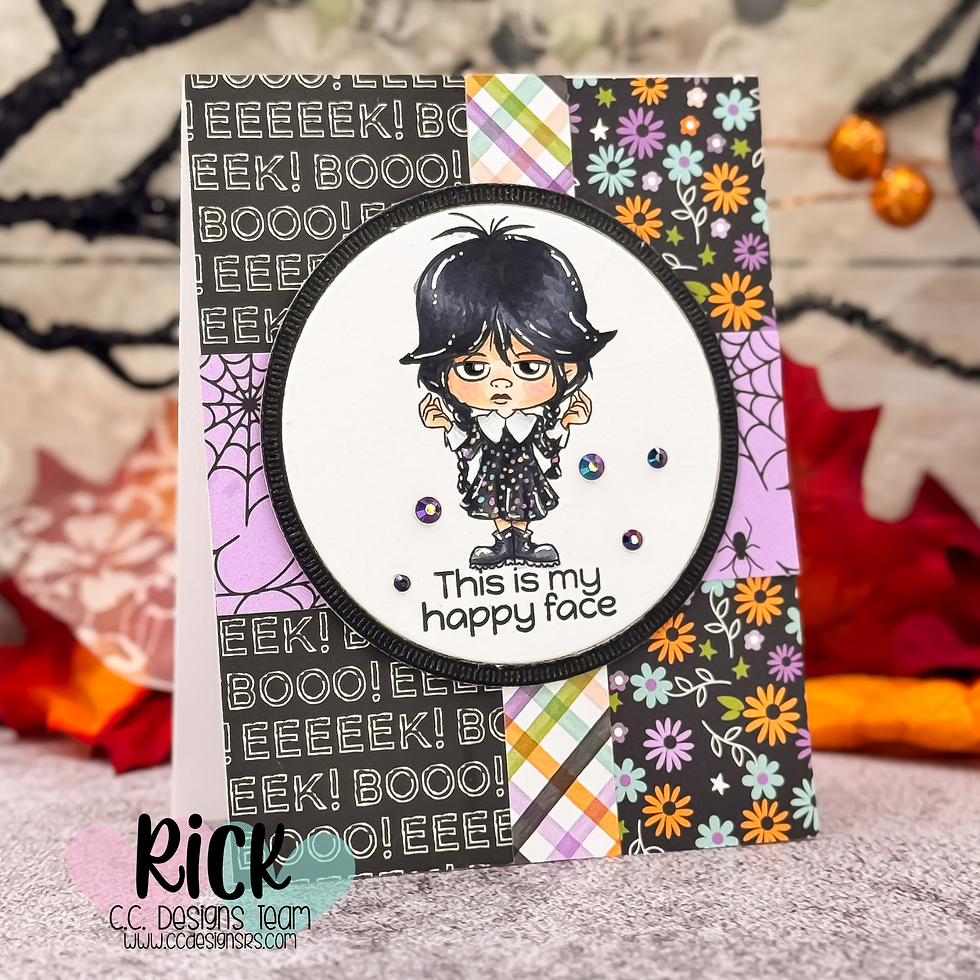
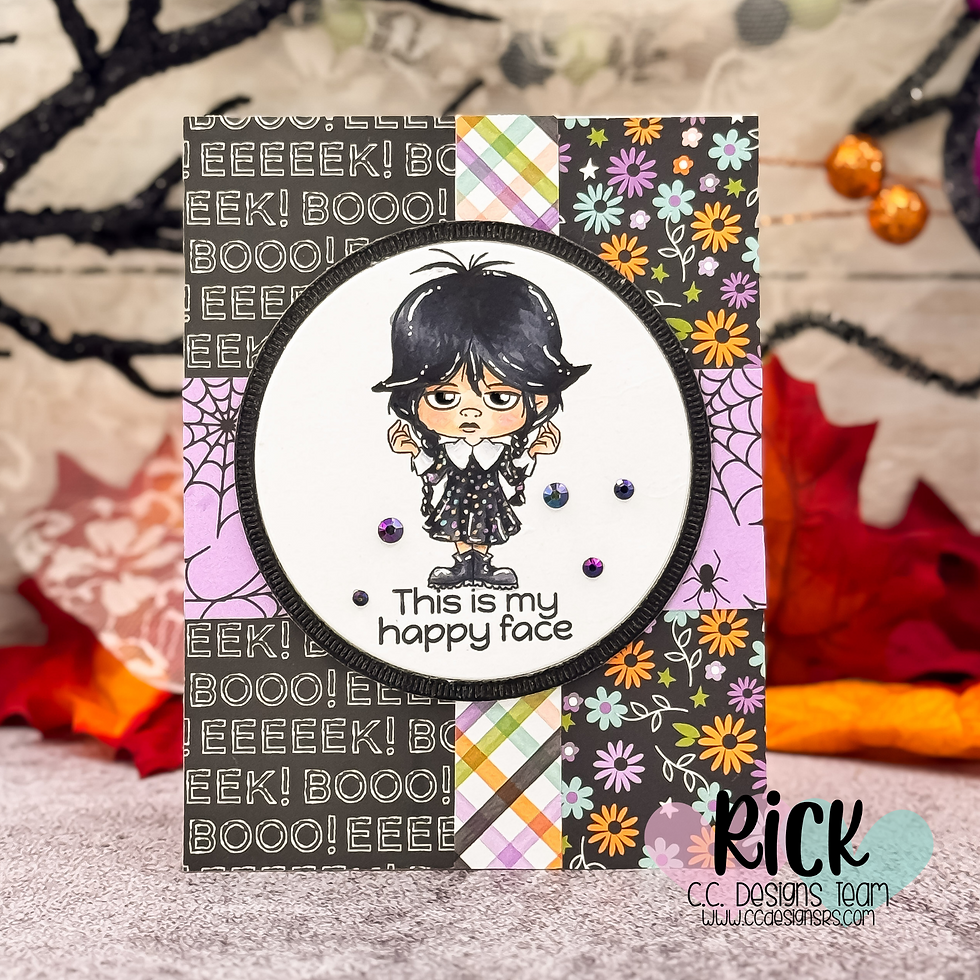
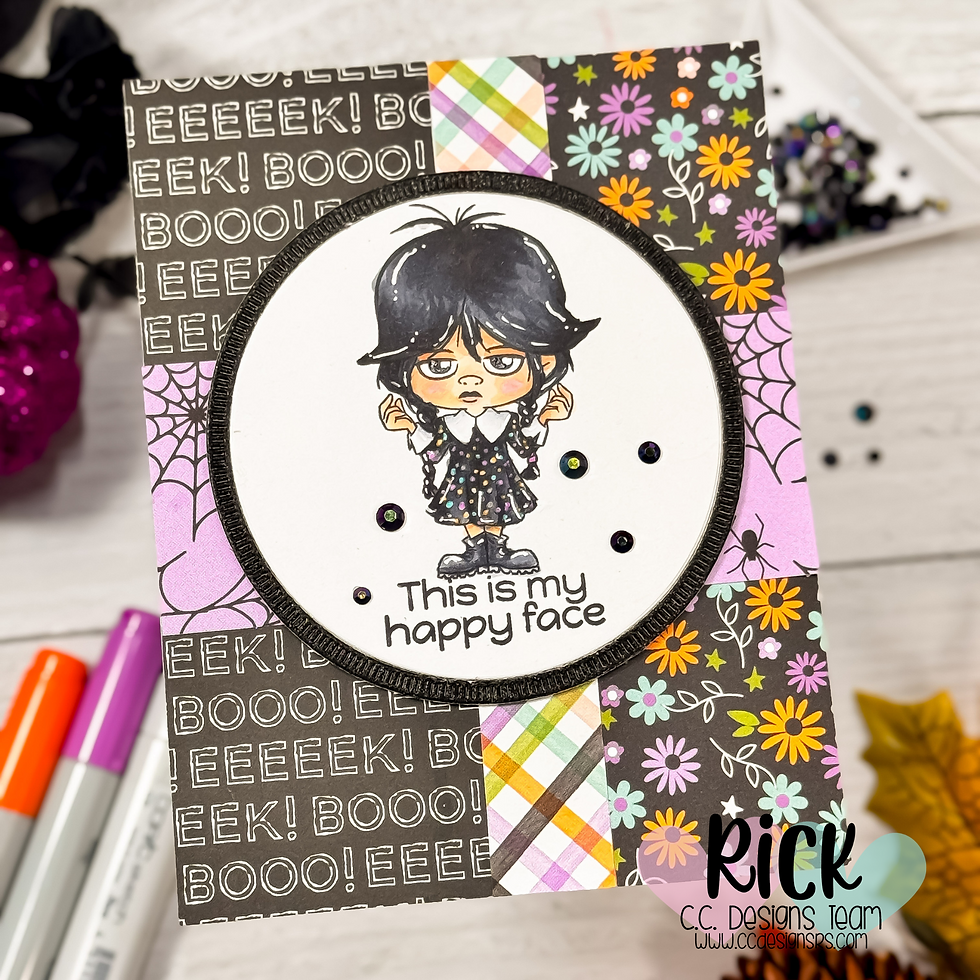
When I’m working with a character stamp that’s full of personality, I like to let it take the lead. The Girl is such a fun image to color, and her pose and expression do all the storytelling. I stamped her on a clean white circle, keeping things simple to draw all the focus in.
Pro tip: A circle die-cut gives your eye a natural place to rest, especially when the background is busy or layered. I framed the circle with a black glitter cardstock mat to help it pop off all the patterned paper. It’s a simple trick, but it really helps ground the focal point and gives the card a polished finish.
Bold Backgrounds Without the Overwhelm
One of the questions I get a lot is: How do you mix patterned papers without it looking messy? Here's the trick—anchor your patterns with solid shapes and repetition. On this card, I used four different prints from the Spooky Things 6 x 8 Pattern Paper Pad: a floral (which I pulled the color palette from), a bold sentiment print, a spider web, and a splash of plaid. Each one adds a little Halloween charm, but by repeating the floral and the BOO! paper and keeping them in vertical strips, everything stays balanced.
I’ll admit—pattern mixing used to intimidate me. I’d sit there overthinking which one clashed with which. But once I started treating patterned paper like background noise instead of the main show, it became a lot more fun. Let the papers add texture and theme, but always make sure the main image is still in the spotlight.
Copic Coloring That Brings the Sass
Coloring The Girl was honestly my favorite part of the whole card. I chose a mostly neutral palette—classic black hair, pale skin, a pop of small colorful polka dots on her dress to tie into the paper. Keeping the color scheme limited helped me finish quickly without sacrificing contrast. If you’re ever feeling overwhelmed with your marker choices, try this: pick three neutrals and one accent color that matches your patterned paper. Instant harmony.
Her hair has some nice thick sections, which are great for practicing light source shading. I kept the highlights subtle and focused most of the contrast around the top of her head and the tips of her hair. For skin, I used my go-to light peachy combos with a little blush on the cheeks—because even grumpy girls deserve a glow.
Pro tip: When your character has a serious or neutral expression, avoid overly bright cheeks or eye whites. It’ll keep the emotion of the image more consistent with the card’s tone.
Small Details, Big Impact
I kept the embellishing simple—just a few black Cosmic Rhinestone gems scattered around the image. That sparkle pulls in the dark tones from the mat and the sentiment paper and adds a little magic without stealing attention. Honestly, when a card already has a lot going on with print and character, less is more.
And speaking of sentiments, how perfect is “This is my happy face?” It’s part of the same stamp set, and I stamped it directly underneath the image before die-cutting the circle. No extra sentiment strip needed—it’s clean, funny, and totally fits the vibe of the card.
Wrapping It Up
This card is a reminder that Halloween doesn’t have to mean scary or overly sweet. It can be stylish, a little sassy, and still totally handmade. If you’ve been looking for a fun way to play with your patterned paper stash—or just want to make someone laugh—this is the card to try.
You can watch the full video tutorial below to see exactly how it came together, including my Copic coloring process and tips for layering paper. I hope this inspires you to get a little bold with your Halloween cards this season and have fun mixing it up with snark, color, and creativity.
And if you end up making your own version, tag me—I’d love to see your “happy face” too.
Sassy Halloween Card with Copic Coloring and Patterned Paper Layers Video Tutorial:
If you have problems watching the video here on my blog you can always watch it on my YouTube Channel by Clicking Here!
(Wondering what I used in this video? Everything is linked to multiple sources in the thumbnails at the end of this post, or in the text below. Compensated affiliate links used when possible). As always I appreciate your support of my videos!
Materials Used:
Here you will find the list of supplies that I used to create today's card. All supplies are linked to supply sources below. Compensated affiliate links may be used at no cost to you.
Happy Stampin'

Rick Adkins
Affiliate Disclaimer:
Just a friendly reminder, as part of my commitment to transparency, please note that some of the links provided maybe affiliate links. This means that if you make a purchase through these links, I may earn a small commission at no extra cost to you. Your support is truly appreciated!
Additionally, I kindly ask that you always accept the tracking cookie for the affiliate websites. Rest assured, this will not in any way expose your computer to viruses or compromise your information. It's simply necessary for the company to attribute the sale to the affiliate, ensuring creators like myself receive their rightful commissions.
Your trust and support enable me to continue sharing creativity through my email lists, blog, and YouTube channel. Thank you for being a valued part of our crafting community!


Comments