Slim Line Easter Scene Card Video Tutorial | Chick Mug Dies | Pixi Dust Designs
- Rick Adkins

- Mar 9, 2024
- 3 min read
Updated: Apr 14, 2024
Hey there, fellow crafting enthusiasts! Can you believe it's almost Easter already? Time sure does fly when you're having fun creating. Today, I'm bursting with excitement to share a delightful slim line card design featuring some of my favorite Easter-themed goodies from Pixi Dust Designs. So, grab your crafting supplies and let's dive into this egg-stra special tutorial together!

Slim Line Easter Scene Card:
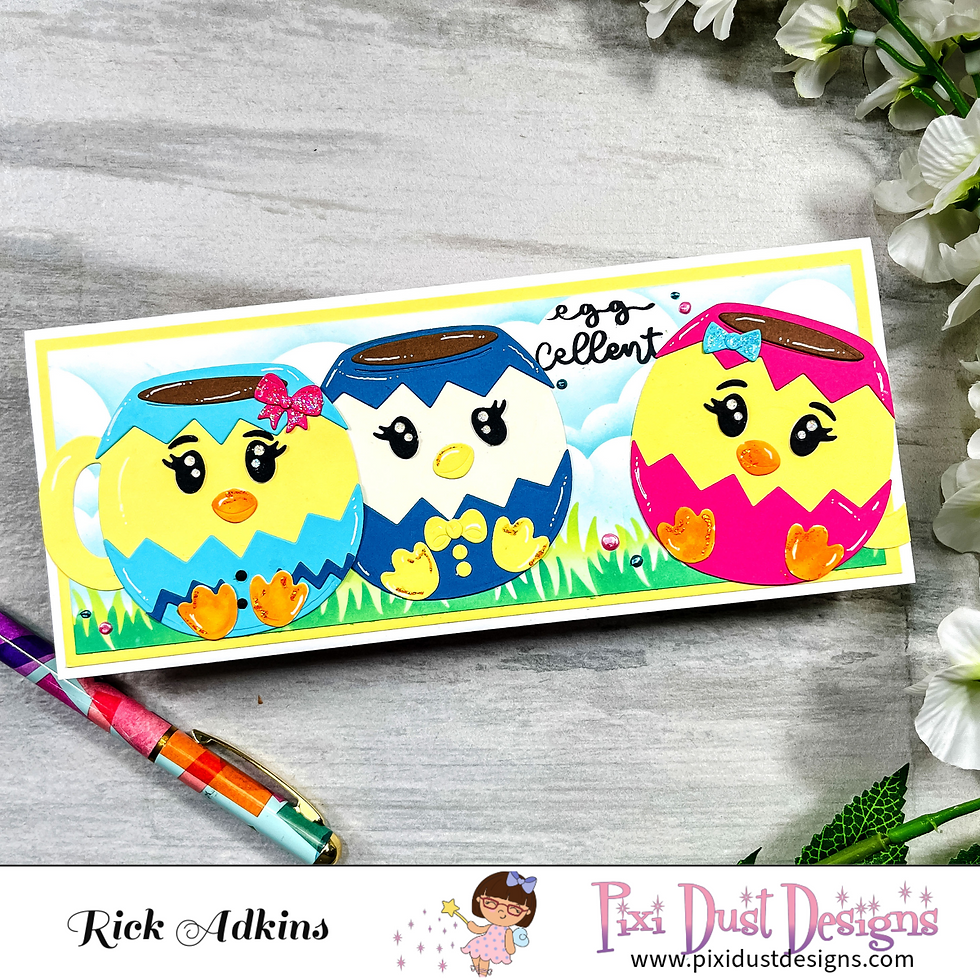
For my card today I featured the Chick Mug Dies (from Pixi Dust Designs) for the focal images. I also used a sentiment from the Easter Bunny Stamp Set (also from Pixi Dust Designs). For the background of my scene I used the Cloudy Stencil and the Grassy Stencil (both from Lawn Fawn) and a little Distress Oxide Inks for the ink blending.
Slim Line Easter Scene Card Video Tutorial:
If you have problems watching the video here on my blog you can always watch it on my YouTube Channel by Clicking here!
(Wondering what I used in this video/project? Everything is linked to multiple sources in the thumbnails at the end of this post, or in the text below. Compensated affiliate links used when possible).
Creating the Chick Mug Die Cuts:
Alright, let's kick things off with everyone's favorite part - die-cutting! I love the versatility of the Chick Mug Die Set from Pixi Dust Designs. It's like a little Easter miracle in the palm of your hand. As I was cutting out the chick mugs, I couldn't help but imagine the smile they'd bring to someone's face when they received this card. Pro tip: experiment with different color combos to make each chick mug uniquely adorable!

Stamping the Sentiment:
Now, let's add some personality to our card with a sentiment that's as punny as it is cute. I reached for the Easter Bunny Stamp Set and stamped the "egg cellent" sentiment onto a coordinating cardstock. It's the perfect finishing touch to our Easter masterpiece.
Background Creation:
Ah, the background - where the magic truly happens! Grab your Cloudy and Grassy Stencils from Lawn Fawn and let's get blending. As I blended the Distress Oxide Inks through the stencils, I couldn't help but feel a sense of calm wash over me. There's something therapeutic about watching the scene come to life with each stroke of the blending tool.

Arranging the Scene
Now comes the fun part - arranging our scene! I carefully placed the chick mugs on the grassy area, making sure each one had its moment to shine. It's amazing how a few die cuts can transform a blank canvas into a whimsical Easter wonderland.

Finishing Touches
To add a sprinkle of magic to our card, I decided to embellish it with a touch of shimmer and shine. Pixi Dust Designs always knows how to add that extra sparkle to my creations. Whether it's sequins or shimmer spray, don't be afraid to let your creativity shine!

Sharing Your Creativity
Now that our card is complete, it's time to share it with the world! Snap a quick photo and share it on social media or your favorite crafting forum. Who knows? Your Easter masterpiece might just inspire someone else to get crafty!

Slim Line Card Measurements:
Card Base - 7" x 8 1/2" scored at 3 1/2" (on the 7" side)
Yellow Cardstock Mat - 3 1/4" x 8 1/4"
White Cardstock Layer (scene) - 3" x 8"
Just a note if you use these measurements for your slim line card base your card will fit into a standard Number 10 Business Envelope that can be picked up at any Walmart, Target store, drug store or office supply store. And you can mail with with just one postage stamp if it's 1/4" or less thickness.
And there you have it, folks - a slim line Easter scene card that's sure to spread joy wherever it goes. I hope this tutorial has inspired you to get creative and embrace the magic of Easter crafting. Remember, the best part of card making is the journey, so don't be afraid to let your imagination soar. Until next time, happy crafting!
Pin Me:
Follow me on Pinterest and save this image to your favorite card making board!

Materials Used:
Here you will find the list of supplies that I used to create today's card. All supplies are linked to supply sources below. Compensated affiliate links may be used at no cost to you.
Happy Stampin'

Rick Adkins


Comments