
Sneak Peek: Sugarplum Summer Stamp Set from C.C. Designs | Beachy Card Idea
- Rick Adkins

- Jul 8, 2025
- 5 min read
Updated: Oct 5, 2025
Hey crafty friends! Rick here, and I’ve got a fun beachy card to share with you today as part of Release Week over at C.C. Designs! If you’re anything like me, summer cards are a great excuse to break out the bright colors, playful patterns, and all the sunshine vibes—and today’s sneak peek totally delivers. I’m featuring one of the images from the brand-new Sugarplum Summer Stamp Set, which officially releases this Friday, July 11th at 12 pm CST. This week is packed with peeks at all the new stamp sets, leading up to a super fun Instagram Hop on Friday at 11 am CST. But today, it’s all about sunshine, pattern paper, and a little girl who’s ready for a shell-abration!

Sneak Peek: Sugarplum Summer Stamp Set from C.C. Designs | Beachy Card Idea
Sunshine and Sass: Meet Sugarplum Summer
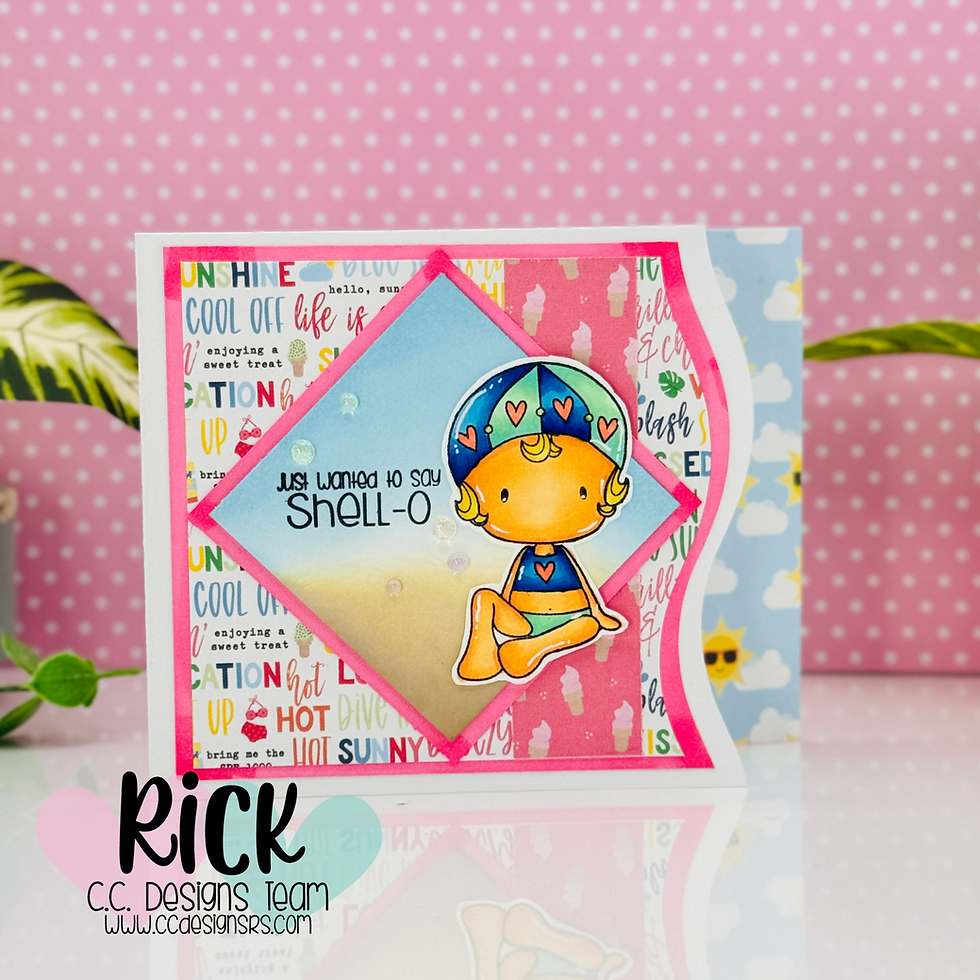
The moment I saw this little girl in her heart-covered swim cap and retro bathing suit, I knew she needed to be front and center on a card. She’s from the new Sugarplum Summer Stamp Set, and she brings that classic summer sweetness with a hint of sass. I stamped her using Memento Tuxedo Black Ink on OLO Blending Cardstock (my go-to when I’m reaching for my Ohuhu Brush Markers). This combo gives me the smoothest blends and crisp, clean lines.
One thing I love doing with my Ohuhu markers is stretching my supplies by coloring custom mats or accents. I didn’t have the perfect shade of pink cardstock to match the patterned paper, so I just created it myself with one of the markers I used in her swimsuit. It ties everything together and helps avoid the “too many shades of pink” problem that can sneak into summer cards.
Ink Blending for a Simple Beachy Background
If you’ve followed me for a while, you know I’m a sucker for a soft ink blended background—and this one is no exception. I cut a small panel of Neenah Solar White 80 lb Cardstock to 2.5" x 2.5", then blended a bit of Tumbled Glass into Antique Linen and Frayed Burlap Distress Oxide Ink for a subtle ocean-meets-sand feel. I kept it soft so it wouldn’t compete with the vibrant patterns I had planned for the rest of the card.
Once that was done, I stamped the playful sentiment “Just Wanted to Say Shell-O” (also from the Sugarplum Summer set) using Versafine Clair Nocturne Ink. That bold black ink really pops against the background, and it’s perfect for detailed sentiments.
Pro Tip: If you’re ink blending small panels like this, use a scrap piece of copy paper as a handle so your fingers don’t leave pressure spots or oils behind on the cardstock—it helps keep that blend nice and smooth.

Shaped Edges Without Fancy Dies
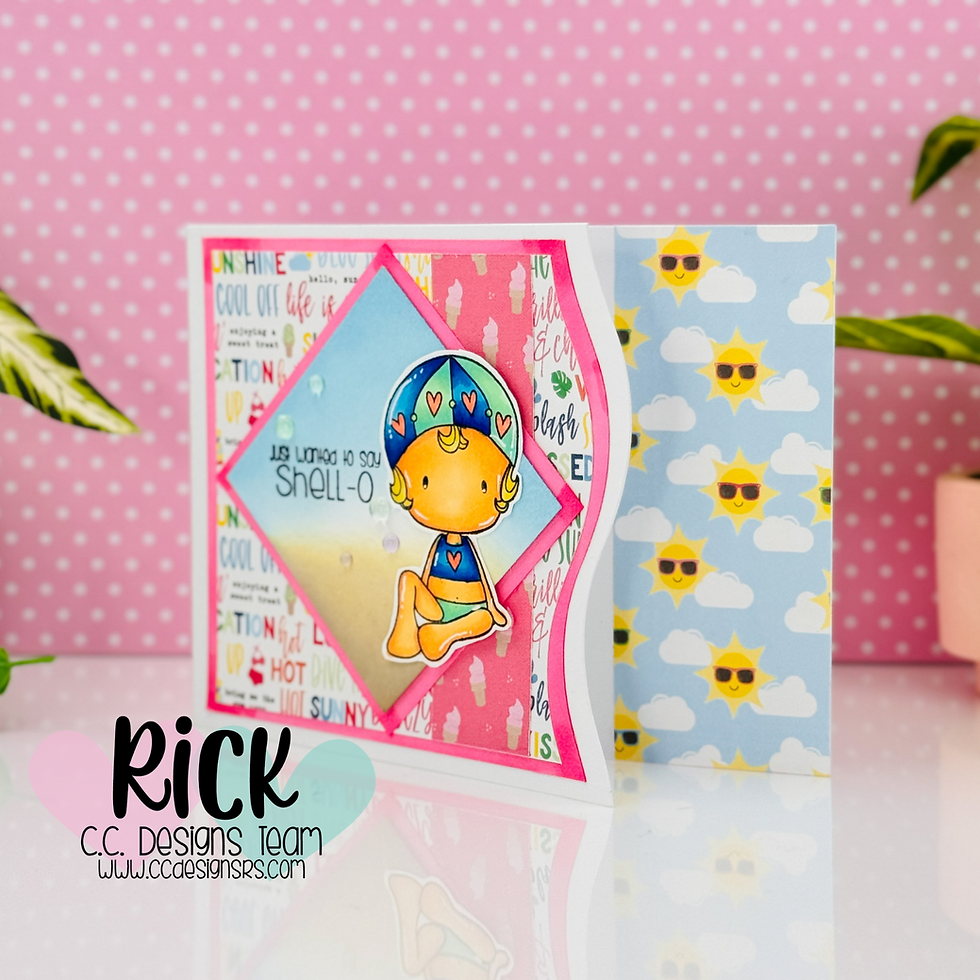
This card has a curved edge that looks like it came from a fancy die—but spoiler alert—it didn’t. I used a decorative paper trimmer to create those fun, wavy edges on the card base, mat layer, and patterned paper. It’s a simple tool that adds a ton of interest without adding bulk or cost. And because I used the same trimmer for each layer, everything lines up with just the right peek of color in between.
My base is made from Neenah Ultra Thick 110 lb Cardstock (cut to 4.25" x 11", scored at 5.5"), and I trimmed the edge of the card front first. From there, I trimmed the mat layer and patterned paper a quarter inch smaller each time, following that same curve. It’s such a fun trick—and a little different than your typical A2 rectangle.

Playing with Pattern Paper
I’ve been reaching for the Sunkissed 6x6 Pattern Paper Pad from Echo Park a lot lately, and this card is a great example of why. The bright summer colors and playful patterns are just begging to be mixed and matched. I used a bold text print as the main background, a pink ice cream cone pattern as a vertical strip, and a strip of sunny skies with sunglasses tucked behind the cut edge for a little surprise detail.
To make the colors feel cohesive, I created a pink mat layer by coloring white cardstock with one of my Ohuhu markers (yep—same marker from earlier!). It’s such an easy way to get the exact shade you need without digging through your scrap bin.
Pro Tip: When mixing patterns, look for prints that share a common color palette or tone. In this case, the bright pinks and blues helped unify the layers, even though the prints themselves are very different.
Finishing Touches That Sparkle
Once everything was layered up, I popped the focal panel up with 1mm foam adhesive. I added the fussy-cut girl (colored and cut earlier) right in the center and gave her a few white gel pen highlights to bring her to life. A few Iridescent Dew Drops from PinkFresh Studio scattered around the panel finished it off with just the right amount of sparkle.
This card was such a joy to make, and it reminded me of summers visiting the Gulf Coast—sunburnt shoulders, sand in everything, and popsicles that melted faster than you could eat them. That nostalgic feeling is what this new stamp set brings to the table, and I can’t wait for you to get your hands on it.

Don’t Miss the Full Release
The Sugarplum Summer Stamp Set (and the rest of the July release) goes live on Friday, July 11th at 12 pm CST over on the C.C. Designs website. Until then, keep an eye out for more sneak peeks all week long—and don’t forget to join the Instagram Hop on Friday at 11 am CST for tons of inspiration and maybe even a giveaway or two.
Whether you're making beach cards, summer birthday greetings, or just something fun to mail to a friend, this release has something for everyone—and I hope today’s project gives you a few ideas to get started.
Thanks for dropping by today I hope that you found a little spark of creative inspiration with my project today. Wondering what I used in this project? Everything is linked to multiple sources in the thumbnails in the Materials Used section, or in the text below. Compensated affiliate links used when possible.
Materials Used:
Here you will find the list of supplies that I used to create today's card. All supplies are linked to supply sources below. Compensated affiliate links may be used at no cost to you.
Happy Stampin'

Rick Adkins
Affiliate Disclaimer:
Just a friendly reminder, as part of my commitment to transparency, please note that some of the links provided maybe affiliate links. This means that if you make a purchase through these links, I may earn a small commission at no extra cost to you. Your support is truly appreciated!
Additionally, I kindly ask that you always accept the tracking cookie for the affiliate websites. Rest assured, this will not in any way expose your computer to viruses or compromise your information. It's simply necessary for the company to attribute the sale to the affiliate, ensuring creators like myself receive their rightful commissions.
Your trust and support enable me to continue sharing creativity through my email lists, blog, and YouTube channel. Thank you for being a valued part of our crafting community!


Comments