
Three Quick & Easy Cards using the Rainbow Garden Card Kit from Paper Rose Studio
- Rick Adkins

- Jul 31, 2025
- 5 min read
Updated: Oct 5, 2025
If there’s one thing I hear often from fellow cardmakers, it’s this: “I want to create beautiful cards, but I don’t always have time to plan it all out.” Sound familiar? I know that feeling well—those days when you want to create, but digging through your stash, picking out color combos, and designing layouts from scratch just feels overwhelming. That’s why I was so excited to dive into the Rainbow Garden Card Kit from Paper Rose Studio. Let me tell you—it’s like opening a box of instant creativity. Everything coordinates, everything is beautiful, and it all works together effortlessly. And today, I’ve got three quick and easy cards to share that came together in no time at all, with just a few extras from my stash.
So, if you’re looking for a way to get those creative wheels turning without spending hours in decision paralysis, this one’s for you.
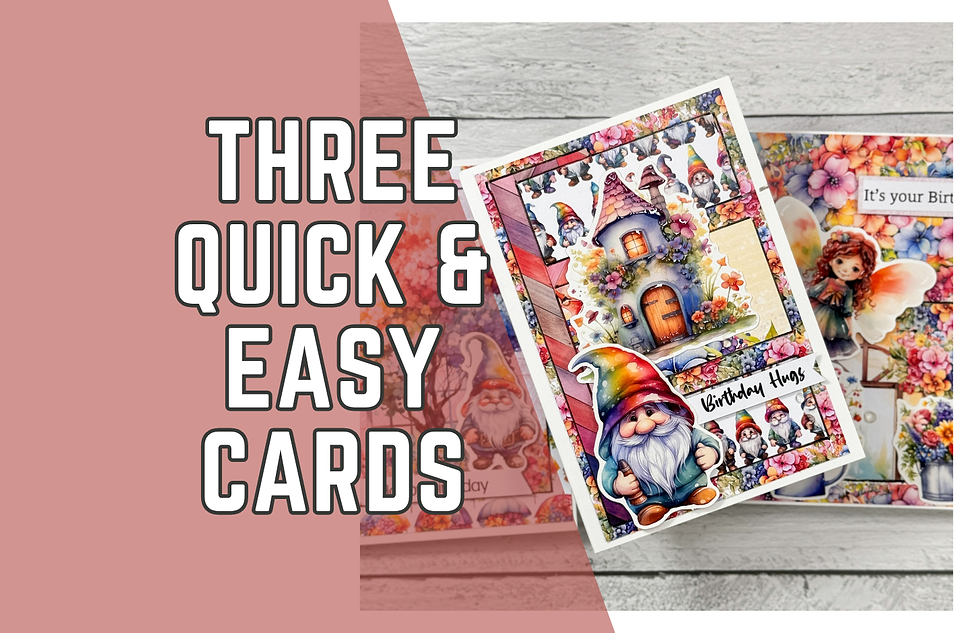
Three Quick & Easy Cards using the Rainbow Garden Card Kit from Paper Rose Studio
A Kit That Does the Heavy Lifting
What I love about the Rainbow Garden Card Kit is how complete it feels. You get eight A5 card bases, a big pack of Rainbow Garden embossed die cuts, cut aparts, 18 gorgeous 6x6 patterned papers, sentiment sheets, and even instruction sheets if you prefer to follow a template. There’s so much packed into this kit that it’s honestly hard to know where to start—but in the best possible way.
Personally, I like to begin by spreading everything out and letting the colors and textures inspire me. That’s exactly what I did here. I pulled out a few card sketches I had saved on my phone for days like this, flipped through the pattern papers, and just let my instincts take over. I kept things simple—no stamping, no die cutting, just layering beautiful elements. I did add a few Clear Crystal Shaker Elements for a little sparkle and some foam adhesive for dimension, but otherwise, everything came straight from the kit.

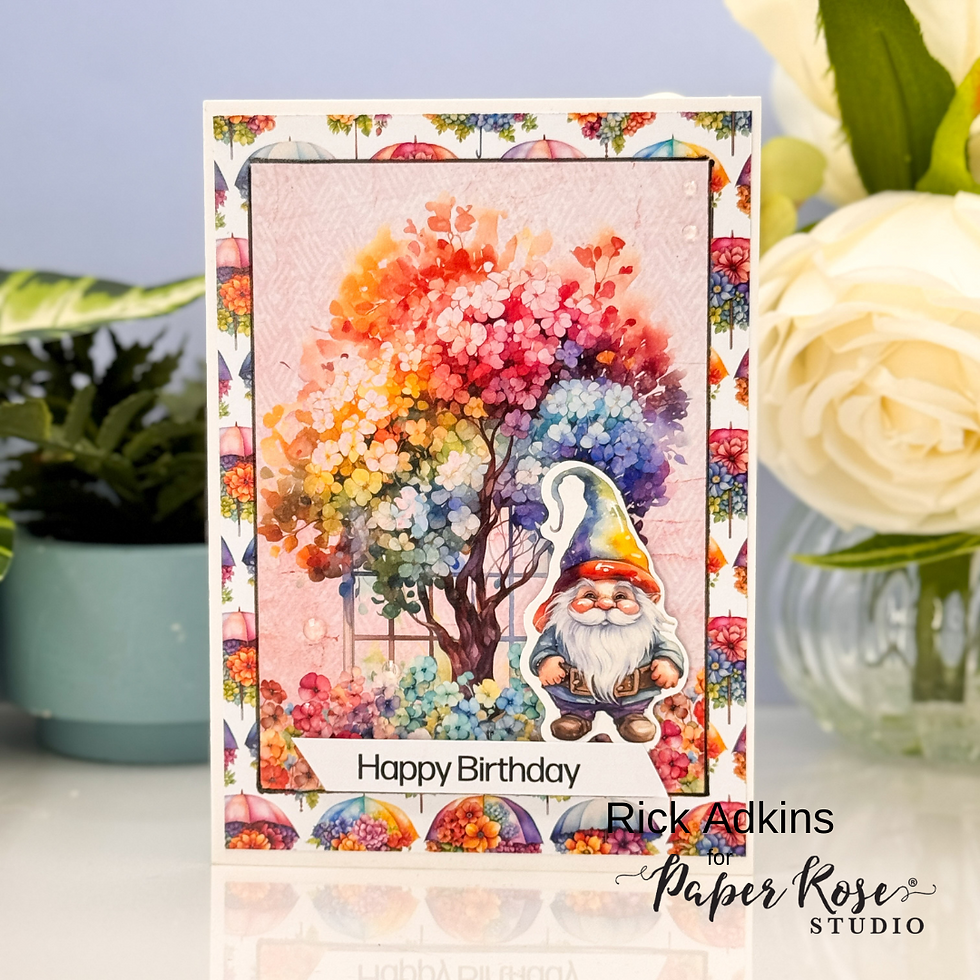
A Colorful Tree That Steals the Show
For my first card, I couldn’t resist using the large embossed die cut tree with those stunning rainbow leaves. It reminded me of a watercolor painting, and I knew it needed to be the star of the show. I paired it with a soft pink embossed panel and a cheerful border print of rainbow umbrellas (yes, the patterned paper in this kit is that detailed and whimsical).
A simple “Happy Birthday” sentiment strip finished it off. I added just a handful of Crystal Clear Embellishments around the tree to create the illusion of falling petals—or maybe light rain. That part’s up to interpretation, but either way, it added just the right amount of sparkle.
Pro Tip: When using pre-printed die cuts like these, don’t be afraid to pop them up with foam squares. It adds that touch of shadow and depth that makes the card feel finished without needing a lot of extra layers.

Gnomes, Cottages, and a Touch of Whimsy
I have a soft spot for gnomes, especially ones with personality—and this kit delivers! One of my favorite cards from this set features a cozy little gnome cottage scene with a cheerful gnome holding a mushroom. It has a storybook feel that instantly made me smile.
I paired the background with a patterned panel that looked like it was lifted straight from a fairytale garden, then added one of the Birthday Hugs sentiment strips and another gnome border to tie it all together. It’s sweet, lighthearted, and came together in under 10 minutes.
Pro Tip: When building a scene with detailed die cuts, let the background paper do some of the work. A busy, colorful print can ground your design and help your main elements stand out without needing to ink or stencil a background.

A Fairy Garden Full of Florals
For my third card, I leaned into the dreamy florals and fairy imagery in the kit. The soft watercolor backgrounds and floral clusters were so lovely, I didn’t want to cover them up. So I kept the layout clean—just a large fairy die cut layered over a floral background, with a pre-printed sentiment that read “It’s your Birthday.”
To finish it off, I added a few more Crystal Clear Embellishments around the wings and flowers for a magical shimmer. It’s light, elegant, and feels like something out of a summer daydream.
Pro Tip: If you ever feel stuck, try picking one image from your supplies (like a fairy or a floral cluster) and let that be your jumping-off point. Build the rest of the card around that one focal piece and let the layers fall into place.

Wrapping It All Up
These three cards came together in a single afternoon, and I still have so much product left in the kit for future projects. That’s the beauty of working with a coordinated card kit like Rainbow Garden—you get to skip the planning phase and jump right into the fun part: making something beautiful.
If you're short on time or just want to get your creativity flowing again, I highly recommend giving this kit a try. It’s a little box of joy, and I hope these cards inspire you to pull out a kit (or even a collection of pre-coordinated products from your stash) and just start creating.
Let me know in the comments which card spoke to you—or if you’ve made something with this kit, I’d love to see it!

Thanks for dropping by today I hope that you found a little spark of creative inspiration with my project today. Wondering what I used in this project? Everything is linked to multiple sources in the thumbnails in the Materials Used section, or in the text below. Compensated affiliate links used when possible.
Materials Used:
Here you will find the list of supplies that I used to create today's card. All supplies are linked to supply sources below. Compensated affiliate links may be used at no cost to you.
Happy Stampin'

Rick Adkins
Affiliate Disclaimer:
Just a friendly reminder, as part of my commitment to transparency, please note that some of the links provided maybe affiliate links. This means that if you make a purchase through these links, I may earn a small commission at no extra cost to you. Your support is truly appreciated!
Additionally, I kindly ask that you always accept the tracking cookie for the affiliate websites. Rest assured, this will not in any way expose your computer to viruses or compromise your information. It's simply necessary for the company to attribute the sale to the affiliate, ensuring creators like myself receive their rightful commissions.
Your trust and support enable me to continue sharing creativity through my email lists, blog, and YouTube channel. Thank you for being a valued part of our crafting community!


Comments