
Create Stunning Beach Cards! | Card Sketch For August | Video
- Rick Adkins

- Aug 13, 2025
- 4 min read
Updated: Oct 5, 2025
Some cards just feel like sunshine, don’t they? That’s exactly how this one came together. I wanted something that screamed summer—bright colors, playful accents, and that relaxing “day at the beach” vibe. But here’s the thing… I didn’t want to stare at my craft desk wondering how to arrange all the elements. That’s when I remembered the August 2025 Pixi Dust Designs Card Sketch of the Month. Card sketches are like having a friendly road map—they take away the guesswork and let you focus on what’s fun: the colors, textures, and little details that make a card truly yours.

Create Stunning Beach Cards! | Card Sketch For August
Why a Card Sketch Makes All the Difference
I’ve been using card sketches for years, and they’ve saved me from many “creative stalls.” You know that moment when you have a desk full of cute die cuts, gorgeous cardstock, and every ink color imaginable, but you have no idea where to start? That was me earlier this week. This month’s Pixi Dust Designs sketch gave me the perfect jumping-off point. I didn’t have to reinvent the wheel—just follow the layout and let the dies and colors do the talking.
Pro Tip: If you ever feel stuck, pick a card sketch and challenge yourself to make it with completely different themes. This same layout could be fall leaves, winter snowflakes, or spring flowers—no sketch is one-and-done.
Building the Beach Scene
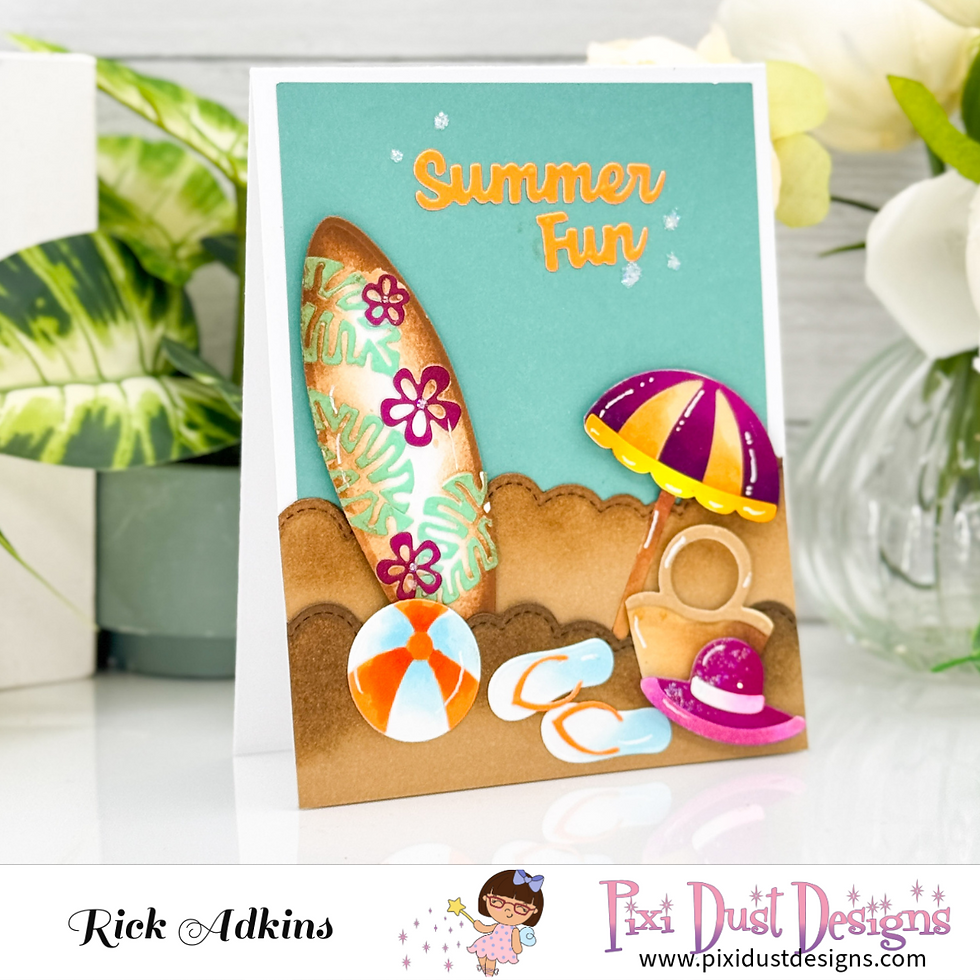
The base of my design came together with a little unexpected twist—I used one of the cloud dies from the Clouds and Grass Slimline Die Set to create the sandy shoreline. Sometimes the most unexpected tools end up being the most versatile. I love the way the scalloped curves of the cloud die mimic rolling sand dunes. I inked the edges with Walnut Stain and Scorched Timber Distress Inks to give them depth and shadow, almost like the sun was hitting the tops of the sandbanks.
The Little Details That Bring It to Life
The stars of this card were all cut from the Summer Accessories VT Die Set—the surfboard, umbrella, beach ball, flip flops, tote bag, and even the “Summer Fun” sentiment. I cut them from white cardstock and added shading with my Copic markers. This gave each piece dimension and a little “pop” against the teal background.
I remember my first beach-themed card years ago… I didn’t add any shading, and everything felt flat and lifeless. Now, I never skip that step. Adding just a touch of color to the edges of your die cuts makes them look more polished and professional—plus, it’s an easy way to give the illusion of sunlight and shadow without overcomplicating the design.
Bringing It All Together
The magic happened once I started layering. I tucked the surfboard behind the sandbanks, popped the umbrella slightly forward, and placed the tote bag and flip flops at the bottom so it looked like someone had just arrived at the beach. The card sketch made balancing all these elements effortless—each piece had its place, and I wasn’t left second-guessing where things should go.
To finish, I adhered the “Summer Fun” sentiment right above the scene, adding a few tiny sparkle details for that sunny, carefree feel.

Your Turn to Try It
This card may look detailed, but it’s incredibly beginner-friendly thanks to the August 2025 Pixi Dust Designs Card Sketch. If you download the sketch and pull out the Summer Accessories VT Die Set, you’ll have all the main pieces ready to go—you just need to decide on your colors and start playing. And remember, don’t be afraid to try unexpected uses for your dies. That cloud die? It’s now one of my favorite ways to make sand.
If you give this a try, I’d love to see your take. Tag Pixi Dust Designs when you post your project so we can all be inspired by each other’s creativity. Use the hashtags #pixi_dust_designs and #pddmonthlycardsketch so we can see your posts on social media!
Create Stunning Beach Cards! | Card Sketch For August | Video Tutorial:
If you have problems watching the video here on my blog you can always watch it on my YouTube Channel by Clicking Here!
(Wondering what I used in this video? Everything is linked to multiple sources in the thumbnails at the end of this post, or in the text below. Compensated affiliate links used when possible). As always I appreciate your support of my videos!
Materials Used:
Here you will find the list of supplies that I used to create today's card. All supplies are linked to supply sources below. Compensated affiliate links may be used at no cost to you.
Happy Crafting,

Rick Adkins
Affiliate Disclaimer:
Just a friendly reminder, as part of my commitment to transparency, please note that some of the links provided maybe affiliate links. This means that if you make a purchase through these links, I may earn a small commission at no extra cost to you. Your support is truly appreciated!
Additionally, I kindly ask that you always accept the tracking cookie for the affiliate websites. Rest assured, this will not in any way expose your computer to viruses or compromise your information. It's simply necessary for the company to attribute the sale to the affiliate, ensuring creators like myself receive their rightful commissions.
Your trust and support enable me to continue sharing creativity through my email lists, blog, and YouTube channel. Thank you for being a valued part of our crafting community!


Comments