
How to Make a Spooky Halloween Card with a Pumpkin House Design
- Rick Adkins

- Sep 11, 2025
- 4 min read
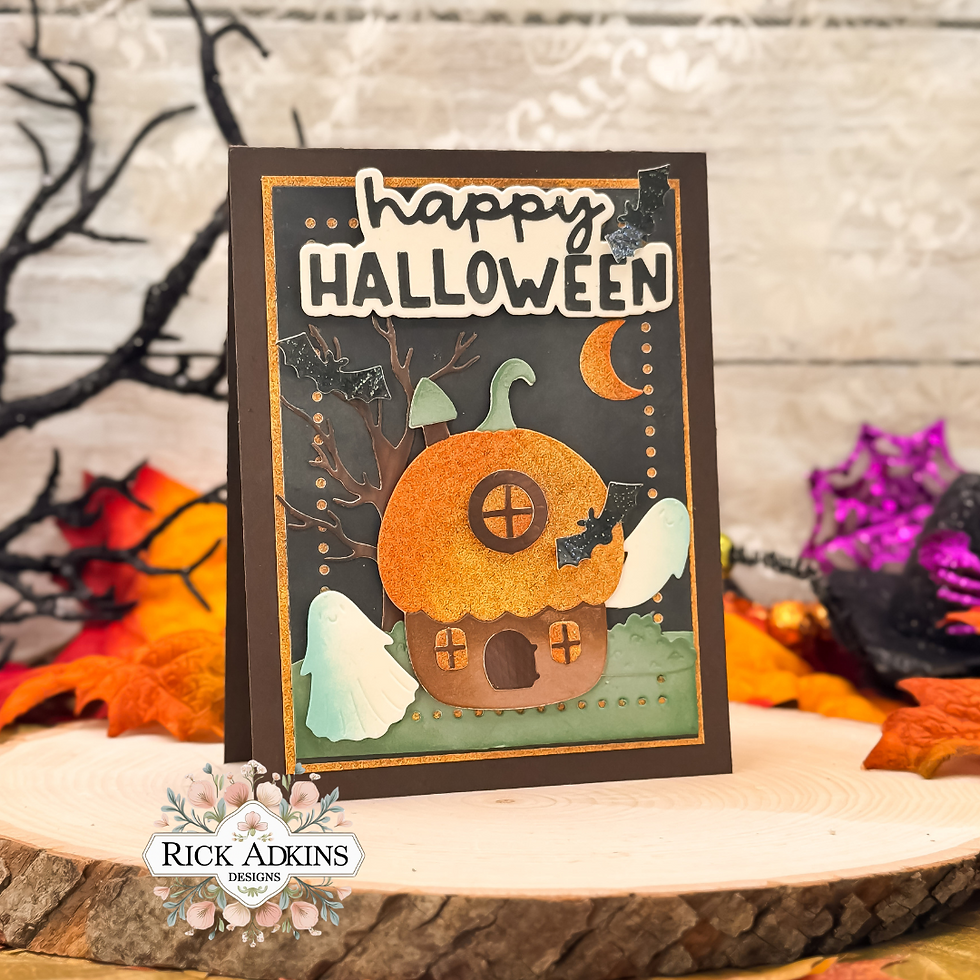
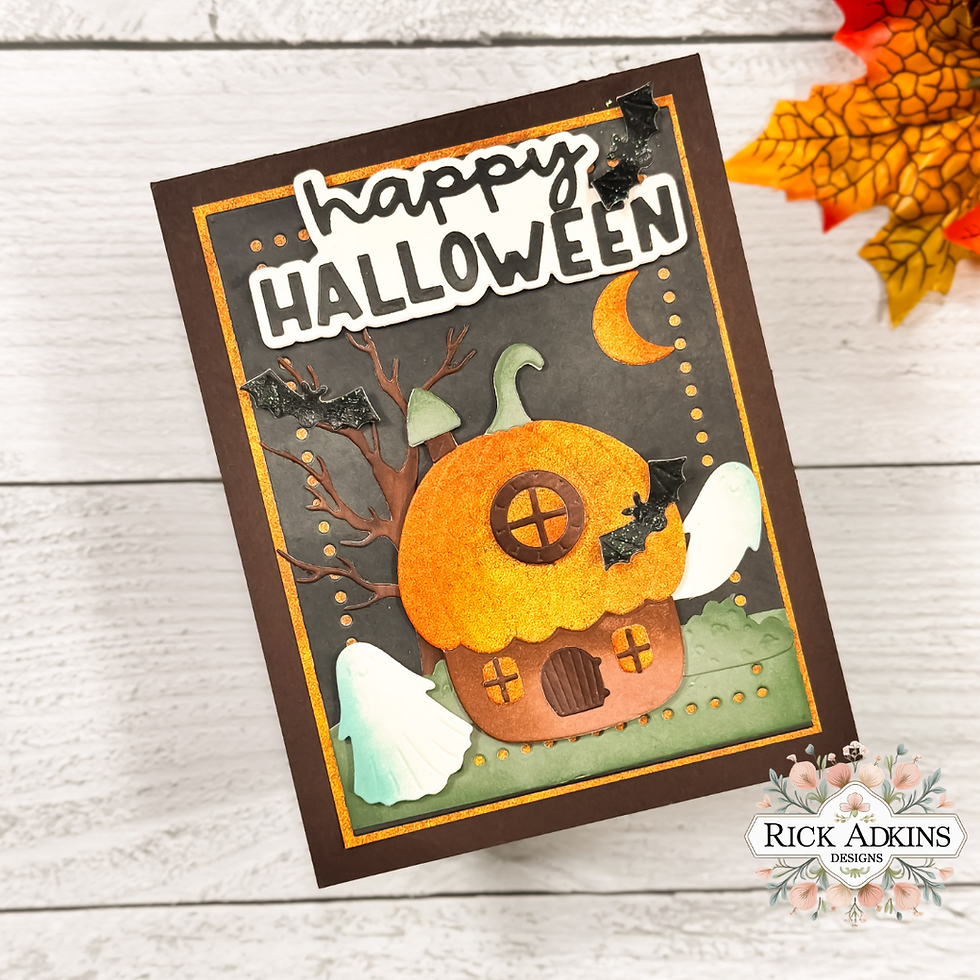
Halloween cardmaking is one of my favorite parts of fall because it lets me mix playful, spooky, and whimsical details all on one card. This year, I wanted something a little different than the usual pumpkins and ghosts, so I reached for the Pumpkin House Build & Layer Die Set from Scrapbook.com. It’s such a fun way to create a scene that feels both magical and spooky—like a Halloween fairy tale right on your card front. I’ll be honest, when I first saw this die set, I immediately pictured a whole neighborhood of pumpkin houses, but I decided to start with just one. What I love about this design is how it brings a story to life without needing a lot of extra embellishment.

How to Make a Spooky Halloween Card with a Pumpkin House Design
Building the Pumpkin House Scene
The key to this card was layering different textures and papers. I cut all the pieces for the house, the tree, the moon, the bushes, and even the ground from the Willow Lane 6 x 8 Pattern Paper Pad. That paper pad has a mix of rich, spooky colors that just scream Halloween. For the ghosts, I kept it simple and used scraps of white cardstock, while the bats came from the black glitter paper in the Mixed Metals Glitter Paper Pad. Using glitter cardstock here was such a game-changer—it gave the bats just the right amount of shimmer, like they were catching the moonlight.
Here’s a pro tip: if your die-cut pieces feel a little flat, add some ink blending with Distress Inks. I blended edges on almost all of my cuts, and it made such a difference. The little house roof suddenly had dimension, the ground looked like it had depth, and the tree felt more alive. It’s a small step that goes a long way.
A Background with Extra Detail
I wanted the background and ground to tie together seamlessly, so I cut them both at the same time using a rectangle from the Swiss Dot Rectangles Die Set. Cutting them together meant the stitched dotted detail lined up perfectly—almost like the ground was made for that background. It solved the problem of the background and foreground looking like two separate layers, and instead gave the whole scene a polished look.
This is one of those little tricks I’ve started using more often. Anytime I can run layers through with a die at the same time, I know I’ll get a cleaner, more professional finish.

Adding Dimension and Depth
Once the house was layered together, I started assembling the scene. I placed the tree and moon in the background, tucked in the bushes, and then popped up the Pumpkin House and ghosts with foam adhesive. That little bit of lift really changes the feel of the card. It keeps your eye moving around the scene and makes it feel interactive, almost like you could knock on the pumpkin door and say hello.
I still remember one of the first Halloween cards I made years ago that looked so flat I was disappointed when I finished. That was the moment I realized dimension is everything. Foam tape is now one of my most-used supplies, and it makes all the difference when you want your die cuts to really shine.

A Sentiment That Stands Out
For the sentiment, I used the Willow Lane Halloween Witch Fox Die Set, which includes this bold “Happy Halloween.” I cut the shadow layer from a scrap of white cardstock and the sentiment itself from the same black patterned paper I used for the background. This is a great solution when you’re worried about a sentiment getting lost against busy backgrounds—the shadow layer creates instant contrast and helps the words pop.

Pulling It All Together
I finished the card by adhering the scene onto an A2 top-folding card base made from Ground Coffee Cardstock. The deep brown tied in so nicely with the earthy tones of the pumpkin house and tree. I always love how a strong card base color can frame a design and make everything feel cohesive.
What I ended up with is a card that’s equal parts whimsical and spooky. It has all the classic Halloween elements—pumpkin, ghosts, bats, a crescent moon—but the little pumpkin house gives it a unique twist. If you’ve ever felt like your Halloween cards were starting to look the same year after year, this is a fun way to shake things up.
Final Thoughts
Halloween cardmaking is such a playful opportunity to tell a little story with your supplies, and this Pumpkin House design really captures that idea. By mixing patterned papers, glitter cardstock, and a few ink-blended details, you can create a scene that’s layered, dimensional, and full of personality.
If you’re looking for a Halloween card that will stand out from the rest, I highly recommend giving the Pumpkin House Build & Layer Die Set a try. It’s a design that sparks imagination, and once you’ve built one, you might just find yourself creating an entire pumpkin village.
Thanks for dropping by today I hope that you found a little spark of creative inspiration with my project today. Wondering what I used in this project? Everything is linked to multiple sources in the thumbnails in the Materials Used section, or in the text below. Compensated affiliate links used when possible.
Materials Used:
Here you will find the list of supplies that I used to create today's card. All supplies are linked to supply sources below. Compensated affiliate links may be used at no cost to you.
Happy Crafting,

Rick Adkins
Affiliate Disclaimer:
Just a friendly reminder, as part of my commitment to transparency, please note that some of the links provided maybe affiliate links. This means that if you make a purchase through these links, I may earn a small commission at no extra cost to you. Your support is truly appreciated!
Additionally, I kindly ask that you always accept the tracking cookie for the affiliate websites. Rest assured, this will not in any way expose your computer to viruses or compromise your information. It's simply necessary for the company to attribute the sale to the affiliate, ensuring creators like myself receive their rightful commissions.
Your trust and support enable me to continue sharing creativity through my email lists, blog, and YouTube channel. Thank you for being a valued part of our crafting community!


Comments