
Masculine Thank You Card Tutorial with Colored Pencils and Torn Edge Details

Masculine cards always seem to spark the same conversation in the crafting world: why are they so much harder to design? I think a lot of us naturally reach for florals, soft colors, and embellishments, so when it comes time to create a masculine thank you card, it can feel a little outside our comfort zone. That’s exactly why I wanted to make this project. I wanted to create a handmade thank you card that still felt warm and creative while using a more rustic color palette and texture-driven design.

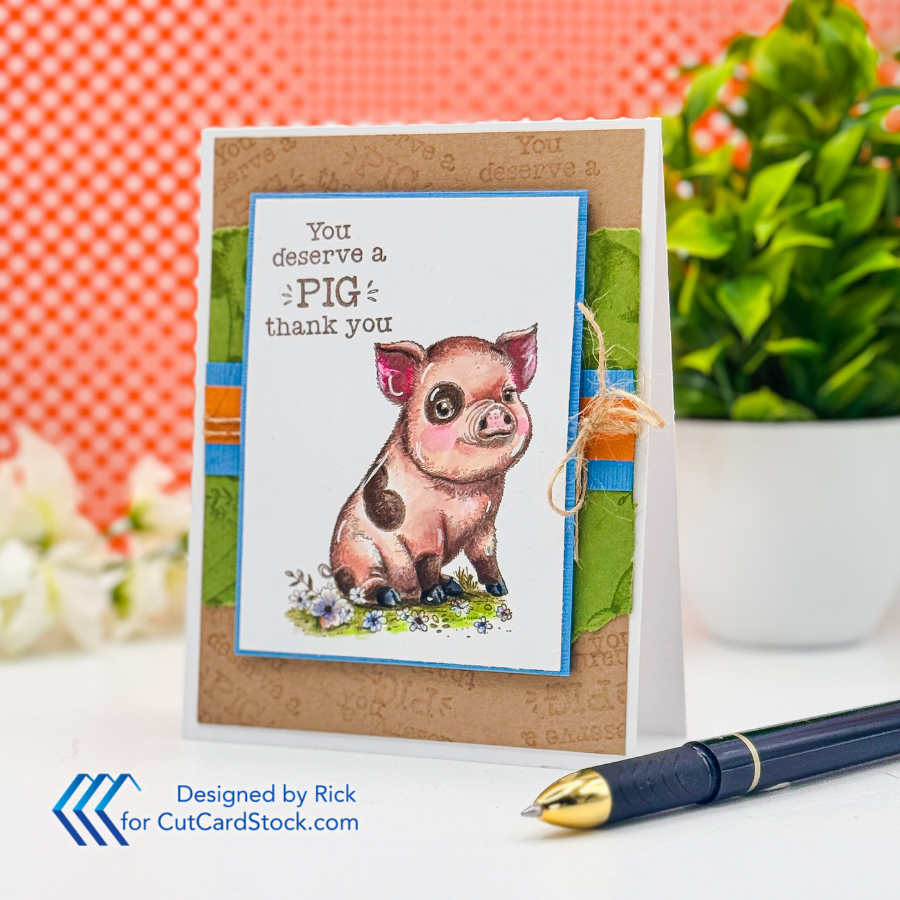
For this card, I combined several cardstock colors from CutCardStock along with simple stamping, colored pencils, and torn edge details to create a card that feels layered and interesting without becoming overly complicated. One of the things I really love about this design is that it works well for beginner cardmakers, but it also gives intermediate crafters room to play with texture, coloring, and layering.
Why the Color Palette Works
When I’m creating masculine cards, I usually start with the color palette first. For this project, I leaned into earthy greens, warm browns, and pops of muted blue and orange. Those colors instantly create a more grounded and casual feel compared to brighter pastel combinations.
The Sand Castle Neutral Tan Discount Cardstock was the perfect starting point because it adds a natural, kraft-inspired look without being too dark. I paired that with the Green Curry DCS Discount Cardstock to bring in a little richness and texture. Then I added strips of Blue Calico DCS Discount Card Stock and Pop Tone Orange Fizz Cardstock to break up the neutral tones and give the eye somewhere to rest.
One thing I always remind newer cardmakers is that masculine cards do not have to mean “plain.” Texture and contrast can do a lot of the heavy lifting when you are working with a simpler design style.

Creating Interest with Background Stamping
One of my favorite techniques on this card is the subtle background stamping. Instead of leaving the cardstock layers solid, I stamped both the sentiment and pig image repeatedly onto the background panels using lighter ink colors.
This is such an easy way to stretch your stamp sets. A focal image does not always have to stay in the spotlight. Repeating images in softer ink tones can create custom patterned paper that perfectly coordinates with your card design.
I also love this technique for stash-building. If you have older stamp sets sitting unused, try turning the smaller images or sentiments into backgrounds. It completely changes how those products work in your collection.

Torn Edges Add Easy Texture
The torn edge detail on the Green Curry layer might be one of my favorite parts of this card. It adds just enough texture to make the design feel rustic and relaxed without needing dies or embossing folders.
Sometimes cardmakers feel like they need a lot of specialty tools to create texture, but simple techniques like tearing paper can add just as much character. The key is to tear slowly and remove only a little cardstock at a time. You want the edges to look organic rather than overly distressed.
If rustic styles are not your thing, this same layout would also look great with clean straight edges or even decorative scissors.

A Simple Coloring Approach
For the pig image, I combined Crayola Markers some from the (Original Set) and some from the (Bold and Bright Colors Set) with Prismacolor Pencils. I love mixing inexpensive supplies with artist-grade products because it shows that you do not always need the fanciest materials to create something polished.
The markers gave me a quick base layer of color, while the colored pencils helped deepen shadows and add detail. This is one of my favorite approaches for beginner to intermediate colorists because it feels much less intimidating than working entirely with alcohol markers.
If you do not enjoy coloring, this card design could easily work with patterned paper, die cuts, or even a bold sentiment instead of a stamped image.
Why This Layout Is Easy to Adapt
What makes this card layout especially versatile is that the design itself is simple. The layers, horizontal strip, and centered focal panel can work with almost any stamp set or occasion.
You could turn this into:
A birthday card with brighter colors
A Father’s Day card with navy and kraft tones
A holiday card using plaid patterns and deeper greens
A clean and simple thank you card with softer stamping
That flexibility is something I always look for when designing cards because I want layouts to feel reusable long after the original project is finished.

Final Thoughts
I think masculine cards become much easier when we focus less on “making it masculine” and more on creating texture, contrast, and balance. This card uses simple techniques, but the combination of layered cardstock, background stamping, and soft coloring helps it feel thoughtful and complete.
I hope this project encourages you to look at your cardstock scraps, stamp sets, and basic supplies in a new way. Sometimes the simplest techniques can create the most memorable handmade cards.
Have you tried torn edge details or background stamping on your cards before? I’d love to hear how you use these techniques in your own cardmaking projects!
Thanks for dropping by today I hope that you found a little spark of creative inspiration with my project today. Wondering what I used in this project? Everything is linked to multiple sources in the thumbnails in the Materials Used section, or in the text below. Compensated affiliate links used when possible.
Supplies Used
Here you will find the list of supplies that I used to create today's card. All supplies are linked to supply sources below. Compensated affiliate links may be used at no cost to you.
Happy Crafting,

Rick Adkins
Affiliate Disclaimer:
Just a friendly reminder, as part of my commitment to transparency, please note that some of the links provided maybe affiliate links. This means that if you make a purchase through these links, I may earn a small commission at no extra cost to you. Your support is truly appreciated!
Additionally, I kindly ask that you always accept the tracking cookie for the affiliate websites. Rest assured, this will not in any way expose your computer to viruses or compromise your information. It's simply necessary for the company to attribute the sale to the affiliate, ensuring creators like myself receive their rightful commissions.
Your trust and support enable me to continue sharing creativity through my email lists, blog, and YouTube channel. Thank you for being a valued part of our crafting community!


Comments