
Spellbinding Spinner Card Creation with Witch's Brew Stamp Set: Video Tutorial
- Rick Adkins

- Apr 25, 2025
- 5 min read
Updated: Aug 16, 2025
There’s just something magical about an interactive card—especially when it spins! I’m so excited to share today’s project with you because it combines one of my favorite things about card making (fun surprises!) with the whimsical charm of the Witch’s Brew Stamp Set from Miss Ink Stamps. And yes, I even managed to sneak in a transformation twist with a little witch who accidentally turned herself into a cat. Don’t you just love it when a story comes to life on a card?

In today’s card, I created a spinner mechanism on the inside that gives the illusion of the witch turning into her feline self. It’s a simple construction, but it makes a huge impact—and it’s sure to bring a smile to whoever opens it!
Spellbinding Spinner Card Creation with Witch's Brew Stamp Set:
A Little Hocus Pocus with the Witch’s Brew Stamp Set
As soon as I saw the Witch's Brew Stamp Set, I knew I had to build a little scene that felt like a peek into a spell caster’s secret chamber. The set is packed with charming images—from bubbling cauldrons to spellbooks to witches mid-spell. I especially love that it comes with coordinating dies (Witch’s Brew Outline Dies) that make assembly a breeze.
To bring this cast of characters to life, I stamped all of them out on Neenah Classic Crest Solar White 80 lb Cardstock with Memento Tuxedo Black Ink and colored everything in with my Spectrum Noir TriBlend Markers. I stuck to eerie greens, and soft neutrals to keep that witchy vibe going. I even gave one of the witches red hair—because why not?
Pro Tip: If you're using alcohol markers, stamp with an alcohol-friendly ink like Memento and let it dry thoroughly before coloring. And don’t forget to color a few extra elements like potions or books—you never know what you’ll need when it’s time to build your scene.

Creating the Potion-Filled Background
Once my characters were ready, it was time to build their little world. I created a background panel using the Potion Bottles Layering Stencil Set, and this might just be my favorite stencil set right now. It’s so clever!
I used three of the four layers:
Tumbled Glass for the outline of the bottles
Gathered Twigs for the cork tops
Twisted Citron to fill the potions with a spooky green glow

I kept the potion color the same across all bottles to keep things cohesive, but you could absolutely go wild and make each potion a different color. Just grab a smaller blending brush for more control.
Pro Tip: When working with layering stencils, tape everything down with low-tack tape or use a sticky mat to prevent shifting. It makes a world of difference in keeping things crisp.
I mounted the background onto a mat layer of Lilac Cardstock.

Cobblestone Details & Building the Scene
To ground my little magical scene, I used the Cobblestone Stencil on a die-cut oval from Dolphin Cardstock. A little gray ink blending was all it needed to create the feel of an old stone floor—perfect for a spell room!
I built the scene with a mix of foam tape and liquid adhesive to get some good dimension. On the front, I used the sitting witch casting a spell, her cauldron, the chamber wash stand, some potions, and a stack of books. The sentiment “Just a Little Hocus Pocus” stamped in Versafine Onyx Black Ink finishes off the card front.
Pro Tip: If you’re building a scene with lots of little pieces, lay everything out first and snap a quick photo with your phone before gluing. That way, you can remember where everything goes.
The Magic Inside: A Spinning Surprise
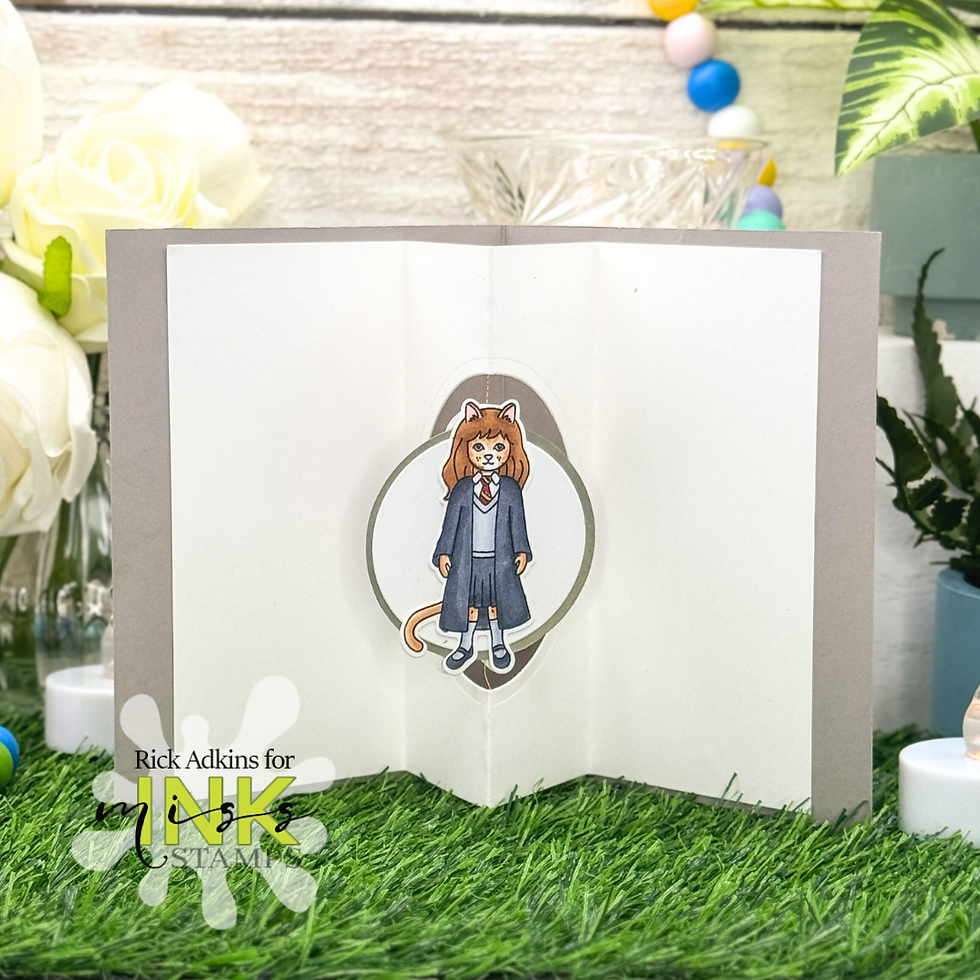
Here’s where the real fun begins. On the inside of the card, I created a spinner that features the standing witch on one side and her transformed cat-self on the other. When the recipient opens the card, the image spins—just like magic!
I created a scored panel that folds into an “M” shape to hold the spinner mechanism in place and keep it hidden when the card is closed. I die cut a circle window into the center, used strong thread for the spinner, and sandwiched the two images on either side.
Pro Tip: The tighter you twist the thread before closing the card, the more dramatic the spin when it’s opened. And be sure your adhesive is strong enough to hold the thread in place—this part does the heavy lifting!
This little interactive element turns the card from just “cute” to completely unforgettable. And honestly, I think we could all use a little more magic in our mailboxes, don’t you?

Final Thoughts
This card may look complex, but with the right supplies and a bit of planning, it comes together surprisingly smoothly. It’s such a fun way to stretch your stash and try out a new technique.
I love that it tells a story—the curious little witch, her potion gone awry, and a bit of “hocus pocus” that leaves her with whiskers and a tail! These are the kinds of cards that stick with people long after they open them. And as a card maker, there’s nothing more satisfying than that.
If you’ve been feeling stuck in a creative rut or looking to try something new, give an interactive spinner card a go. It’s one of those designs that never fails to surprise and delight.
Spellbinding Spinner Card Creation with Witch's Brew Stamp Set Video Tutorial:
If you have problems watching the video here on my blog you can always watch it on my YouTube Channel by Clicking here!
Some of the supplies I’ve used today were generously provided by Miss Ink Stamps. I only share products I truly love and use in my own crafting. This post contains affiliate links, which means I may earn a small commission at no extra cost to you. Thank you for supporting my blog and helping me continue to bring you fun new ideas!
Materials Used:
Here you will find the list of supplies that I used to create today's card. All supplies are linked to supply sources below. Compensated affiliate links may be used at no cost to you.
Happy Stampin'

Rick Adkins
Affiliate Disclaimer:
Just a friendly reminder, as part of my commitment to transparency, please note that some of the links provided maybe affiliate links. This means that if you make a purchase through these links, I may earn a small commission at no extra cost to you. Your support is truly appreciated!
Additionally, I kindly ask that you always accept the tracking cookie for the affiliate websites. Rest assured, this will not in any way expose your computer to viruses or compromise your information. It's simply necessary for the company to attribute the sale to the affiliate, ensuring creators like myself receive their rightful commissions.
Your trust and support enable me to continue sharing creativity through my email lists, blog, and YouTube channel. Thank you for being a valued part of our crafting community!


Comments