
Stretch Your Dies: Creating an Off The Edge Card and Custom Envelope
- Rick Adkins

- Jan 27
- 4 min read
Updated: Mar 5
One of the things I hear most often from cardmakers is, “I love my dies… but I feel like I use them the same way every time.” That’s exactly the problem I wanted to solve with this project. Instead of reaching for a standard card base, I challenged myself to design an off-the-edge card in a nontraditional size—one that lets the die shape take center stage and feel intentional, not awkward.
This jacket-shaped card was inspired by fan art (with a little Grease flair), but the real goal goes beyond the theme. I wanted to show how a shaped die—originally designed for something else—can become the foundation for a statement card and a coordinating custom envelope. I walk through the visual process on video so you can see it come together, but here on the blog I want to dig into the design thinking behind it and how you can apply the same ideas with your own supplies.
If you’re someone who loves bold designs but sometimes feels stuck figuring out how to pull them off cleanly, this approach is a great confidence booster.

Why an Off-The-Edge Card Works So Well
Off-the-edge card designs immediately feel special because they break the expected rectangle. The key, though, is making sure that shape feels purposeful rather than accidental. That’s why I chose to let the jacket die define the entire card structure instead of layering it on top of a card base.
When the shape is the card, your design decisions actually get simpler:
The focal point is already chosen
You don’t need to over-embellish
The eye knows exactly where to land
This is especially helpful if you tend to overthink layouts or feel like your cards get cluttered quickly.

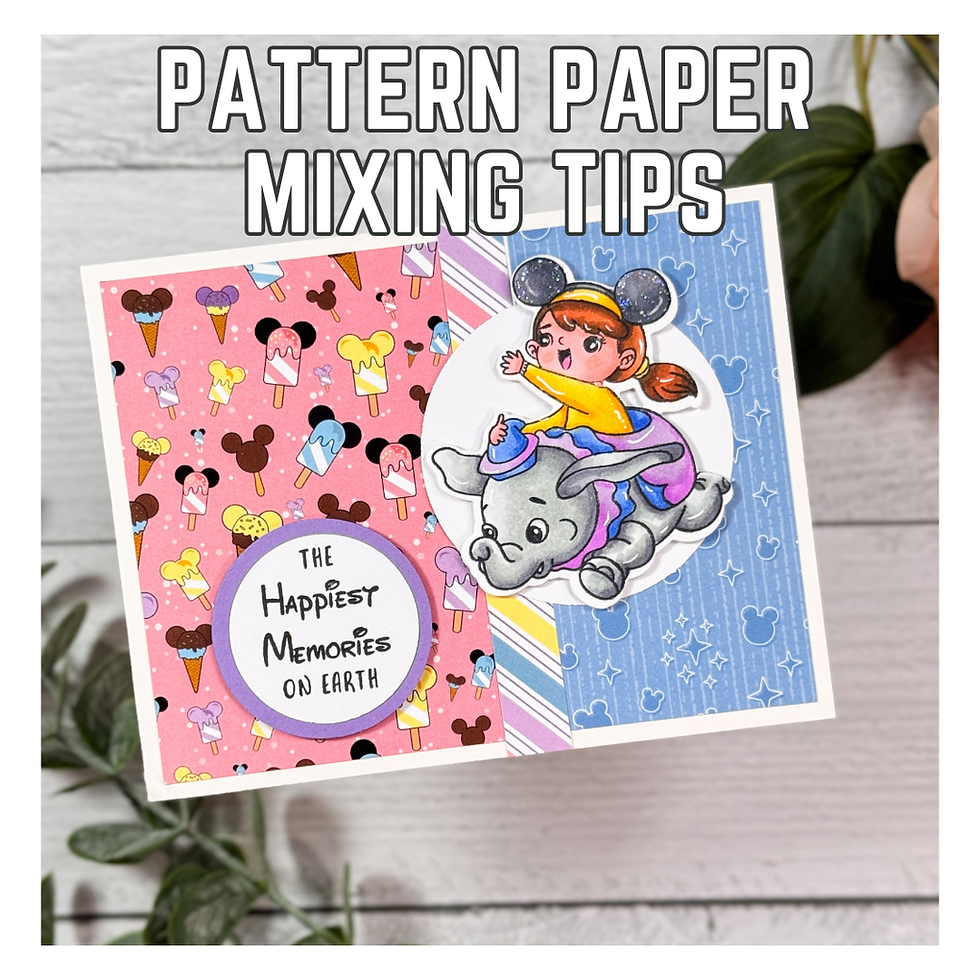
Mixing Pattern Paper Without the Overwhelm
Pattern paper can either elevate a shaped card—or completely overpower it. For this project, I stuck to a tight color story and mixed small-scale patterns with more open designs. That balance keeps the jacket shape readable while still adding interest.
A common mistake I see is trying to showcase every pattern you love at once. Instead, think of pattern paper as texture. If the shape is bold, the patterns should support it, not compete with it. This mindset makes patterned paper far less intimidating, especially for clean-and-simple cardmakers.

Why a Custom Envelope Matters Here
Nontraditional card sizes are fun… until you realize they don’t fit in a standard envelope. Rather than seeing that as a drawback, I treat it as part of the design opportunity. A custom envelope instantly makes a shaped card feel finished and intentional.
Creating an envelope to match also solves a practical problem for cardmakers:You don’t have to redesign your card to fit what you already have. Instead, you adapt the packaging to the project. That shift alone can open the door to more creative freedom.

Product Choices That Supported the Design
The Leather Jacket Mini Album Die Set from Scrappy Boy Stamps worked beautifully here because the shape is detailed enough to feel complete on its own. I didn’t need a lot of extras to sell the idea—it already carries visual weight.
The You’re The One That I Want Stamp Set added subtle stamped details without overwhelming the design, and the You're The One That I Want 6 x 9 Pattern Paper Pack made it easy to pull coordinating patterns that felt intentional rather than random. Each product played a specific role, which is exactly what you want when working with a bold card shape.

How to Make This Idea Work With Your Stash
You don’t need a jacket die to use this approach. Look for:
Mini album dies
Large focal dies (florals, tags, frames)
Dies with a strong outer silhouette
This technique works for birthdays, holidays, themed cards, and even elegant designs—just swap the shape and papers. If you’re newer to shaped cards, try keeping embellishments minimal and let the die do the heavy lifting.

A Little Encouragement Before You Try It
Shaped cards don’t have to be perfect to be impactful. The goal isn’t precision—it’s confidence. Once you give yourself permission to step outside the rectangle, you may be surprised how freeing it feels.
If this idea sparks something for you, save it for later or leave me a comment and let me know what die in your stash you’d try this with first.
Watch the Video
If you’re a visual learner, seeing the process will really help this idea click.
You can watch the process here:Designing Statement Cards with Shaped Dies | Off-The-Edge Cardmaking
If you have problems watching the video here on my blog you can always watch it on my YouTube Channel by Clicking Here!
(Wondering what I used in this video? Everything is linked to multiple sources in the thumbnails at the end of this post, or in the text below. Compensated affiliate links used when possible). As always I appreciate your support of my videos!
Materials Used:
Here you will find the list of supplies that I used to create today's card. All supplies are linked to supply sources below. Compensated affiliate links may be used at no cost to you.
Happy Crafting,

Rick Adkins
Affiliate Disclaimer:
Just a friendly reminder, as part of my commitment to transparency, please note that some of the links provided maybe affiliate links. This means that if you make a purchase through these links, I may earn a small commission at no extra cost to you. Your support is truly appreciated!
Additionally, I kindly ask that you always accept the tracking cookie for the affiliate websites. Rest assured, this will not in any way expose your computer to viruses or compromise your information. It's simply necessary for the company to attribute the sale to the affiliate, ensuring creators like myself receive their rightful commissions.
Your trust and support enable me to continue sharing creativity through my email lists, blog, and YouTube channel. Thank you for being a valued part of our crafting community!

Comments