
3 Easy Cardmaking Ideas Using Stencils for Stunning Results
- Rick Adkins

- May 2
- 4 min read
If you’ve ever pulled out a stencil, made a card, and thought… “well, that looks fine,” but not exciting, you’re definitely not alone. Stencils are one of those tools that can either feel incredibly versatile—or a little limiting—depending on how you use them. So for today’s project, I wanted to challenge that idea and show how just a few small shifts can completely change the outcome.
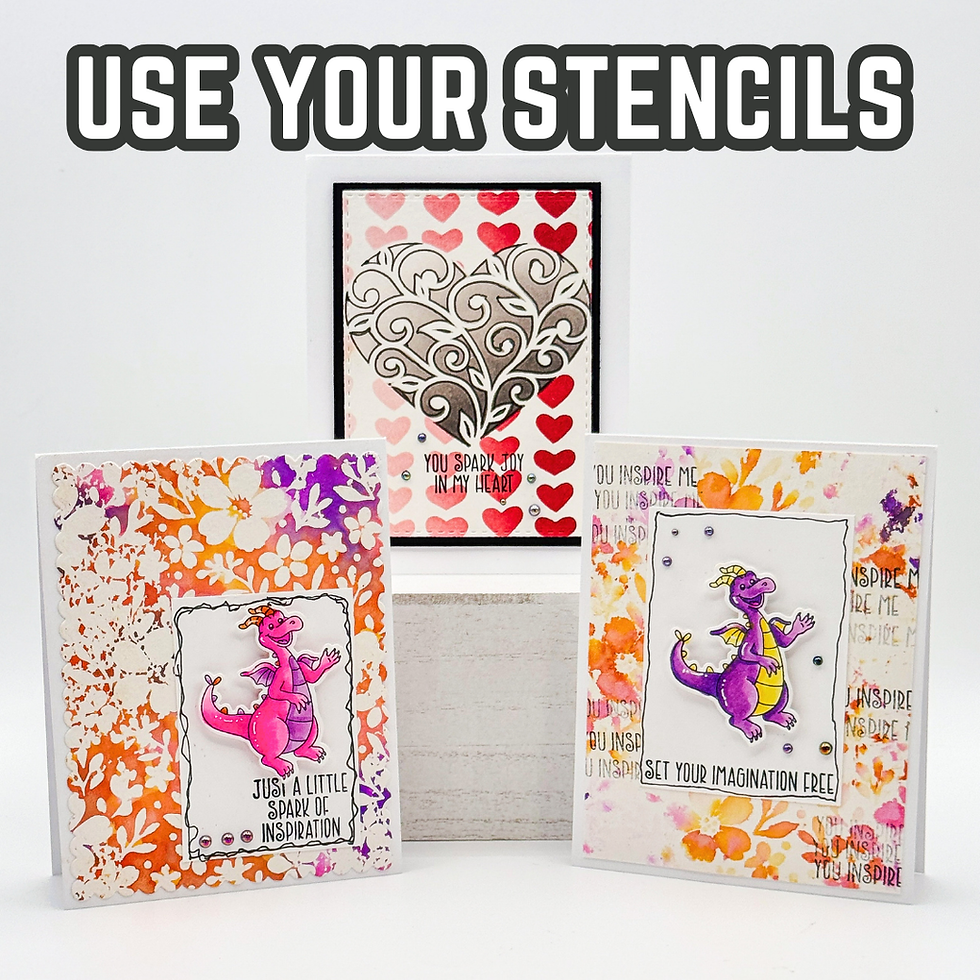
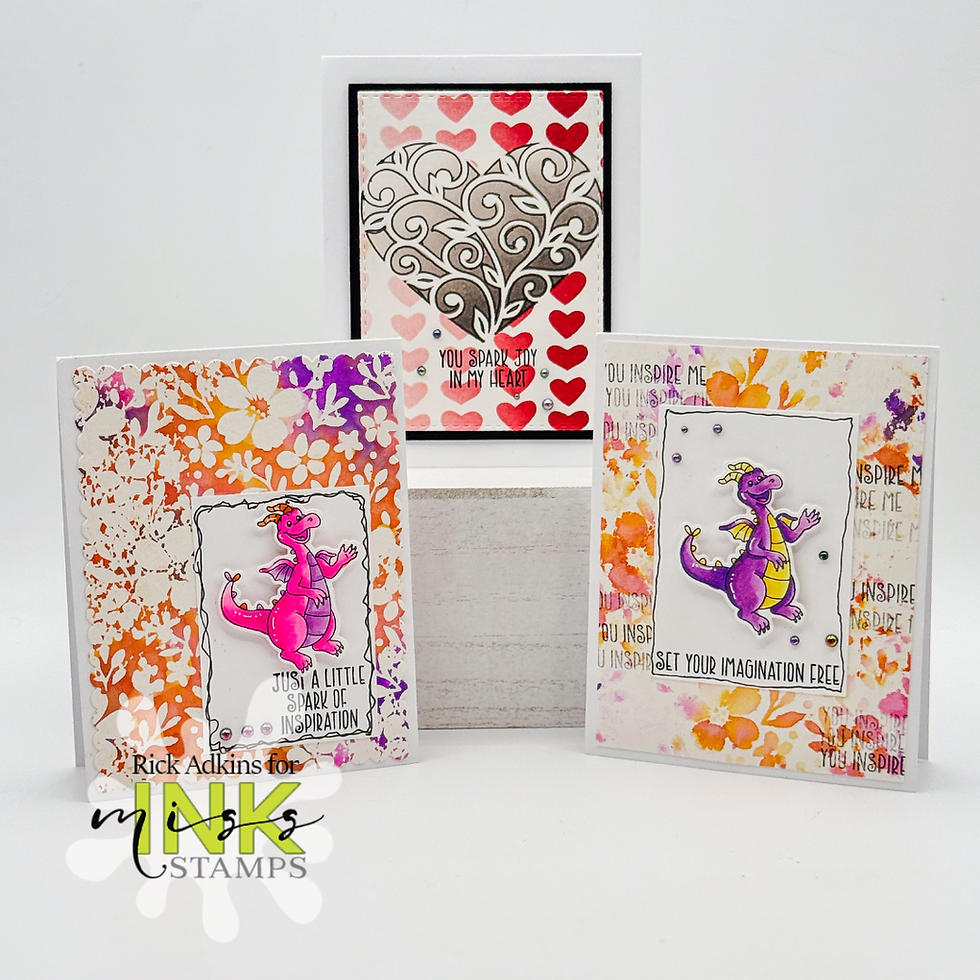
I created three clean and layered cards using stencil techniques, all with a fun imagination theme, and each one has a slightly different approach. In the video, I walk through how everything comes together visually, but here I wanted to talk through the why behind the choices—because that’s what really helps you take these ideas and make them your own.
Why These Stencil Techniques Work
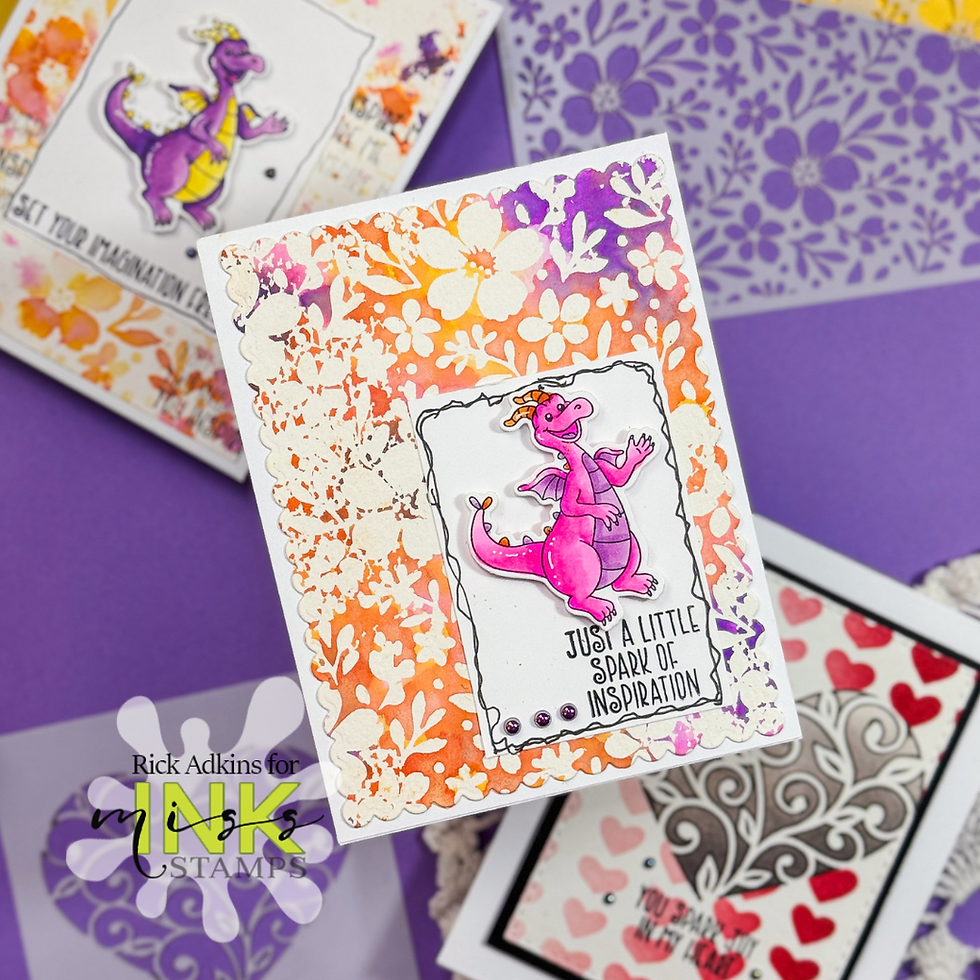
The first two cards focus on something I think more cardmakers should try—using both the positive and negative of a stencil. Most of the time, we reach for a stencil and use it one way, then clean it off and move on. But when you flip that thinking and treat the leftover or reverse image as a design opportunity, it instantly doubles your options.
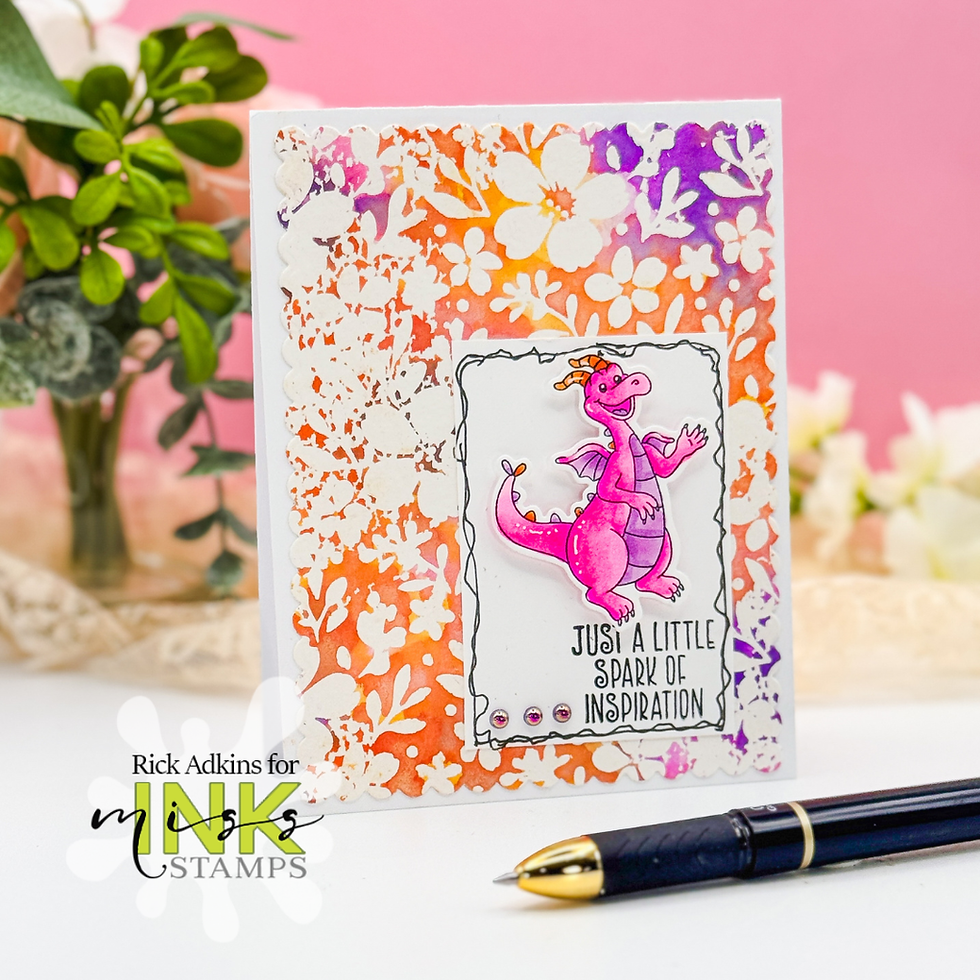
For the dragon cards, I used stencil stamping to create a soft, watercolor-style background. This works especially well when you want something that feels artistic but not overly controlled. The slightly imperfect, blended look takes the pressure off and gives you a background that already feels “finished” before you even add your focal point.
And that’s really the key here—letting the background do some of the work for you. When your background has movement and color variation, you don’t have to overthink the rest of the design.
Balancing Detail Without Overwhelm
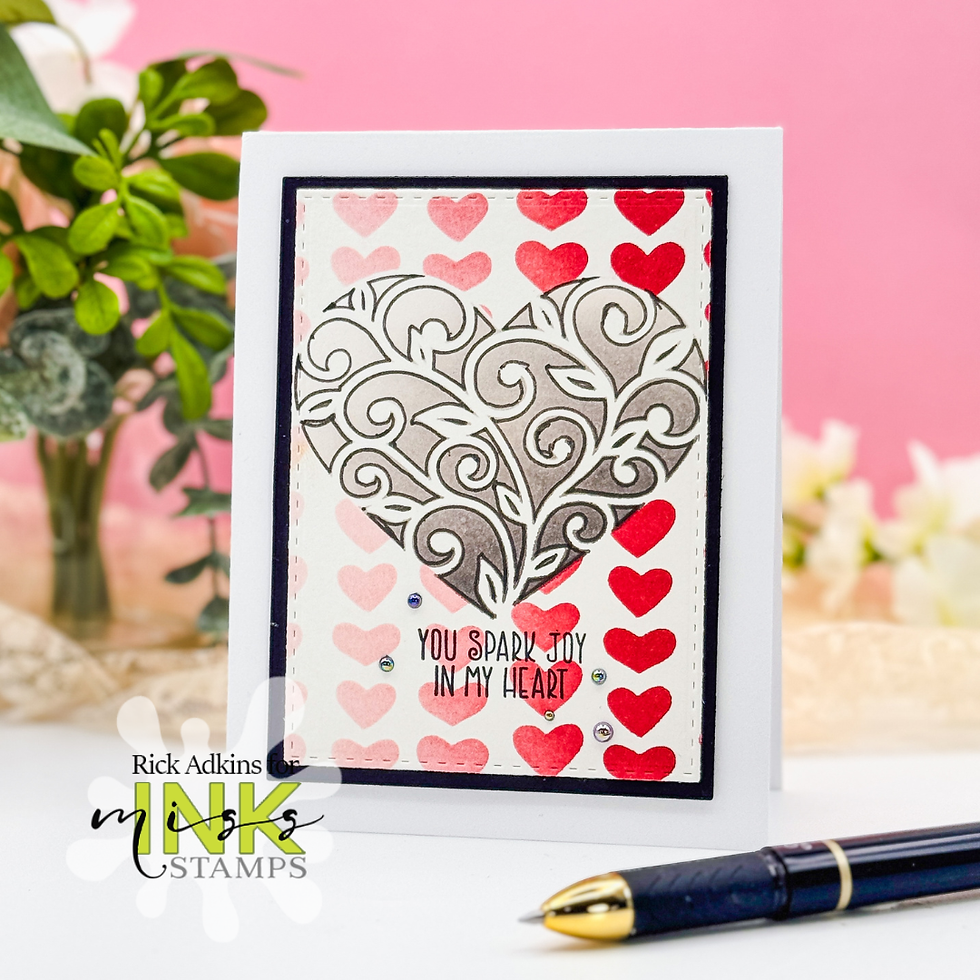
The third card takes a different direction with the leafy heart design, combining ink blending, masking, and background stenciling. Now, that might sound like a lot—but the goal isn’t to make things more complicated. It’s actually the opposite.
Masking allows you to control where the detail goes. Instead of trying to fill the entire card front, you’re creating a defined space, which makes your design feel intentional and balanced. Adding a bit of fineliner outlining helps sharpen those edges and gives the whole piece a polished look without needing extra layers.
One thing I see often is cardmakers trying to add more when something doesn’t feel quite right. In reality, it’s usually about placing detail in the right areas, not everywhere.

A Simple Way to Get More From Your Supplies
All three of these cards were created using stencil designs from Miss Ink Stamps, including the May 2026 Free with Purchase Classic Florals Stencil and the 4x4 Thank You Leafy Heart stencil. What I love about these is how easily they shift between soft and bold looks depending on how you use them.
The dragon images worked especially well here because they add personality without competing with the background. When you pair a playful stamped image with a more abstract stencil background, it creates a nice contrast that keeps the card interesting without feeling busy.
This is a great reminder that you don’t need a huge collection of supplies—you just need to look at what you already have a little differently.
Common Stencil Mistakes (and Easy Fixes)
If your stencil cards tend to feel flat or repetitive, a few small adjustments can make a big difference:
Using one technique every time → Try switching between ink blending, stencil stamping, or even dry embossing
Overfilling the background → Give your design some breathing room
Skipping contrast → Pair soft backgrounds with bold focal images (or vice versa)
Not using both sides of the stencil idea → Always ask, “what else can this make?”
Sometimes it’s not about learning something new—it’s about using what you already know in a new way.
Make It Work With What You Have
You can easily adapt these ideas with whatever is in your stash:
Don’t have these exact stencils? Any floral, geometric, or layered stencil will work
No stamped characters? Try sentiments, die cuts, or even a bold focal shape
Prefer simpler designs? Skip the masking and focus on the stencil stamping technique
Want to change the theme? These layouts would work beautifully for birthdays, thank you cards, or even seasonal designs
The structure stays the same—you’re just swapping out the details.
Final Thoughts
If you’ve been feeling stuck with your stencil cards, I hope this gives you a fresh perspective. You don’t need to reinvent your entire process—just try one small change and see where it takes you.
And remember, your cards don’t have to be perfect to be meaningful. Sometimes the most interesting results come from experimenting and letting go of the idea that everything has to be precise.
If you haven’t watched the video yet, I think it’ll really help bring these ideas to life.
Watch the Video
You can watch the process here and see how these three cards come together: Struggling With Stencils? Try These Easy Tricks
If you have problems watching the video here on my blog you can always watch it on my YouTube Channel by Clicking Here!
(Wondering what I used in this video? Everything is linked to multiple sources in the thumbnails at the end of this post, or in the text below. Compensated affiliate links used when possible). As always I appreciate your support of my videos!
Materials Used:
Here you will find the list of supplies that I used to create today's card. All supplies are linked to supply sources below. Compensated affiliate links may be used at no cost to you.
Happy Crafting,

Rick Adkins
Affiliate Disclaimer:
Just a friendly reminder, as part of my commitment to transparency, please note that some of the links provided maybe affiliate links. This means that if you make a purchase through these links, I may earn a small commission at no extra cost to you. Your support is truly appreciated!
Additionally, I kindly ask that you always accept the tracking cookie for the affiliate websites. Rest assured, this will not in any way expose your computer to viruses or compromise your information. It's simply necessary for the company to attribute the sale to the affiliate, ensuring creators like myself receive their rightful commissions.
Your trust and support enable me to continue sharing creativity through my email lists, blog, and YouTube channel. Thank you for being a valued part of our crafting community!


Comments