
How to Make a Waterfall Birthday Gift Card Holder
- Rick Adkins

- 6 hours ago
- 4 min read
Gift cards are one of the easiest gifts to give, but they can sometimes feel a little impersonal. As cardmakers, we have the ability to transform a simple gift card into something that feels thoughtful, creative, and handmade. That's exactly what inspired today's project.
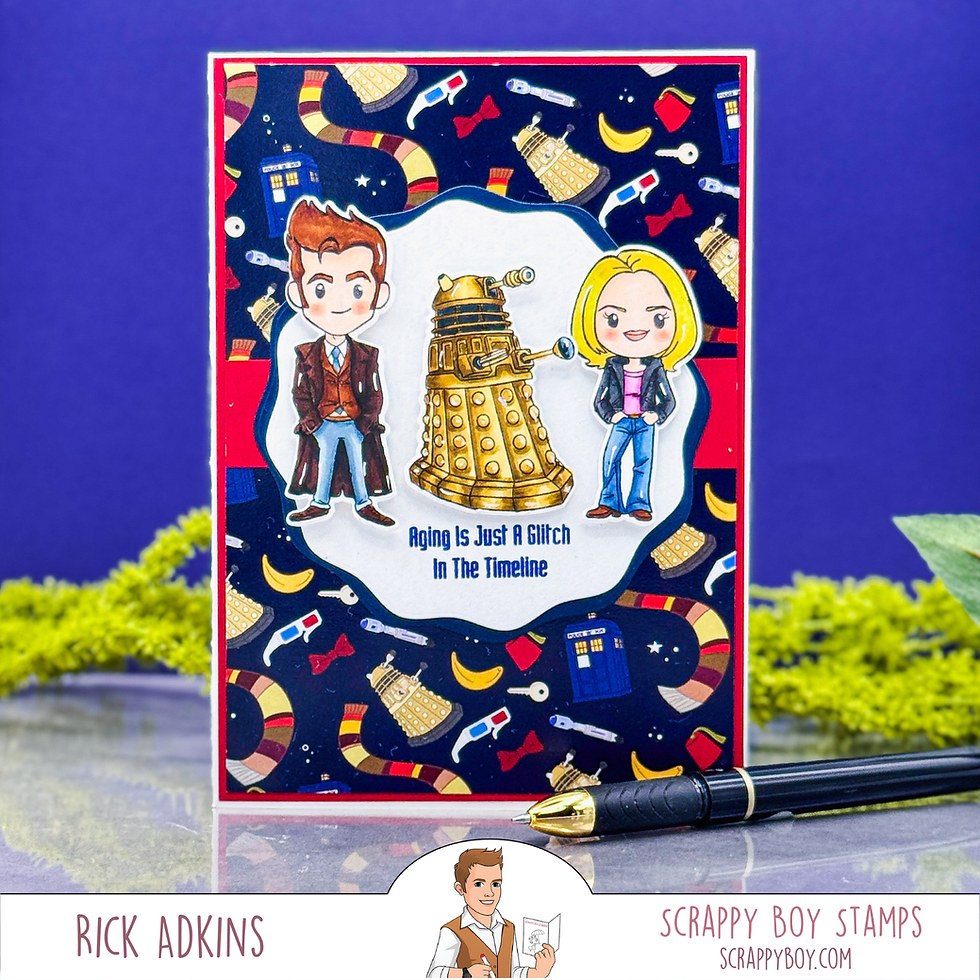
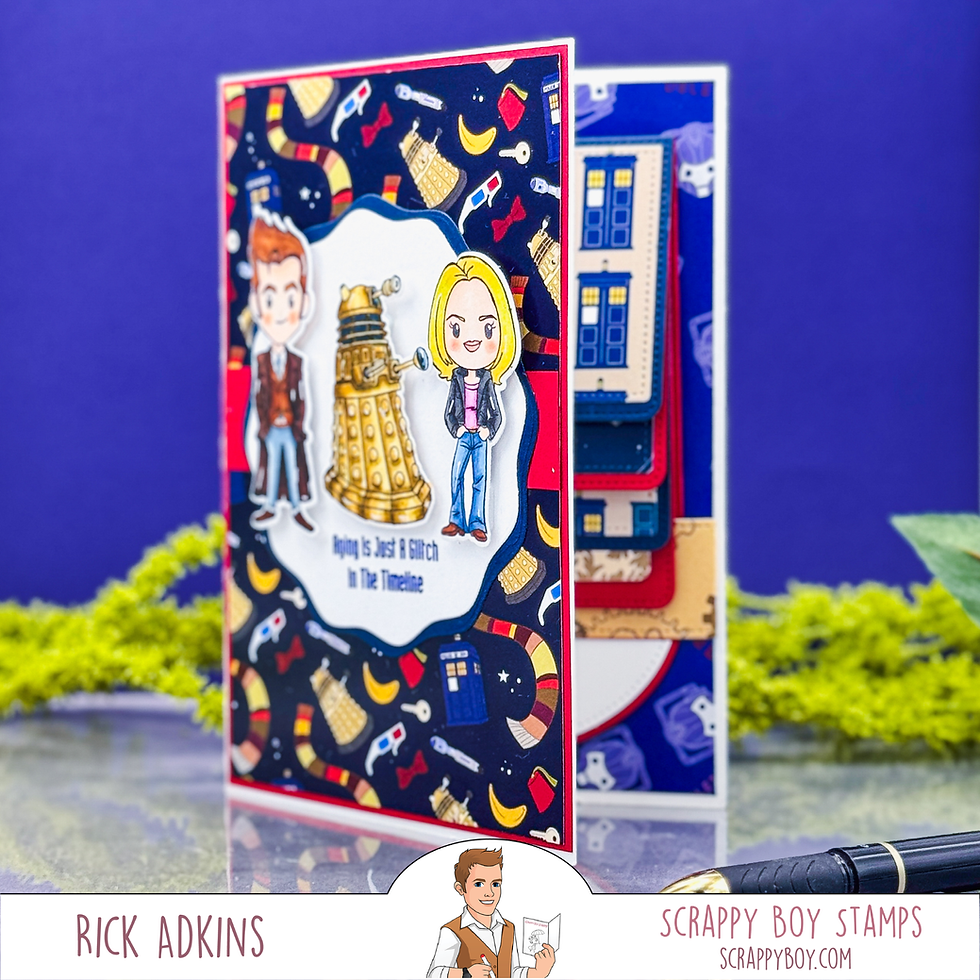
For this birthday card, I wanted to create something that combined a fun interactive element with a gift card holder while still allowing the themed images and patterned paper to take center stage. The result is a waterfall-style interactive birthday card featuring the Wandering Time Keeper collection from Scrappy Boy Stamps. While the video walks through the construction process, I thought it would be helpful to share some of the design decisions behind the project and why this approach works so well.

Why Interactive Gift Card Holders Work So Well
One of the challenges many cardmakers face is finding ways to make gift cards feel special. Whether you're giving a birthday gift to a family member, friend, or fellow fan of a favorite television series, slipping a gift card into an envelope doesn't always create the memorable experience we want.
Interactive cards solve that problem beautifully.
The waterfall mechanism (from the Waterfall Gift Card Holder Die Set) adds movement and discovery to the design. Instead of simply opening a card and finding a gift card tucked inside, the recipient gets to interact with the project and reveal the surprise. That extra moment of engagement often makes the card feel just as meaningful as the gift itself.
For birthdays especially, interactive elements help create a sense of celebration and fun.

Let the Pattern Paper Do Some of the Work
One thing I loved about this project was the opportunity to feature the Wandering Time Keeper patterned paper. The bold colors and recognizable themed images create an instant focal point before any stamping or embellishing is added.
This is a technique I often recommend when cardmakers feel overwhelmed by design decisions. Instead of creating a complicated background from scratch, start with a strong patterned paper and allow it to guide the rest of the card.
Because the paper already contains so much visual interest, I kept the center panel relatively clean. The stamped characters and sentiment have plenty of room to stand out without competing with the background.
This balance between detailed pattern paper and open space helps create a design that feels cohesive rather than busy.
Choosing a Strong Focal Point
Another design choice that helped this card come together was limiting the number of stamped images used on the front.
When working with fan-art themed products, it's tempting to include every image from the stamp set. However, too many focal images can dilute the impact of the design.
Instead, I selected a few key images that immediately communicate the theme and arranged them around the sentiment. This creates a visual triangle that naturally guides the eye around the card front.
If you're ever struggling with card layouts, try choosing fewer images and giving them more space. The result is often cleaner, easier to read, and more visually effective.

Common Interactive Card Mistakes to Avoid
Interactive cards can feel intimidating, but many of the challenges cardmakers encounter come from overcomplicating the design rather than the mechanism itself.
A few things to keep in mind:
Avoid adding bulky embellishments near moving parts.
Test the interactive element several times before final assembly.
Use strong contrast between the focal images and background.
Keep the front design balanced so the mechanism remains the star of the project.
The goal is to create a card that functions smoothly while still looking polished and intentional.

Adapting This Idea with Supplies You Already Own
One of my favorite things about this design is how easily it can be adapted.
Don't have a fan-art themed stamp set? Try:
Birthday critters
Floral images
Sports-themed stamps
Masculine card designs
Holiday characters
You can also substitute different patterned paper collections to completely change the look of the project while using the same basic design concept.
If you're newer to interactive cards, start with a simple color palette and fewer embellishments. If you're more experienced, consider adding additional layers, ink blending, or specialty cardstock to customize the design.
The overall concept remains the same: combine a strong focal point, coordinating patterned paper, and an interactive gift card holder to create something memorable.
Final Thoughts
Projects like this remind me that handmade cards don't have to be complicated to make an impact. Sometimes adding a simple interactive element is enough to turn an everyday gift card into something the recipient will remember long after the birthday celebration is over.
If you've been hesitant to try interactive cardmaking, I hope this project encourages you to give it a try. Start with the supplies you already have, focus on the experience you want to create for the recipient, and don't worry about making everything perfect.
I'd love to hear how you would customize this idea for another occasion, so feel free to leave a comment below.
Watch the Video
If you're a visual learner, you can watch the process here:
If you have problems watching the video here on my blog you can always watch it on my YouTube Channel by Clicking Here!
(Wondering what I used in this video? Everything is linked to multiple sources in the thumbnails at the end of this post, or in the text below. Compensated affiliate links used when possible). As always I appreciate your support of my videos!
Supplies Used
Here you will find the list of supplies that I used to create today's card. All supplies are linked to supply sources below. Compensated affiliate links may be used at no cost to you.
Happy Crafting,

Rick Adkins
Affiliate Disclaimer:
Just a friendly reminder, as part of my commitment to transparency, please note that some of the links provided maybe affiliate links. This means that if you make a purchase through these links, I may earn a small commission at no extra cost to you. Your support is truly appreciated!
Additionally, I kindly ask that you always accept the tracking cookie for the affiliate websites. Rest assured, this will not in any way expose your computer to viruses or compromise your information. It's simply necessary for the company to attribute the sale to the affiliate, ensuring creators like myself receive their rightful commissions.
Your trust and support enable me to continue sharing creativity through my email lists, blog, and YouTube channel. Thank you for being a valued part of our crafting community!


Comments